gluten free zen
Taking The Stress Out Of Gluten-Free Grain-Free & Dairy-Free Living
Grain Free Cinnamon Date Rolls


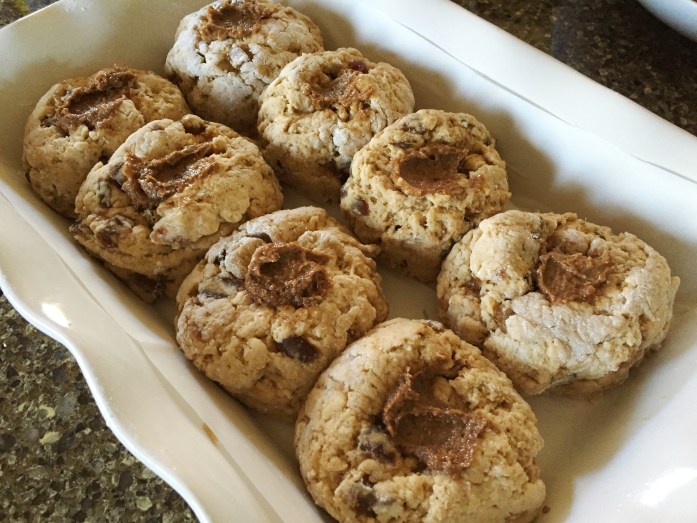
Cinnamon Date Rolls
*8 Large Servings
For the Filling:
1/2 Cup of Dairy Free Soy Free Butter
1/2 Cup of Coconut Sugar
2 teaspoons of Cinnamon
Pinch of Sea Salt
For The Crumble Topping:
1/2 Cup of Coconut Flour
4 Tablespoons of Sweet Potato Flour
2 Tablespoons of Arrowroot
1/2 Cup of Coconut Sugar
2 teaspoons of Cinnamon
3/4 Cup of Dairy Free Soy Free Butter
1/2 Cup of Pecans, chopped
For the Rolls:
12 Medjool Dates, seeded and chopped
2/3 Cup of Arrowroot
1 1/2 Cups of Sweet Potato Flour
1 Cup of Coconut Flour
4 teaspoons of Xanthan Gum
4 teaspoons of Double Acting Baking Powder
1 teaspoon of Sea Salt
3 teaspoons of Cinnamon
2/3 Cup of Dairy Free Soy Free Butter
3 Tablespoons of Yeast
2 1/2 Tablespoons of Coconut Sugar
1/2 Cup of Warm Water
6 Eggs, separated
3 Tablespoons of Apple Cinder Vinegar
3 Tablespoons of Grass Fed Gelatin
1/2 Cup of Cool Water
Extra arrowroot for hands
*Turn the oven to 375 degrees.
For the filling: Mix all ingredients together in a bowl until smooth and fully incorporated with the butter. Set aside.
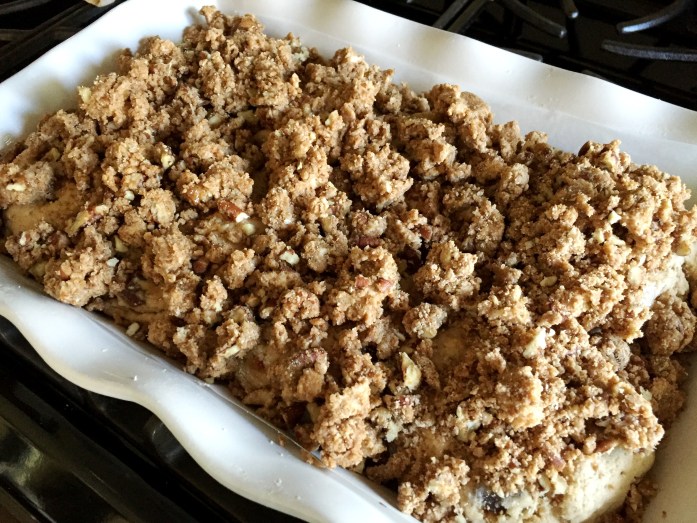
For the topping: Whisk all the dry ingredients and chopped nuts together. Cut in the butter. Set aside.
For the rolls:
Spray an 8 1/2 x 11 pan and line bottom with parchment. Set aside.
Measure the arrowroot, sweet potato flour, coconut flour, xanthan gum, baking powder, salt, and cinnamon into a medium bowl. Whisk to combine and cut in butter. Set aside.
In measuring cup, combine the warm water, yeast, and coconut sugar, whisk and set aside.
In a stand mixer, whisk the egg whites to soft peak. Add the egg yolks and quickly whisk to combine. Turn off mixer and add yeast mixture.
In a microwavable measuring cup, add the 1/2 cup water and gelatin and whisk. Heat for 20 seconds and remove. With the mixer on low, slowly drizzle the gelatin mixture into the egg mixture. Add the apple cider vinegar and mix to combine.
Switch out the whisk for a paddle piece. Add the flour and butter mixture in three parts, mixing on medium. Add the dates.
The dough will be wet. Scoop dough out onto a piece of parchment floured with arrowroot. Flour your hands. Do NOT knead the dough. Separate the dough into 8 similar sized portions.
Taking one portion at a time, pat out into an oblong shape. Don’t overwork it or try to make it smooth. Take a small spoonful of the filling and spread along the length. Pinch both long sides together so that it looks like a fat, short, snake. Take both ends and bring them together forming a circle and pinch together. Place in the pan and repeat until finished. If you have leftover filling, place a dollop on the top of each roll.
Sprinkle the crumble topping over the rolls, cover lightly with sprayed plastic wrap and a light kitchen towel. Set on top of the stove (while the oven is heating) and let rise for 35 minutes.
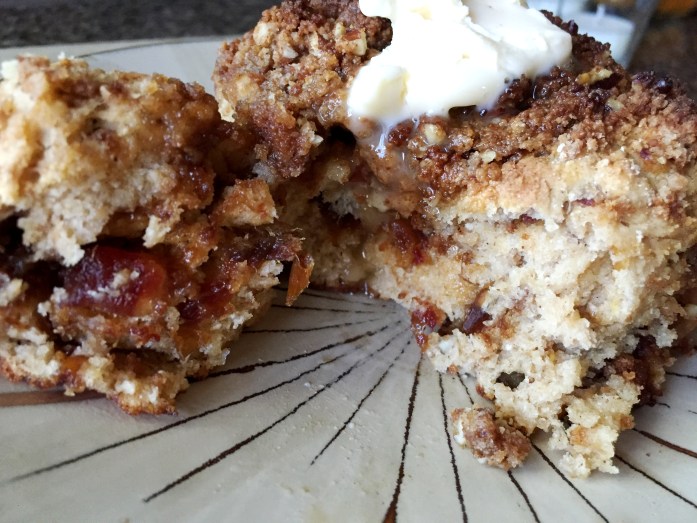
Remove the towel and plastic and bake for about 30-35 minutes. I use convection which cooks faster. If you’re using conventional, start checking the rolls at 30 minutes and go from there. You want then “just done”, if they are over baked they will be dry.
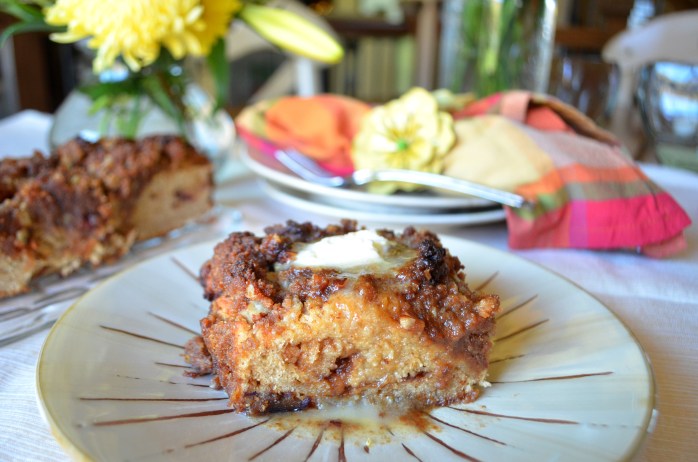
They can be served room temperature or warm with a dollop of dairy free butter on top.
Chocolate Pumpkin Spice Crepes with Peach Compote & Chocolate Coconut Whipped Cream


Chocolate Pumpkin Spice Crepes with Peach Compote & Chocolate Coconut Whipped Cream
*Makes about 8 crepes. Serves 2 people.
It’s best to make the peaches first so they have time to cool. You can eat them warm too, but the whipped cream you’ll want to put on top of them will melt.
Peach Compote
About 1 1/2 Cups of Frozen or Fresh Peaches
1/2 teaspoon of Pumpkin Spice
1 Tablespoon of Coconut Sugar
Bring ingredients to a simmer in a medium saute pan. Turn the burner to barely just a simmer and allow the juices to mingle and thicken. About 10-15 minutes. Remove from burner and cool.
Chocolate Crepes
1/2 Cup of Sweet Potato Flour
1 Tablespoon of Coconut Flour
2 Tablespoons of Cacao Powder
2 teaspoons of Coconut Sugar
Dash of Sea Salt
1 1/2 teaspoons of Pumpkin Spice
1 Cup of 100% Full Fat Coconut Milk
2 Tablespoons of Water
1 1/2 teaspoons of Pure Vanilla Extract
3 Eggs
Whisk all ingredients together in a deep bowl until completely incorporated (makes it easier for scooping) and set aside. Heat a crepe pan or non stick small frying pan on medium. Oil with a little dairy free butter. You won’t need to oil for every crepe.
Using a 1/4 cup dry measuring cup, scoop out crepe mix and pour it into the pan swirling gently to fill the bottom of the pan. When you are able to pick the pan up and loosen the crepe, it’s ready to be flipped (it’s a fast process, don’t overcook them!). Flip with a large spatula so it doesn’t tear and cook on the other side for just a few seconds. I slide mine out onto a plate covered with parchment. They won’t stick to each other. Repeat.
Chocolate Whipped Cream
1 Cup of 100% Full Fat Coconut Milk
2 Tablespoons of Cacao Powder
2-3 Tablespoons of Powdered Sugar (or whatever sweetener you like to use)
2 teaspoons of Pure Vanilla Extract
In a stand mixer, whisk the coconut milk (I have to cover mine with a towel) until thickened. Turn off the mixer and add the cacao powder and the powdered sugar. Cover again, and whisk until incorporated, scraping down the sides once or twice. Add the vanilla and whisk until thickened. This can be made ahead of time too and lasts quite nicely in the fridge for 24 hours. The coconut water will separate a bit, but all you have to do is pour it off. Don’t stir the whipped cream!
Spicy Tri Tip Tacos


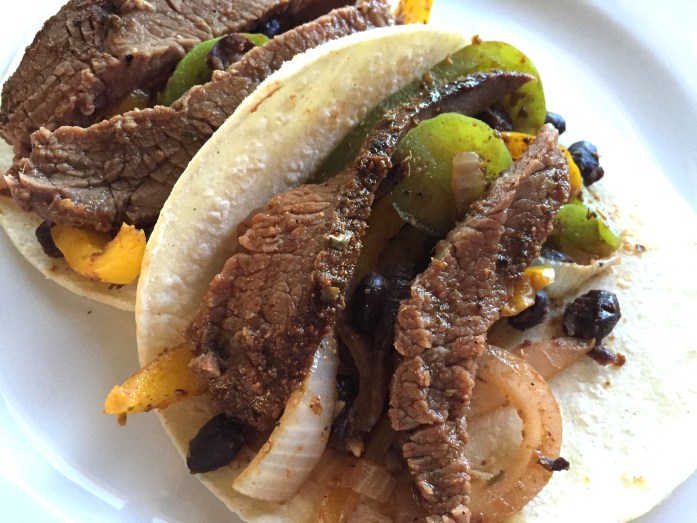
Spicy Tri Tip Tacos
1 Tri Tip Roast, they are typically around 2lbs
(The amount of seasoning will vary by your taste and the amount of heat you want.)
These are approximates as I didn’t measure…
2 1/2 teaspoons of Sea Salt
1 1/2 Tablespoons of Garlic Powder
1 1/2 Tablespoons of Chili Powder
1 1/2 Tablespoons of Cumin
1 1/2 Tablespoons of Oregano
1 1/2 Tablespoons of Cilantro
1 teaspoon of Hot Red Pepper Flakes
Several Grinds of Fresh Peppercorns
2 Bell Peppers
1 Large Red Onion
Chopped Garlic (I used two large cloves)
About 1 teaspoon of Oregano
About 1 teaspoon of Chili Powder
1 Can of Black Beans, rinsed and drained
Avocado Oil for sauteing vegetables
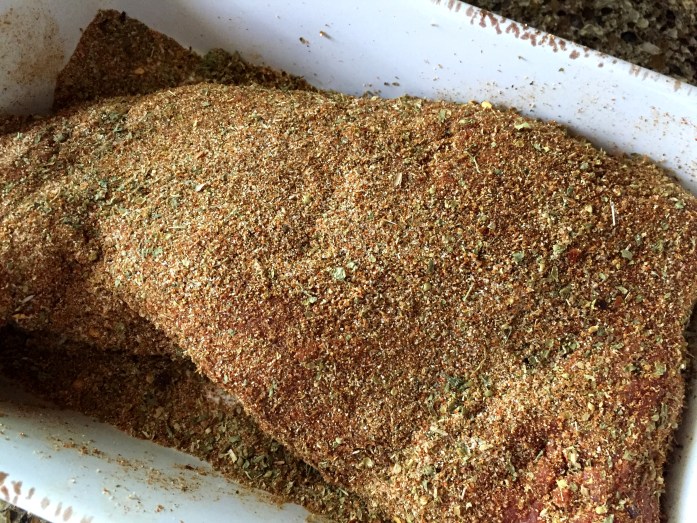
It’s important to pay attention to the natural direction of the grain prior to coating with the rub and cooking. My hand is pointed in the natural direction of the grain. The secret to enjoying certain types of meats that would otherwise be tough, is not only in the preparation but also in how long it rests after it’s been cooked and especially the angle at which it’s cut. After it’s cooked, you’ll cut it in thin slices against (across) the grain.
Begin sprinkling and patting the rub all over the meat, making sure every nook and cranny is nicely coated. Cover, and place in the fridge for a minimum of 4 hours or it can also be prepared a day ahead of cooking. Remove from the fridge and allow to come to room temperature (or close) for about 30-45 minutes. Set the oven to 450 degrees (I used convection). Heat a dry (don’t add oil) ovenproof pan to medium high/high and sear the meat on both sides until almost blackened. You’ll need a well working stove top fan for this…mine is pitiful so I had to open all the doors and windows for a cross breeze. You can also do this entire cooking process on a grill as long as your grill heats very hot. I started mine off on our grill and was worried it was taking too long and would overcook so moved to the kitchen method instead.
Once it’s seared really well on both sides, put it in the oven for 8-10 minutes. I used convection which cooks faster. 8 minutes with convection will get you medium rare, 10 will get you medium. Of course, the ends are thinner and smaller so they will likely be closer to medium regardless of time. If you’re not using convection, cook for 10 minutes and test with a meat thermometer. For medium rare about 125-130, medium/medium well 135-140. But keep in mind that it will continue cooking for the first few minutes it’s resting, so you may want to take it out a touch sooner than what the thermometer is telling you to do.
Remove from the oven and let rest uncovered for 15-20 minutes. While the tri tip was cooking and resting, I sauteed some peppers, onions, and garlic for the tacos. When that was done I added black beans and sauteed until the beans were heated through.
Grain Free Blueberry Breakfast Cake


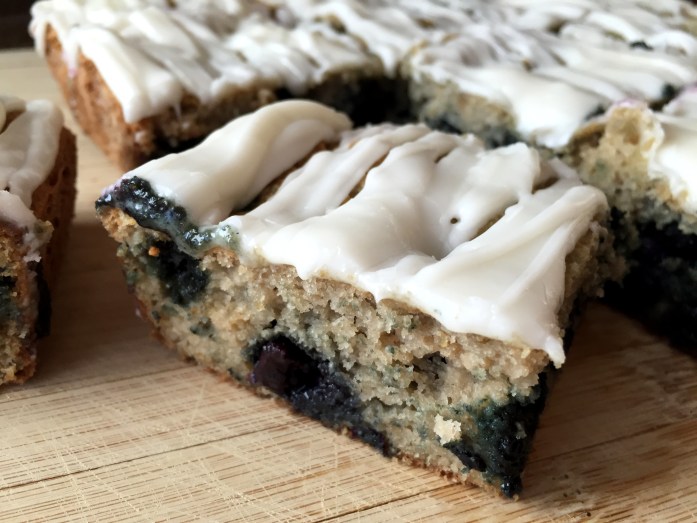


Grain Free Blueberry Breakfast Cake
*Makes 16 servings
3/4 Cups of Coconut Flour
1/2 Cup of Sweet Potato Flour
1/4 Cup of Arrowroot
2 teaspoons of Double Acting Baking Powder
1 teaspoon of Baking Soda
1/4 teaspoon of Sea Salt
3 Tablespoons of Coconut Sugar
6 Tablespoons of Dairy Free, Soy Free Butter
3 Eggs
1 Cup of 100% Full Fat Coconut Milk
1 teaspoon of Pure Vanilla Extract
1 teaspoon of Pure Almond Extract
1 1/2 Cups of Frozen (or fresh) Blueberries
For the frosting I just did a basic powdered sugar frosting. Powdered sugar, almond extract, melted dairy free butter, a little water to thin.
Preheat the oven to 350 degrees. Line a 9×9 inch square pan with parchment and coat with non stick spray. Set aside.
In a large bowl, whisk together all of the dry ingredients. Cut in the 6 Tablespoons of butter. Add the eggs, coconut milk, vanilla and almond extracts, and whisk to combine. Fold in the blueberries.
Spread the batter into the pan and bake (I use convection) for 35 minutes. Remove the cake from the pan by grabbing the edges of the parchment liner and place on a cooling rack. Cool completely and frost.
Gluten Free Banana Bread
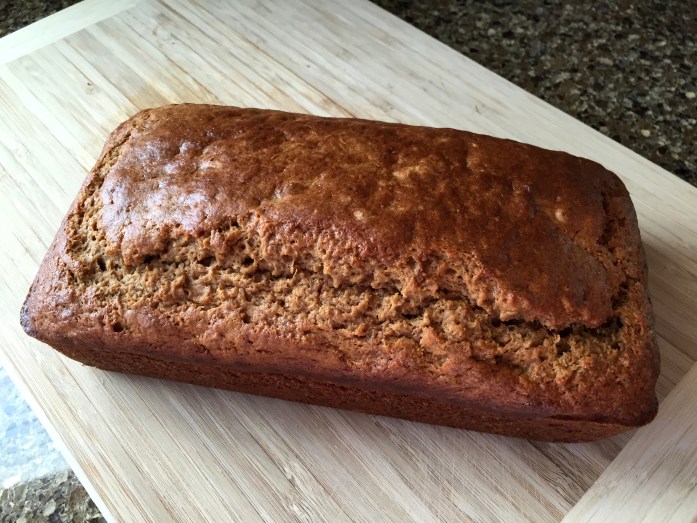
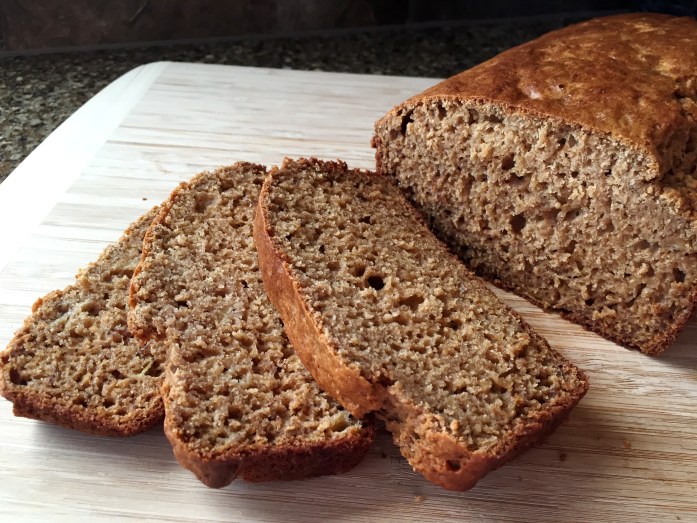
Gluten Free Banana Bread
2 Cups of Mama’s Coconut Blencond Flour
1 teaspoon of Baking Soda
1 teaspoon of Double Acting Baking Powder
1/4 teaspoon of Sea Salt
1 teaspoon of Ground cinnamon
4 eggs
3 Very Ripe Large Bananas
3/4 Cup of Coconut Sugar
1/3 Cup of Avocado Oil
1 teaspoon of Pure Vanilla Extract
Preheat oven to 350 degrees. Spray a 9×5 in loaf pan generously with coconut oil and set aside.
Whisk all of the dry ingredients together in a medium bowl. In another medium bowl whisk all of the wet ingredients and the sugar together until fully incorporated. Add the dry mix to the wet mix and fold gently, just until combined and dry ingredients are fully incorporated.
Bake for 40 minutes. (I use convection)
Gluten Free Onion Rings
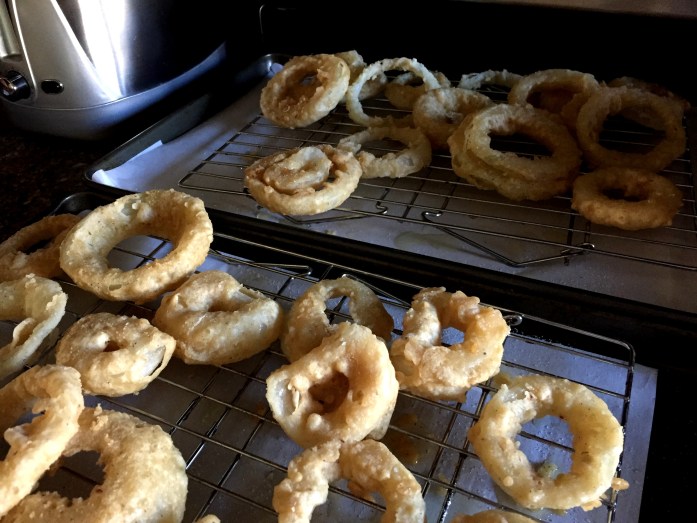
Gluten Free Dairy Free Onion Rings
*You’ll need a dutch oven or deep fryer and a deep fry/candy thermometer, 2 baking sheets lined with parchment or tin foil if you don’t want an oily mess, and 2 cooling racks that will fit on top of the baking sheets. You will also need a large slotted spoon or tongs.
50.7 ounces of Avocado Oil (About 1 1/2 bottles of Chosen Foods 100% Pure Avocado Oil, I buy mine at Costco)
5 Medium to Large Sweet Onions (Peeled and sliced save middles for something else)
3 plus 1 Cups of All Purpose Gluten Free Flour (I used Mama’s All Purpose Almond Flour Blend)
3 Tablespoons of Arrowroot
3 teaspoons of Garlic Powder
1 Tablespoon of Sea Salt plus more for sprinkling
1 1/2 teaspoons of Cayenne Pepper
3 teaspoons of Bragg’s Seasoning
2 teaspoons of Coconut Sugar
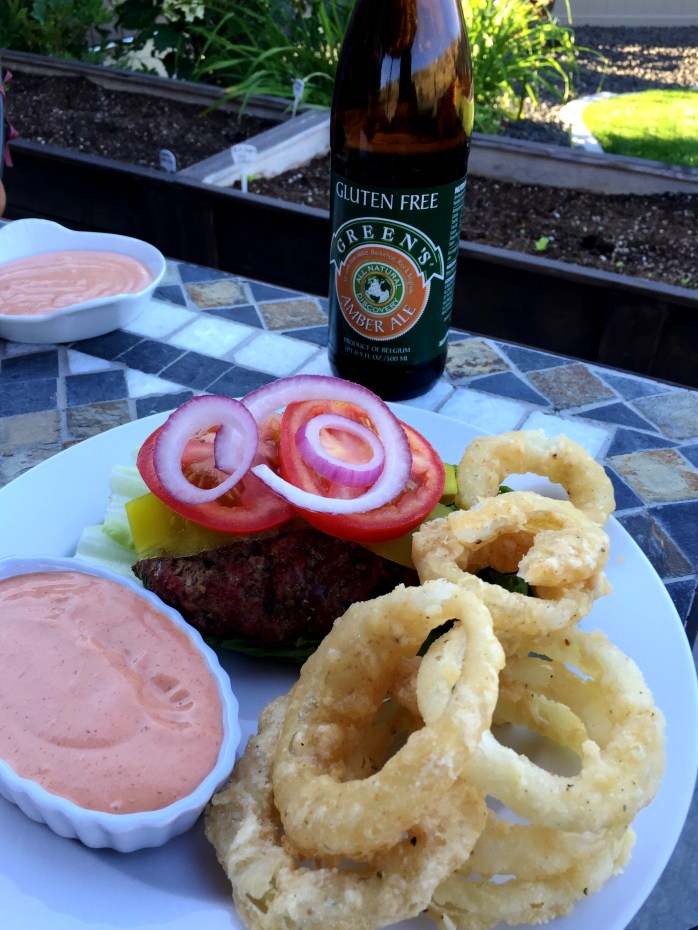
1 1/2 Cups of Gluten Free Beer (I used Green’s Amber Ale the dark ale would work well too)
1 Cup of Perrier (or any sparkling mineral water)
1 Large Egg
Pour the oil into the dutch oven, insert the thermometer, turn the burner on medium or slightly higher, and heat to between 325-350 degrees. This will take some time.
(It’s easiest if you set up an ingredients “station” right next to the stove top.)
While the oil is heating measure the flour, arrowroot, garlic, sea salt, cayenne, Bragg’s, and sugar into a large bowl or baking dish. Whisk to combine. Reserve 1 cup of the flour mixture in a bowl and set aside. Dredge all of the onion slices in the larger amount of flour mixture and set aside on a paper towel or plate.
In a medium bowl combine the beer, sparkling water, and egg. Pour into the larger mixture of flour and whisk to combine.
Preheat the oven to 250 degrees and place the prepared baking sheets in the oven.
Once the oil reaches temperature:
Remove the thermometer. Take an onion and dip in the liquid flour mix, then dredge quickly in the smaller dry reserved flour mix, dip quickly one more time into the liquid mix and then put into the oil. Repeat with 6-7 slices at a time but don’t overcrowd. I let the oil heat up a bit more between each wave of onions. The onion rings won’t brown as much as traditional onion rings. Allow to cook for about 1 1/2 minutes on each side, depending on how thick the onion slices are. Remove from the oil with a slotted spoon or tongs onto the racks and season with more sea salt. Try a piece (or two) from the first batch and see if they’re crispy to your liking, then you can adjust the cooking time from there. Keep warm in the oven. Serve as soon as all the onions are done.
Dipping Sauce:
Olive oil mayo, ketchup, and sriracha. I use about 1/2 C of mayo, 1/4 C of ketchup, and a generous squeeze of sriracha. Amount will depend on how seasoned you like yours and how many people you’re feeding.
Mixed Berry Tart with Goat Cheese & Coconut Cream


Mixed Berry Tart with Goat Cheese & Coconut Cream
*For everything to come together properly, you’ll need to make the whipped cream ahead of time. The tart will set up more solid and plate better if allowed to chill in the fridge overnight or all day prior to serving.
For the tart shell:
1 Cup Mama’s All Purpose Almond Flour
1/4 Cup of Ground Buckwheat Groat Flour (I buy the groats and grind them in my VitaMix)
1/2 teaspoon of Xanthan Gum
1/2 teaspoon of Sea Salt
2 1/2 teaspoons of Pure Almond Extract
1/3 Cup of Coconut Sugar
1/2 Cup of Dairy Free Butter, cold
Measure the flours, xanthan gum, and sea salt into a bowl and whisk to combine. In a mixer, whip the butter and coconut sugar until fully combined and creamy scraping down the sides of the bowl a few times. Add the almond extract and the flour mixture and mix on medium high until combined and the mixture begins pulling away from the sides of the bowl.
Quickly press the dough into a removable bottom tart pan. Refrigerate for at least one hour until solid and chilled. Remove from fridge and poke holes throughout the tart with a fork. Bake at 325 degrees for about 20-25 minutes until crust is a light golden color. Remove and cool completely. (I cool completely and then chill for 15 minutes in the freezer before adding the filling.)
For the filling:
1 oz. of Goat Cheese (the log is creamier and softer than a brick of goat cheese)
1 1/4 Cups of Coconut Milk Yogurt (you can use store bought, but you may want to cut it down to 3/4 – 1 cup as mine is thicker than store bought)
Sweetened Vanilla Coconut Whipped Cream made with 2 Boxes of 100% Coconut Milk – 2 Cups (Chilled over night and then whipped into coconut cream with vanilla and sugar. I think the whipped cream is more stable when it’s allowed to rest and chill in the fridge for at least 2 hours. You could also make it a day ahead, then just pour off any amount of coconut water separation.)
Zest of 1 Lemon
About 3 Cups of Berries/Fruit For The Top Of The Tart
In a mixer with the whisk attachment, add the goat cheese and yogurt and whip until smooth. Add the lemon zest and whip to combine. Remove the whisk and mixer bowl and gently fold in the whipped coconut cream. Pour into tart shell and smooth with a spatula. Top with desired fruits.
Spicy Grilled Shrimp with Garlic Ginger Veggies

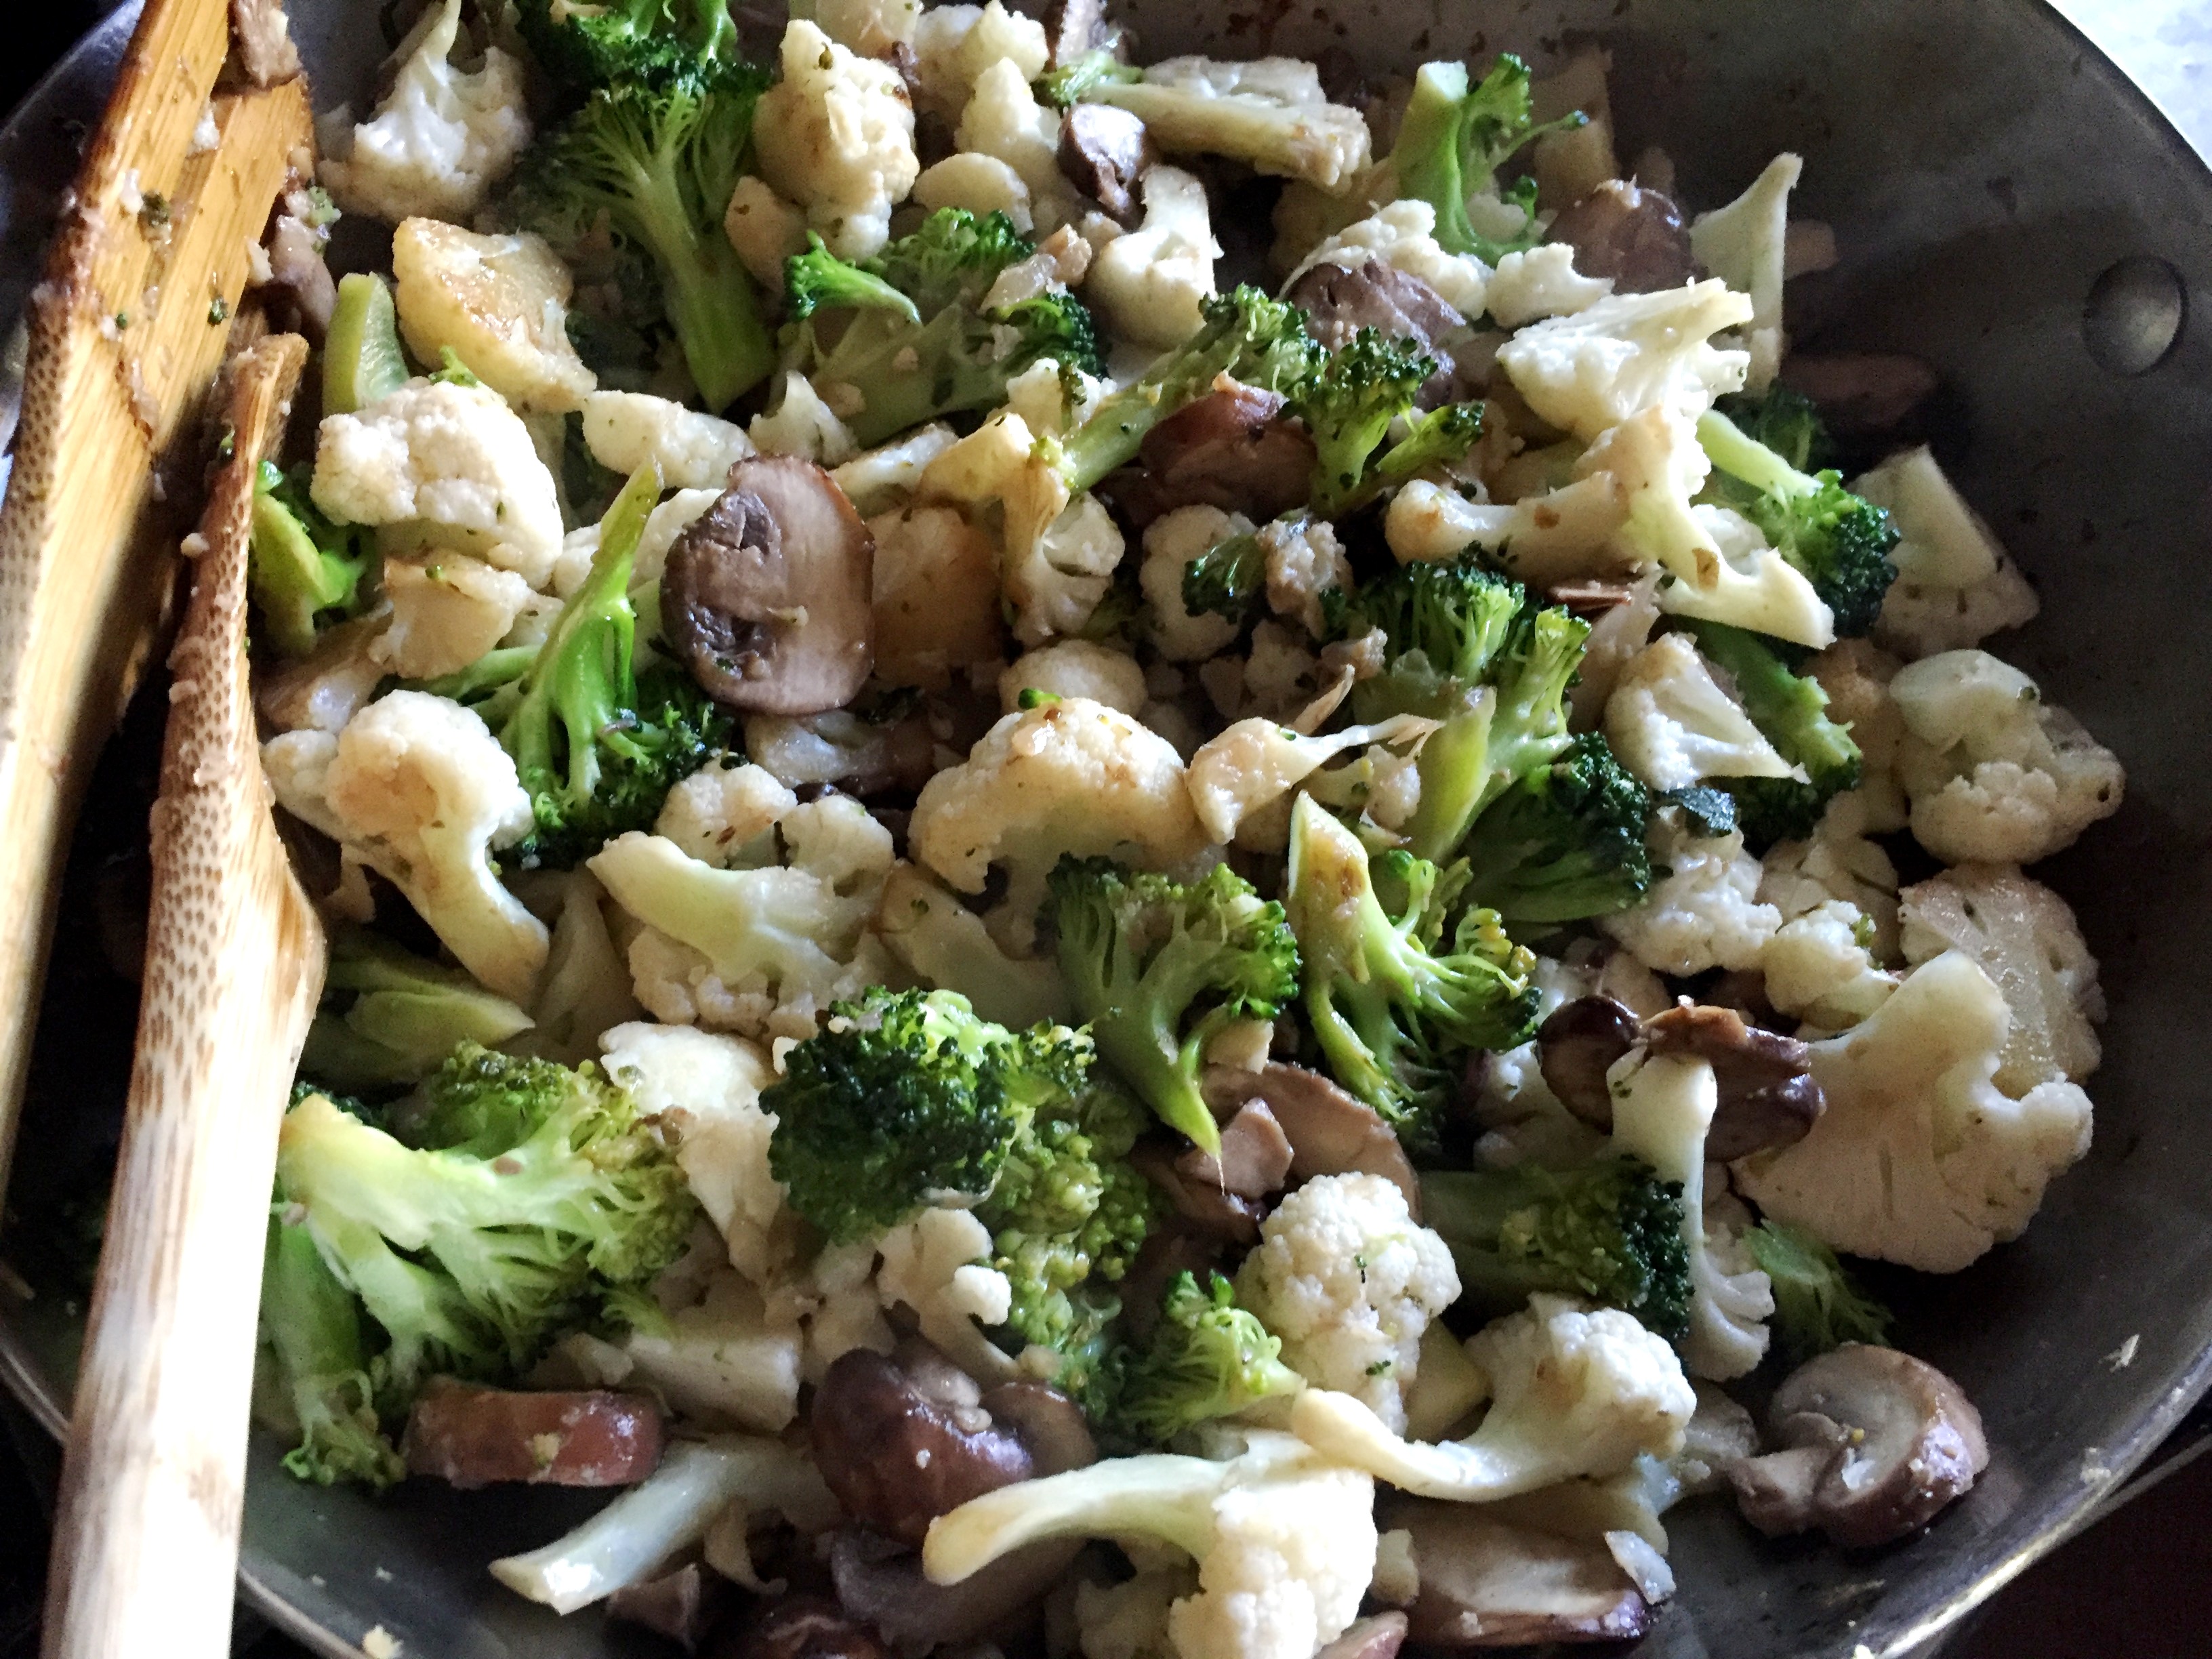


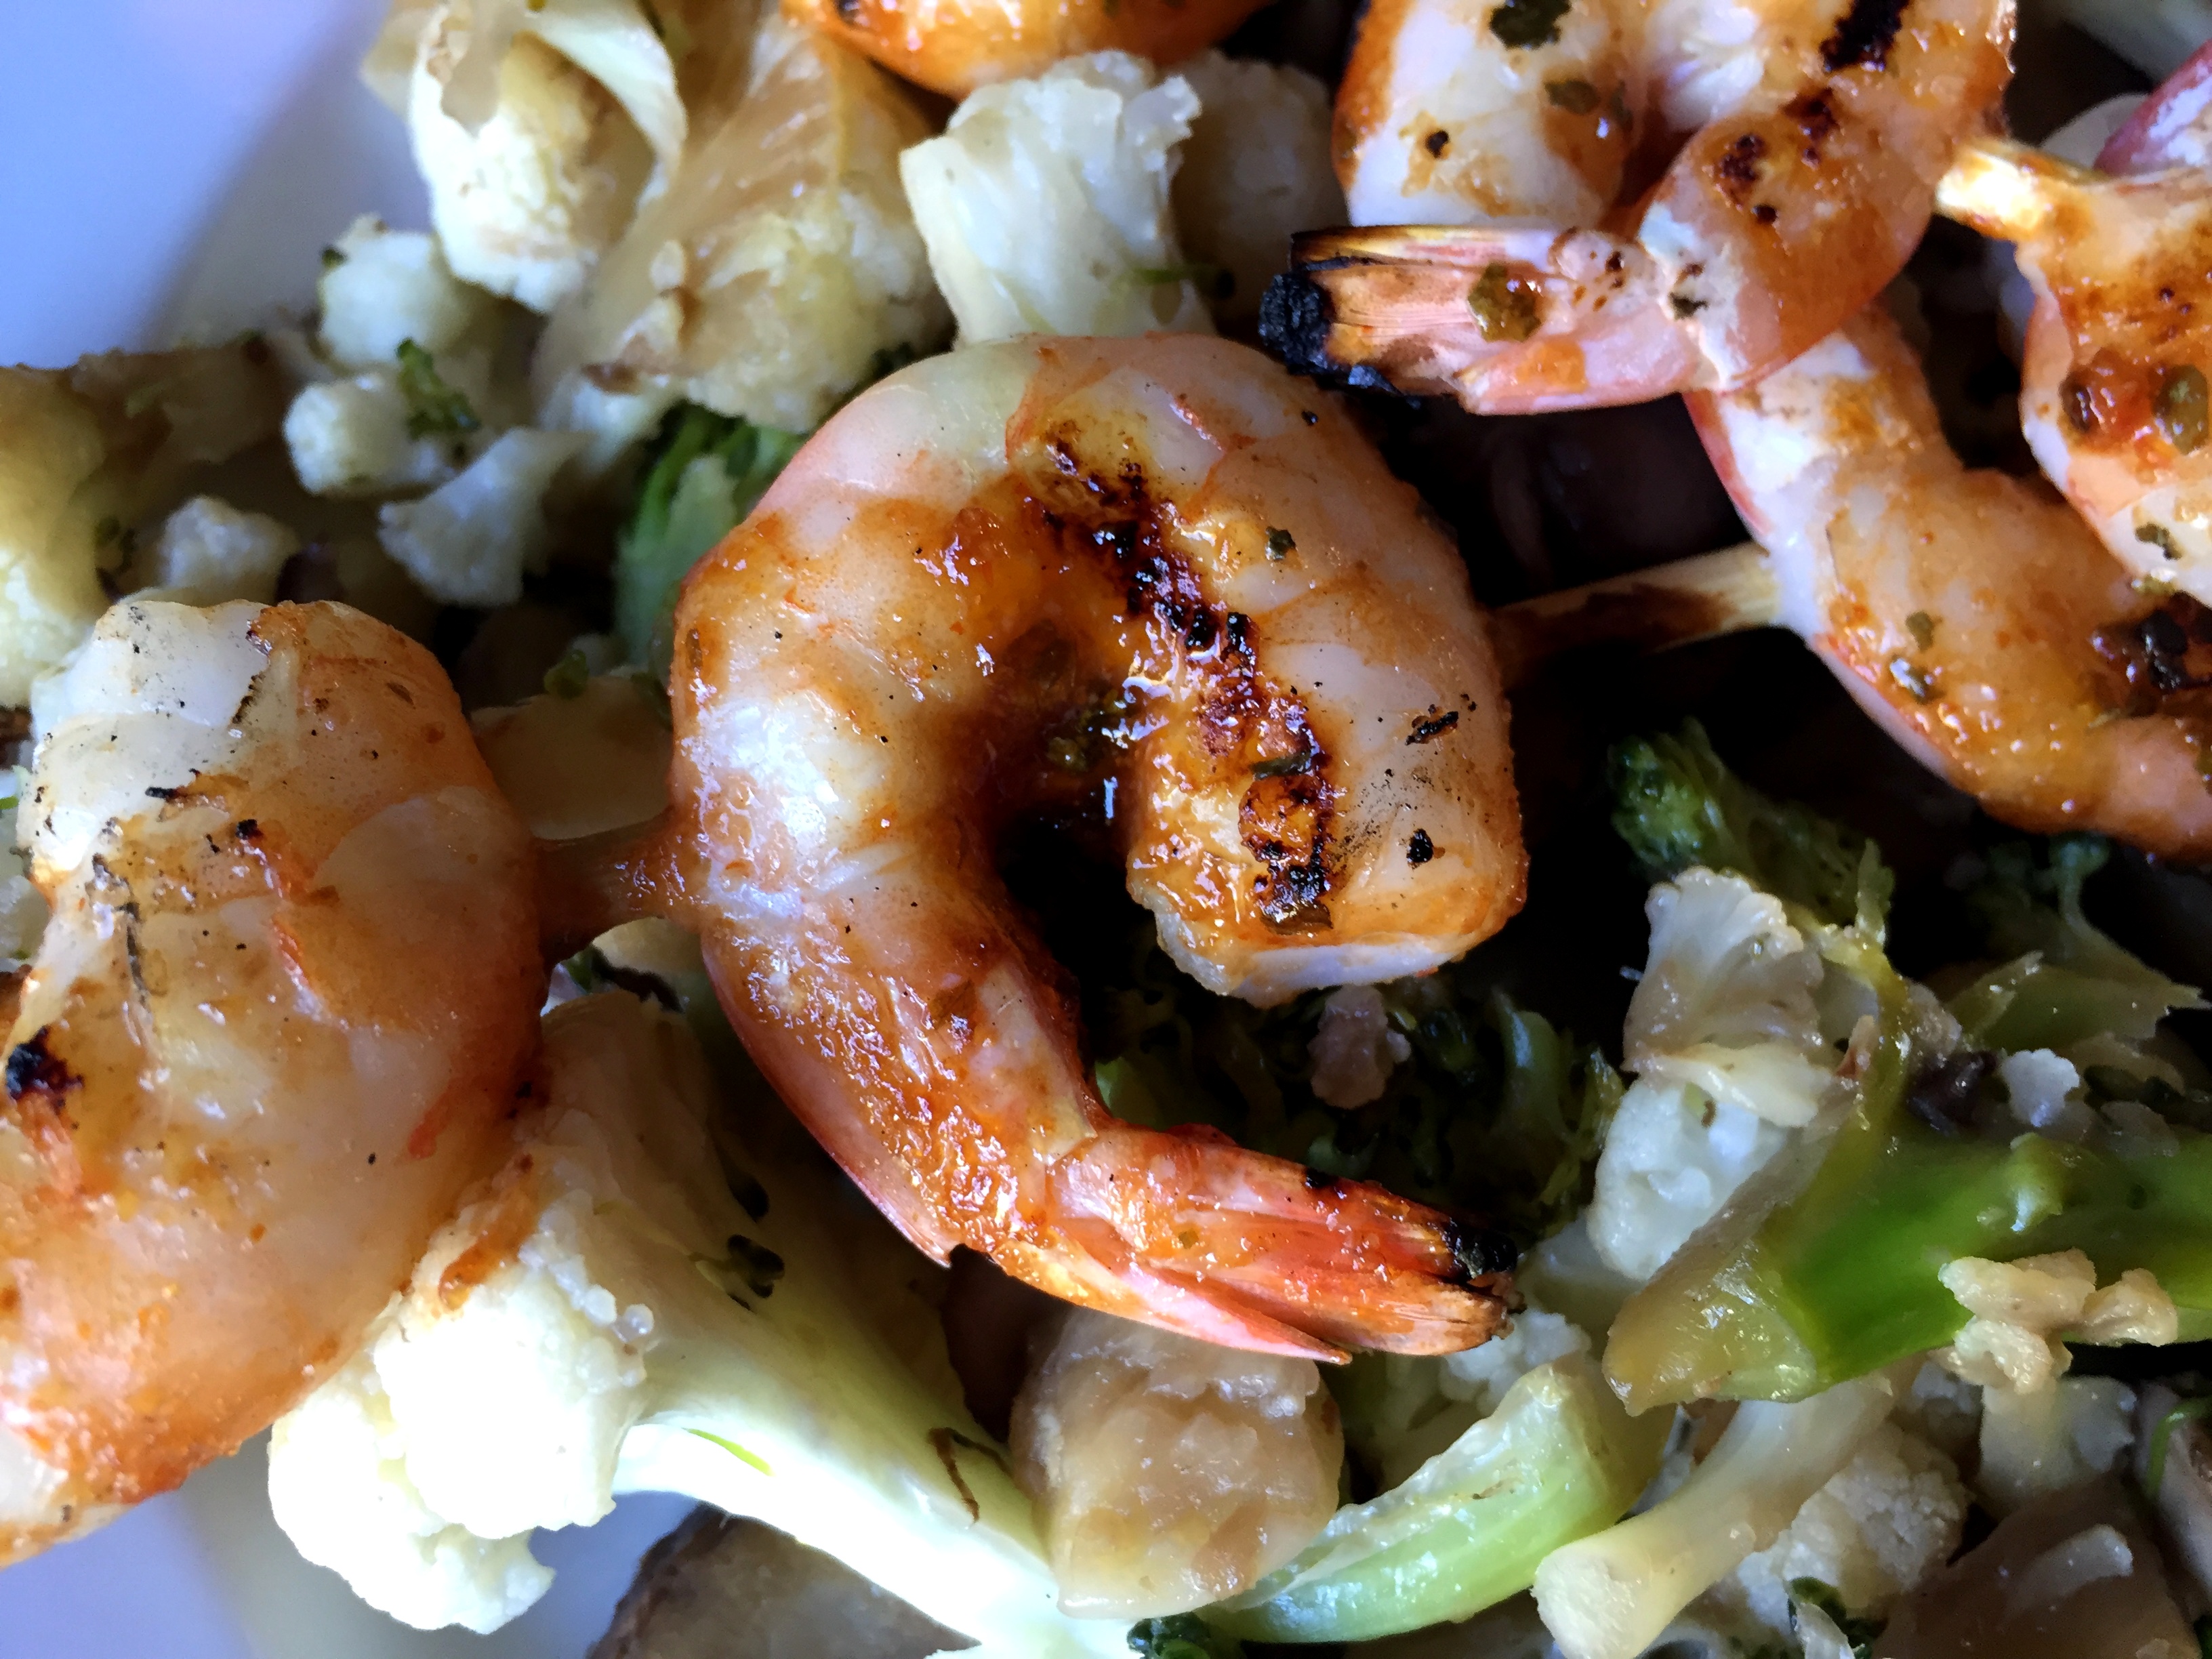
In a large saute pan drizzle about 3 teaspoons of avocado oil and 1 teaspoon of sesame oil. Turn heat to medium/medium high and add 2 cups of cauliflower, 1 1/2 cups of broccoli, 1 package of cremini mushrooms sliced, 3 large minced cloves of garlic, 1 inch piece of peeled and grated ginger, a pinch of sea salt, and about 2 Tablespoons of coconut aminos. Saute until aldente.
While the veggies are cooking, rinse the shrimp and remove the shells. Slide them onto skewers. In a small bowl, combine 2 teaspoons of coconut aminos, 1/2 teaspoon of sesame oil, 1/2 teaspoon of avocado oil, 1 Tablespoon of your favorite BBQ sauce, 1/4-1/2 teaspoon of sriracha depending on how spicy you want it, 1/2 teaspoon of garlic powder, 1/2 teaspoon of dried cilantro, and 1/8 teaspoon of dried ginger. Whisk to combine and brush onto both sides of shrimp. Preheat a grill on high. Grill the shrimp quickly, only a couple of minutes on each side. Plate the veggies, add the shrimp, and enjoy!
Cherry Chocolate Chip Coconut Macaroons
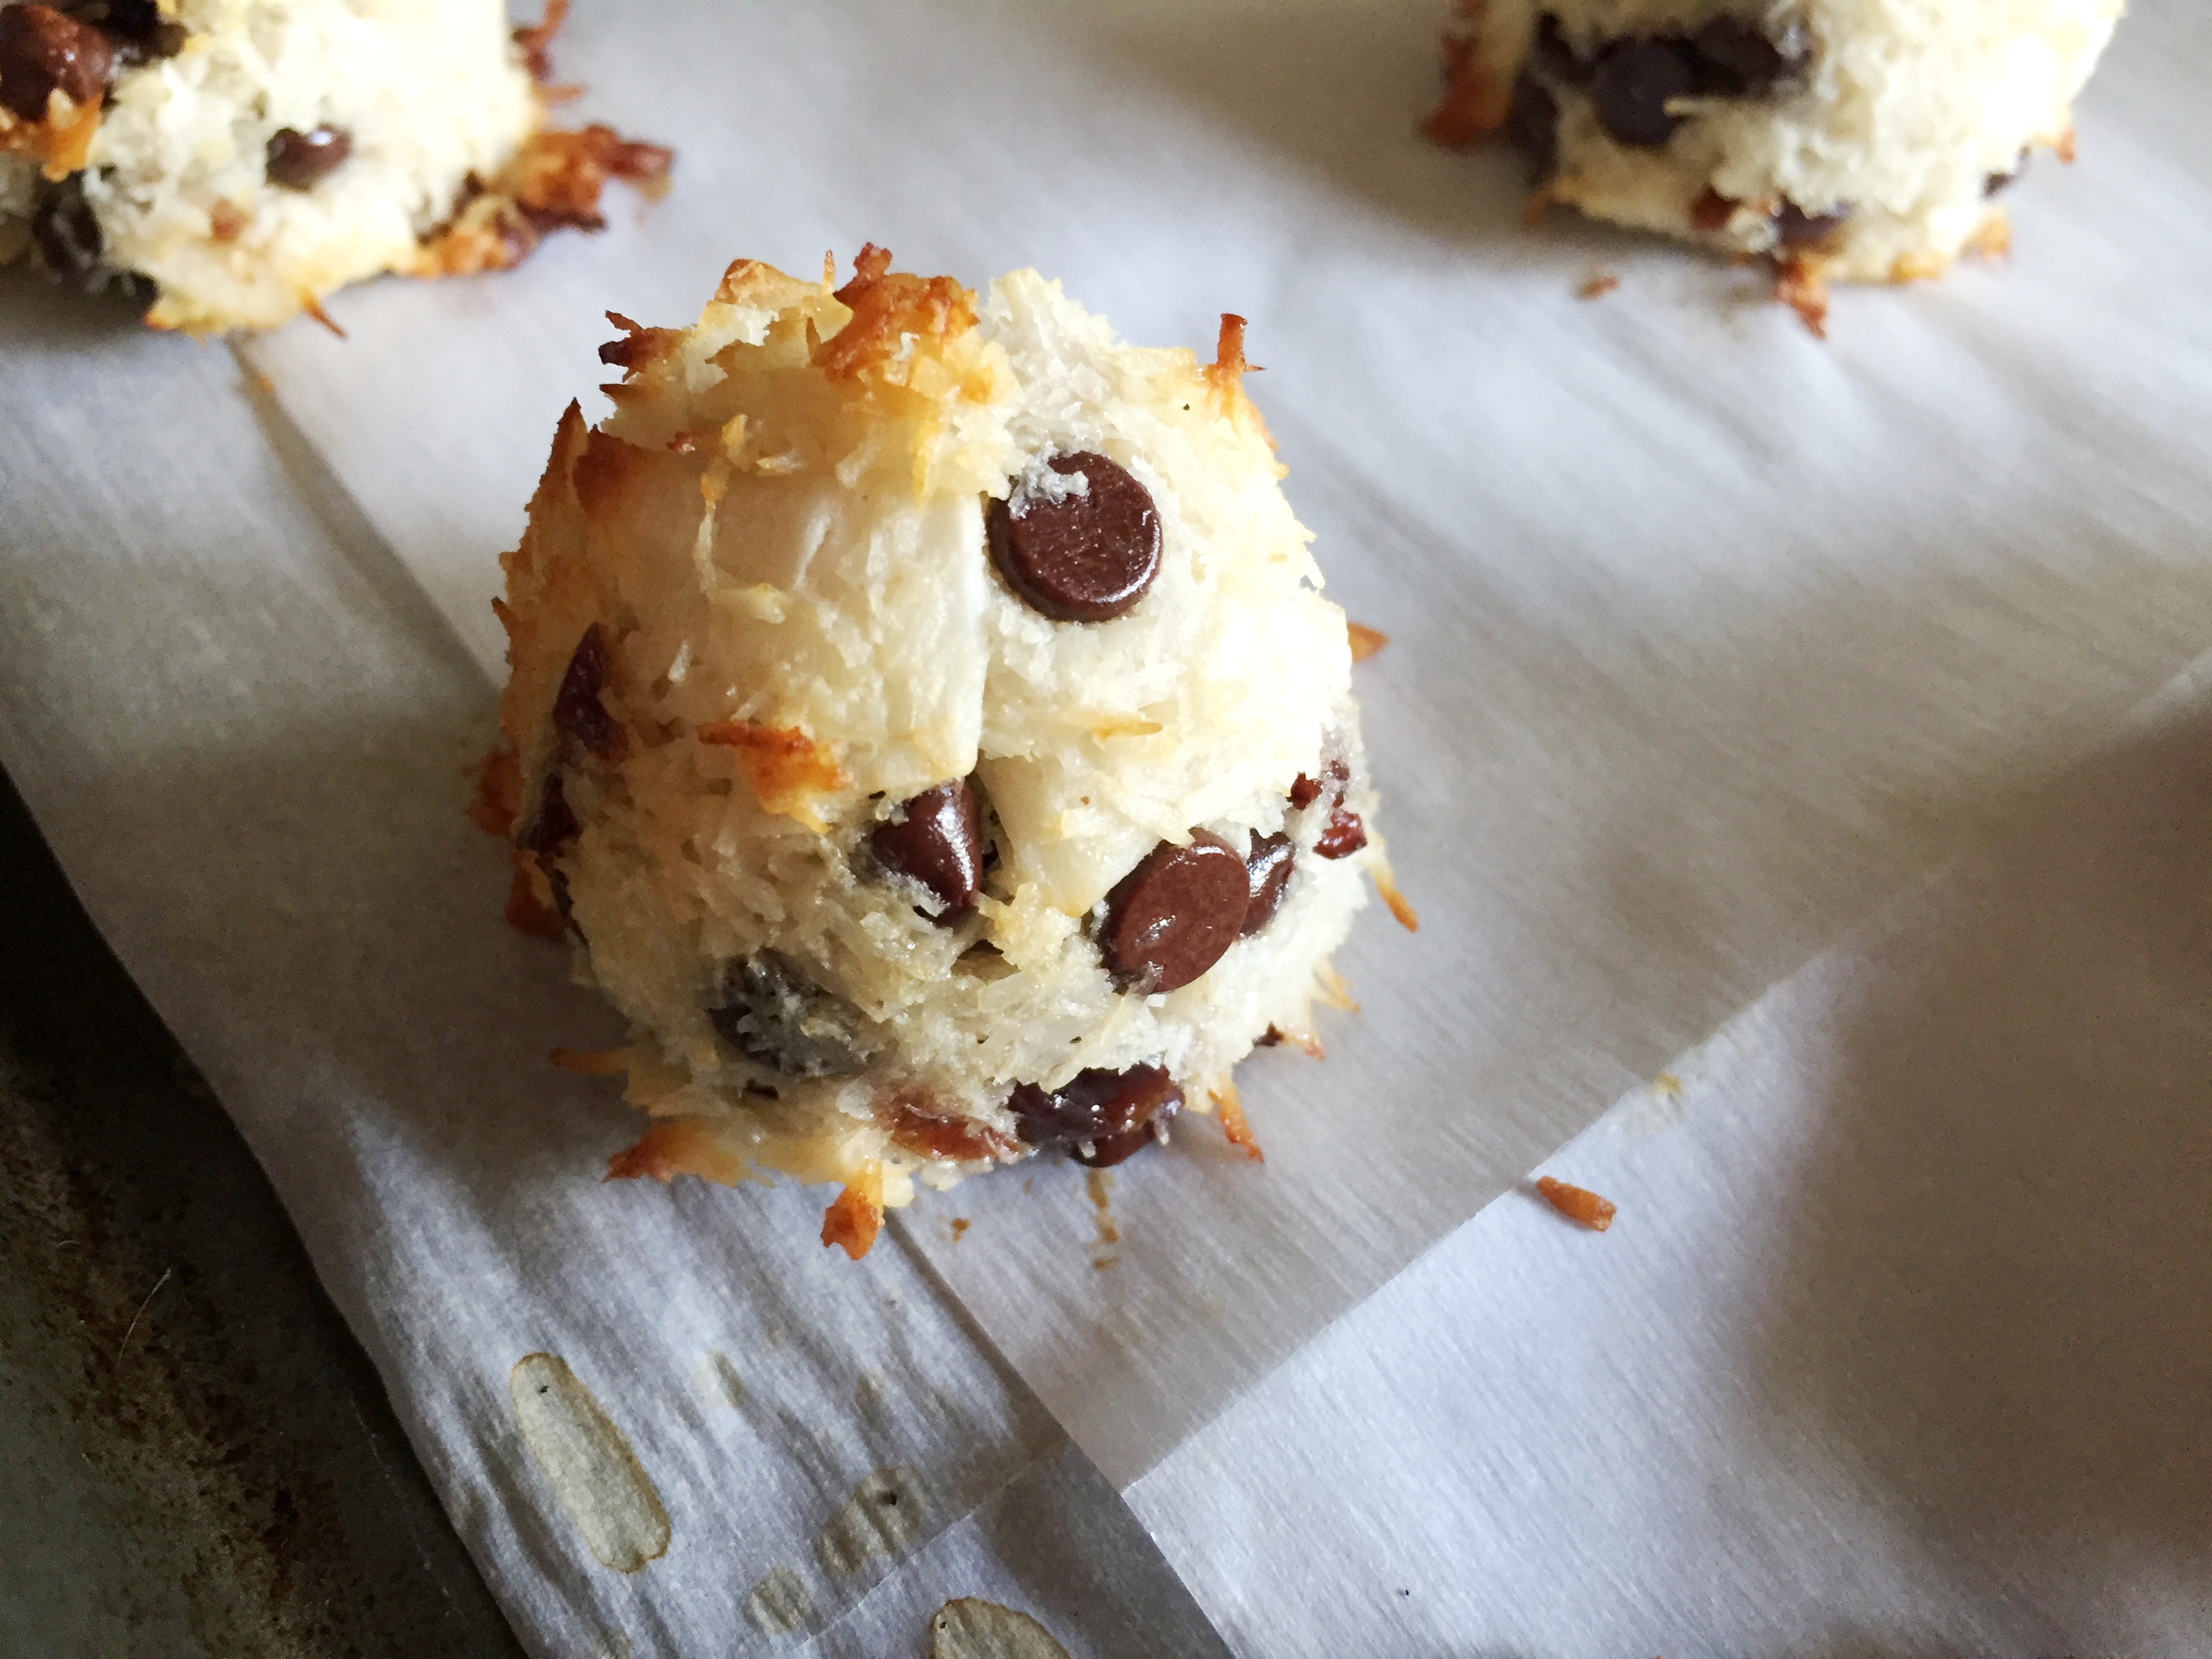
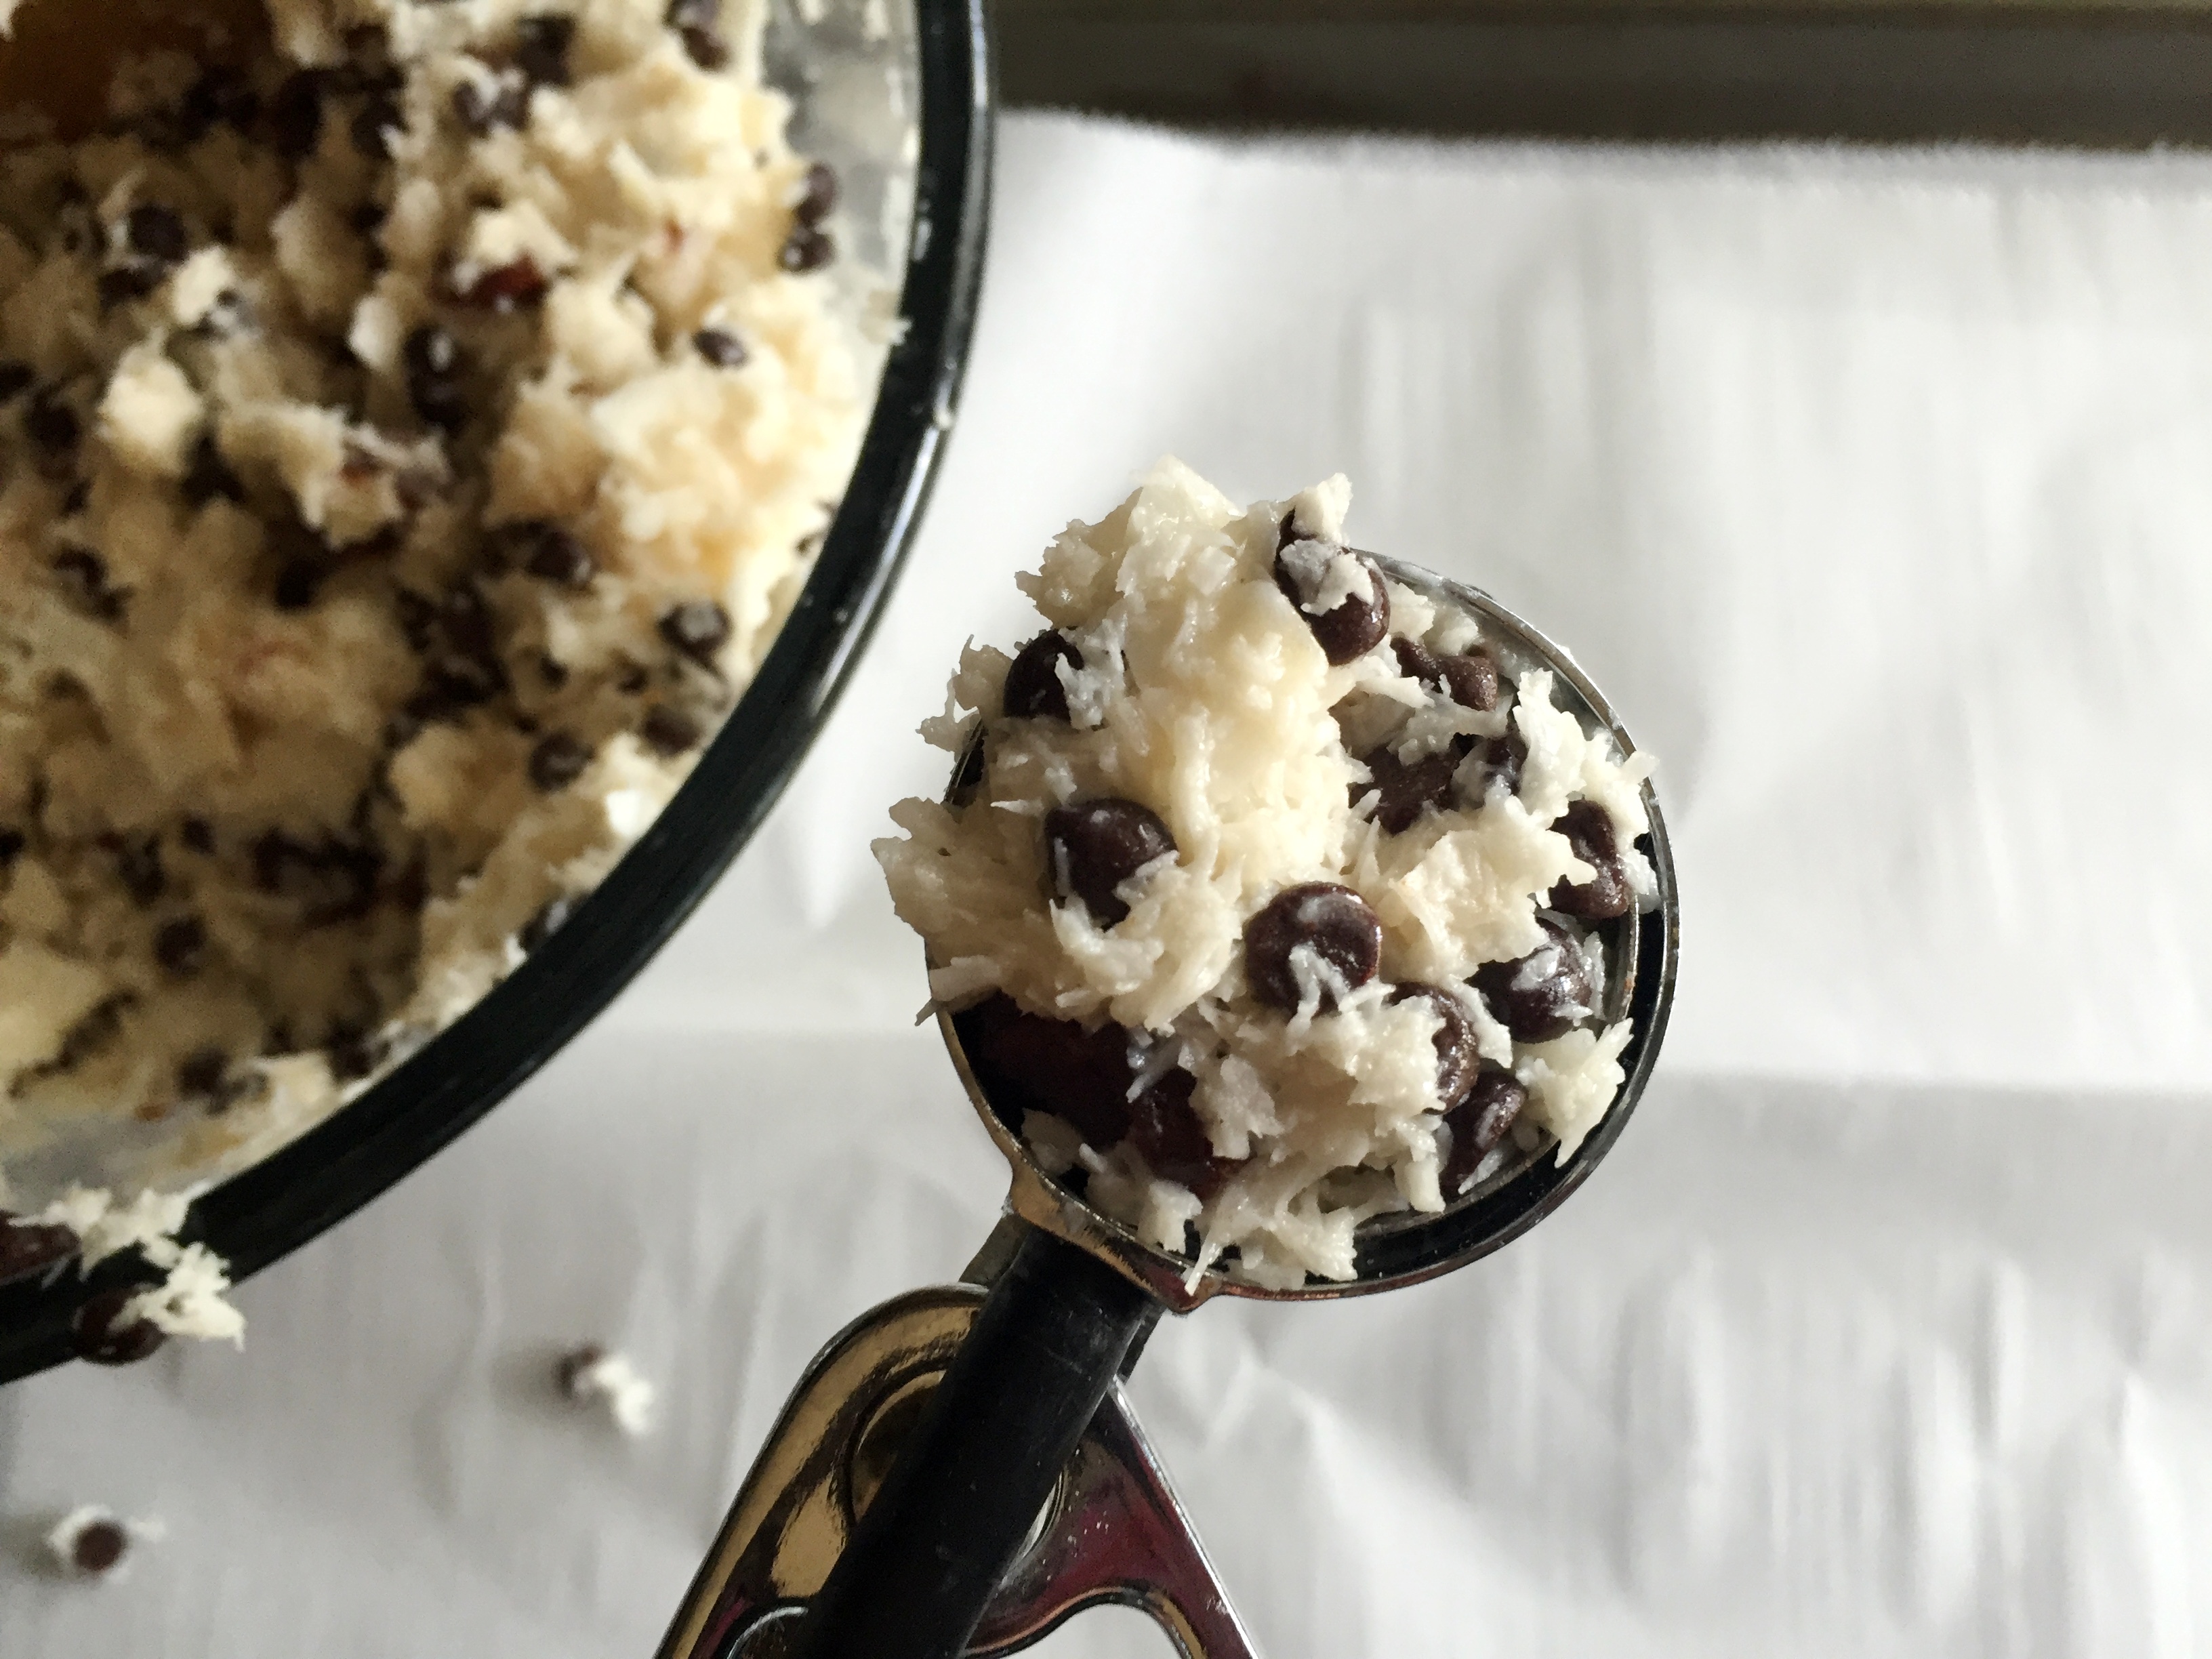
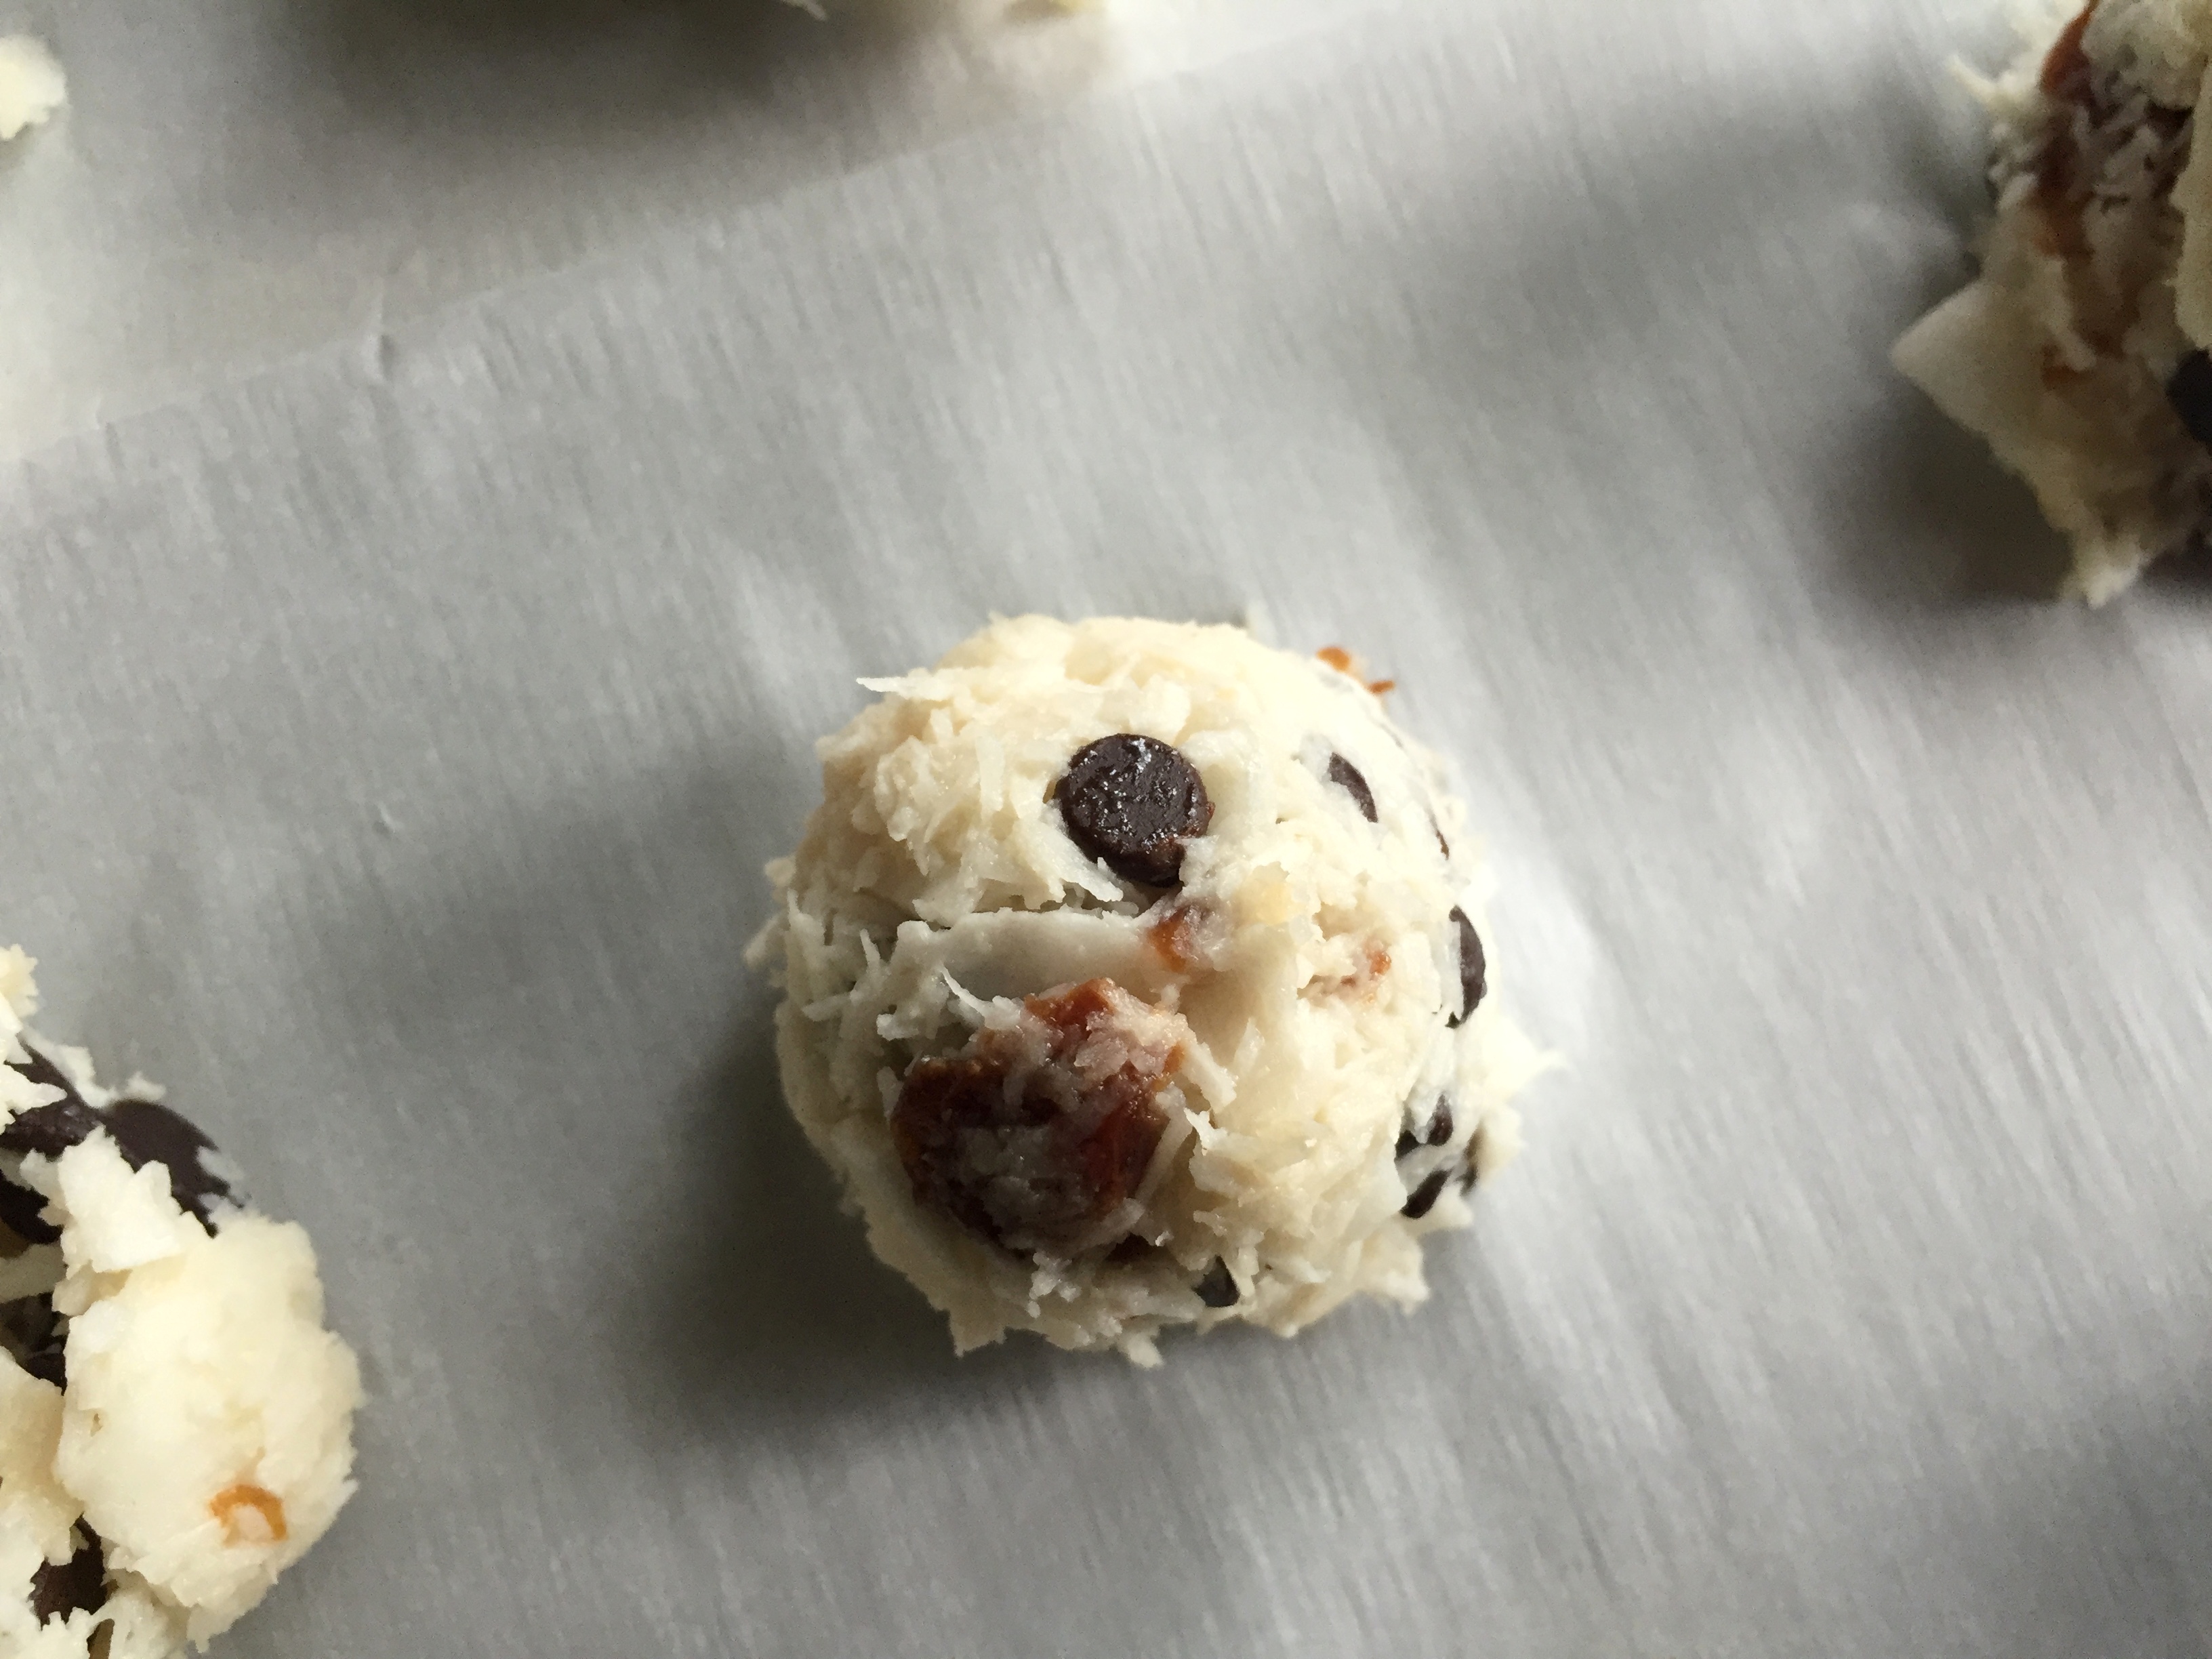
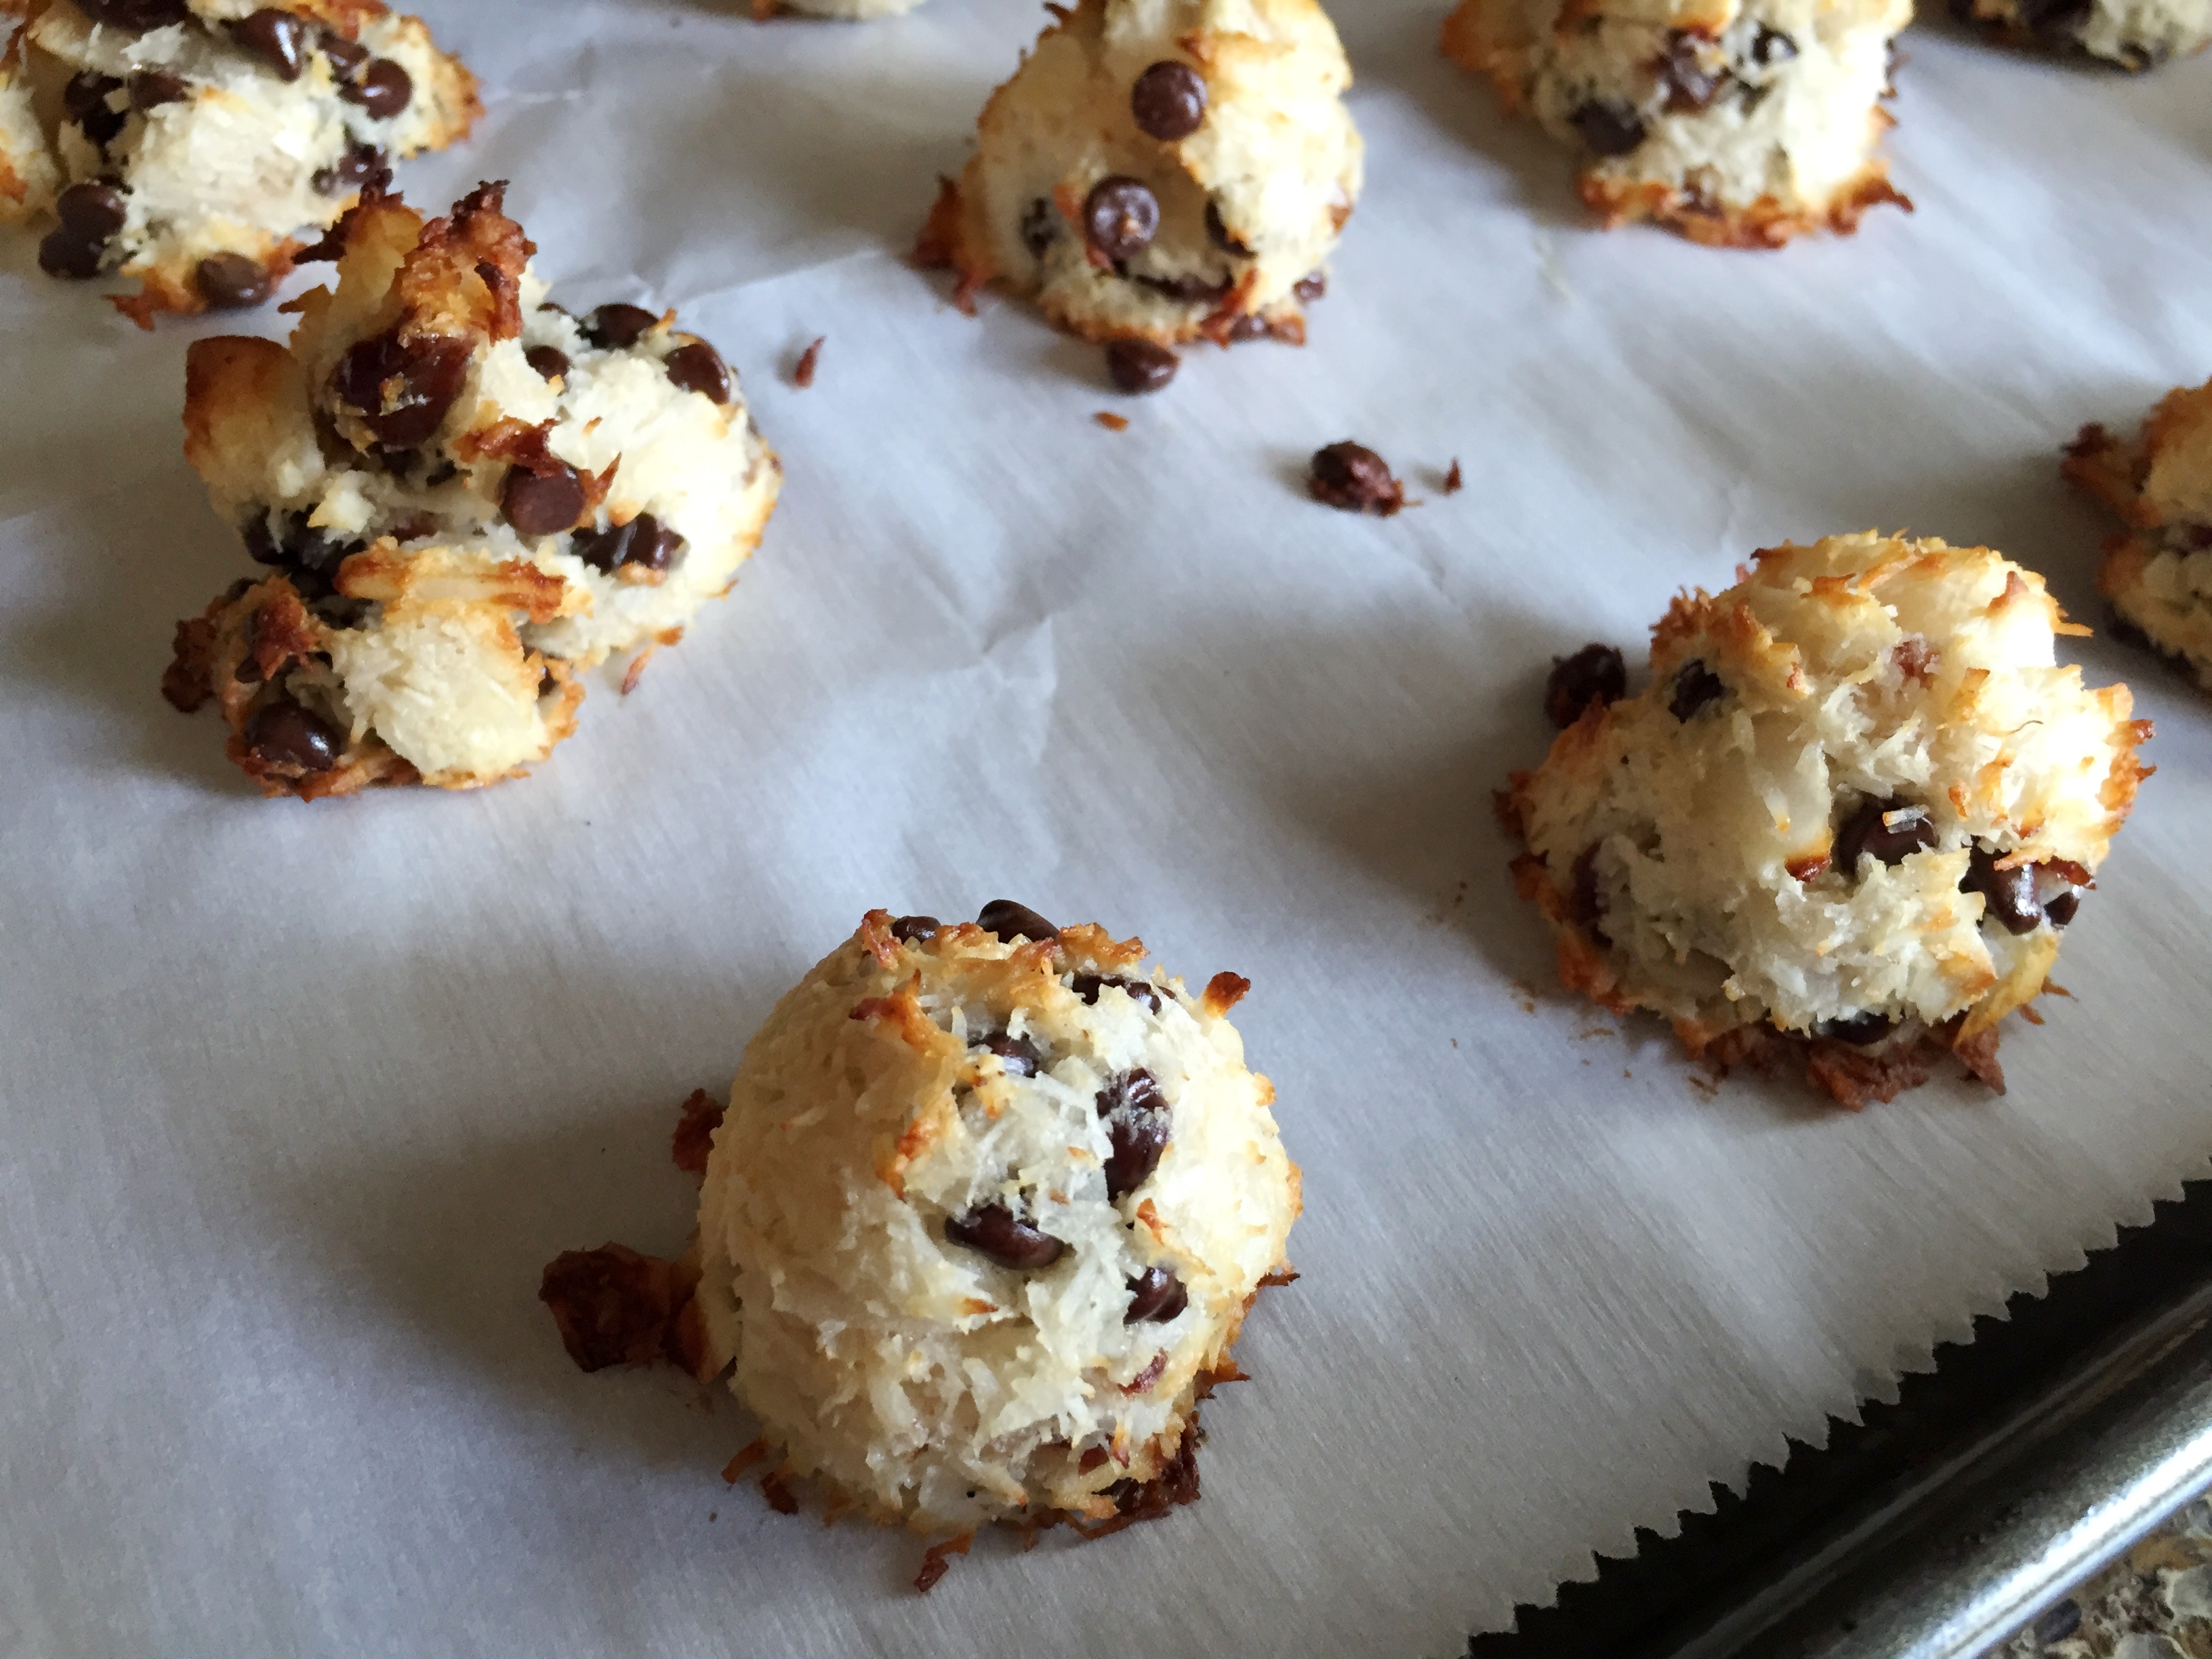
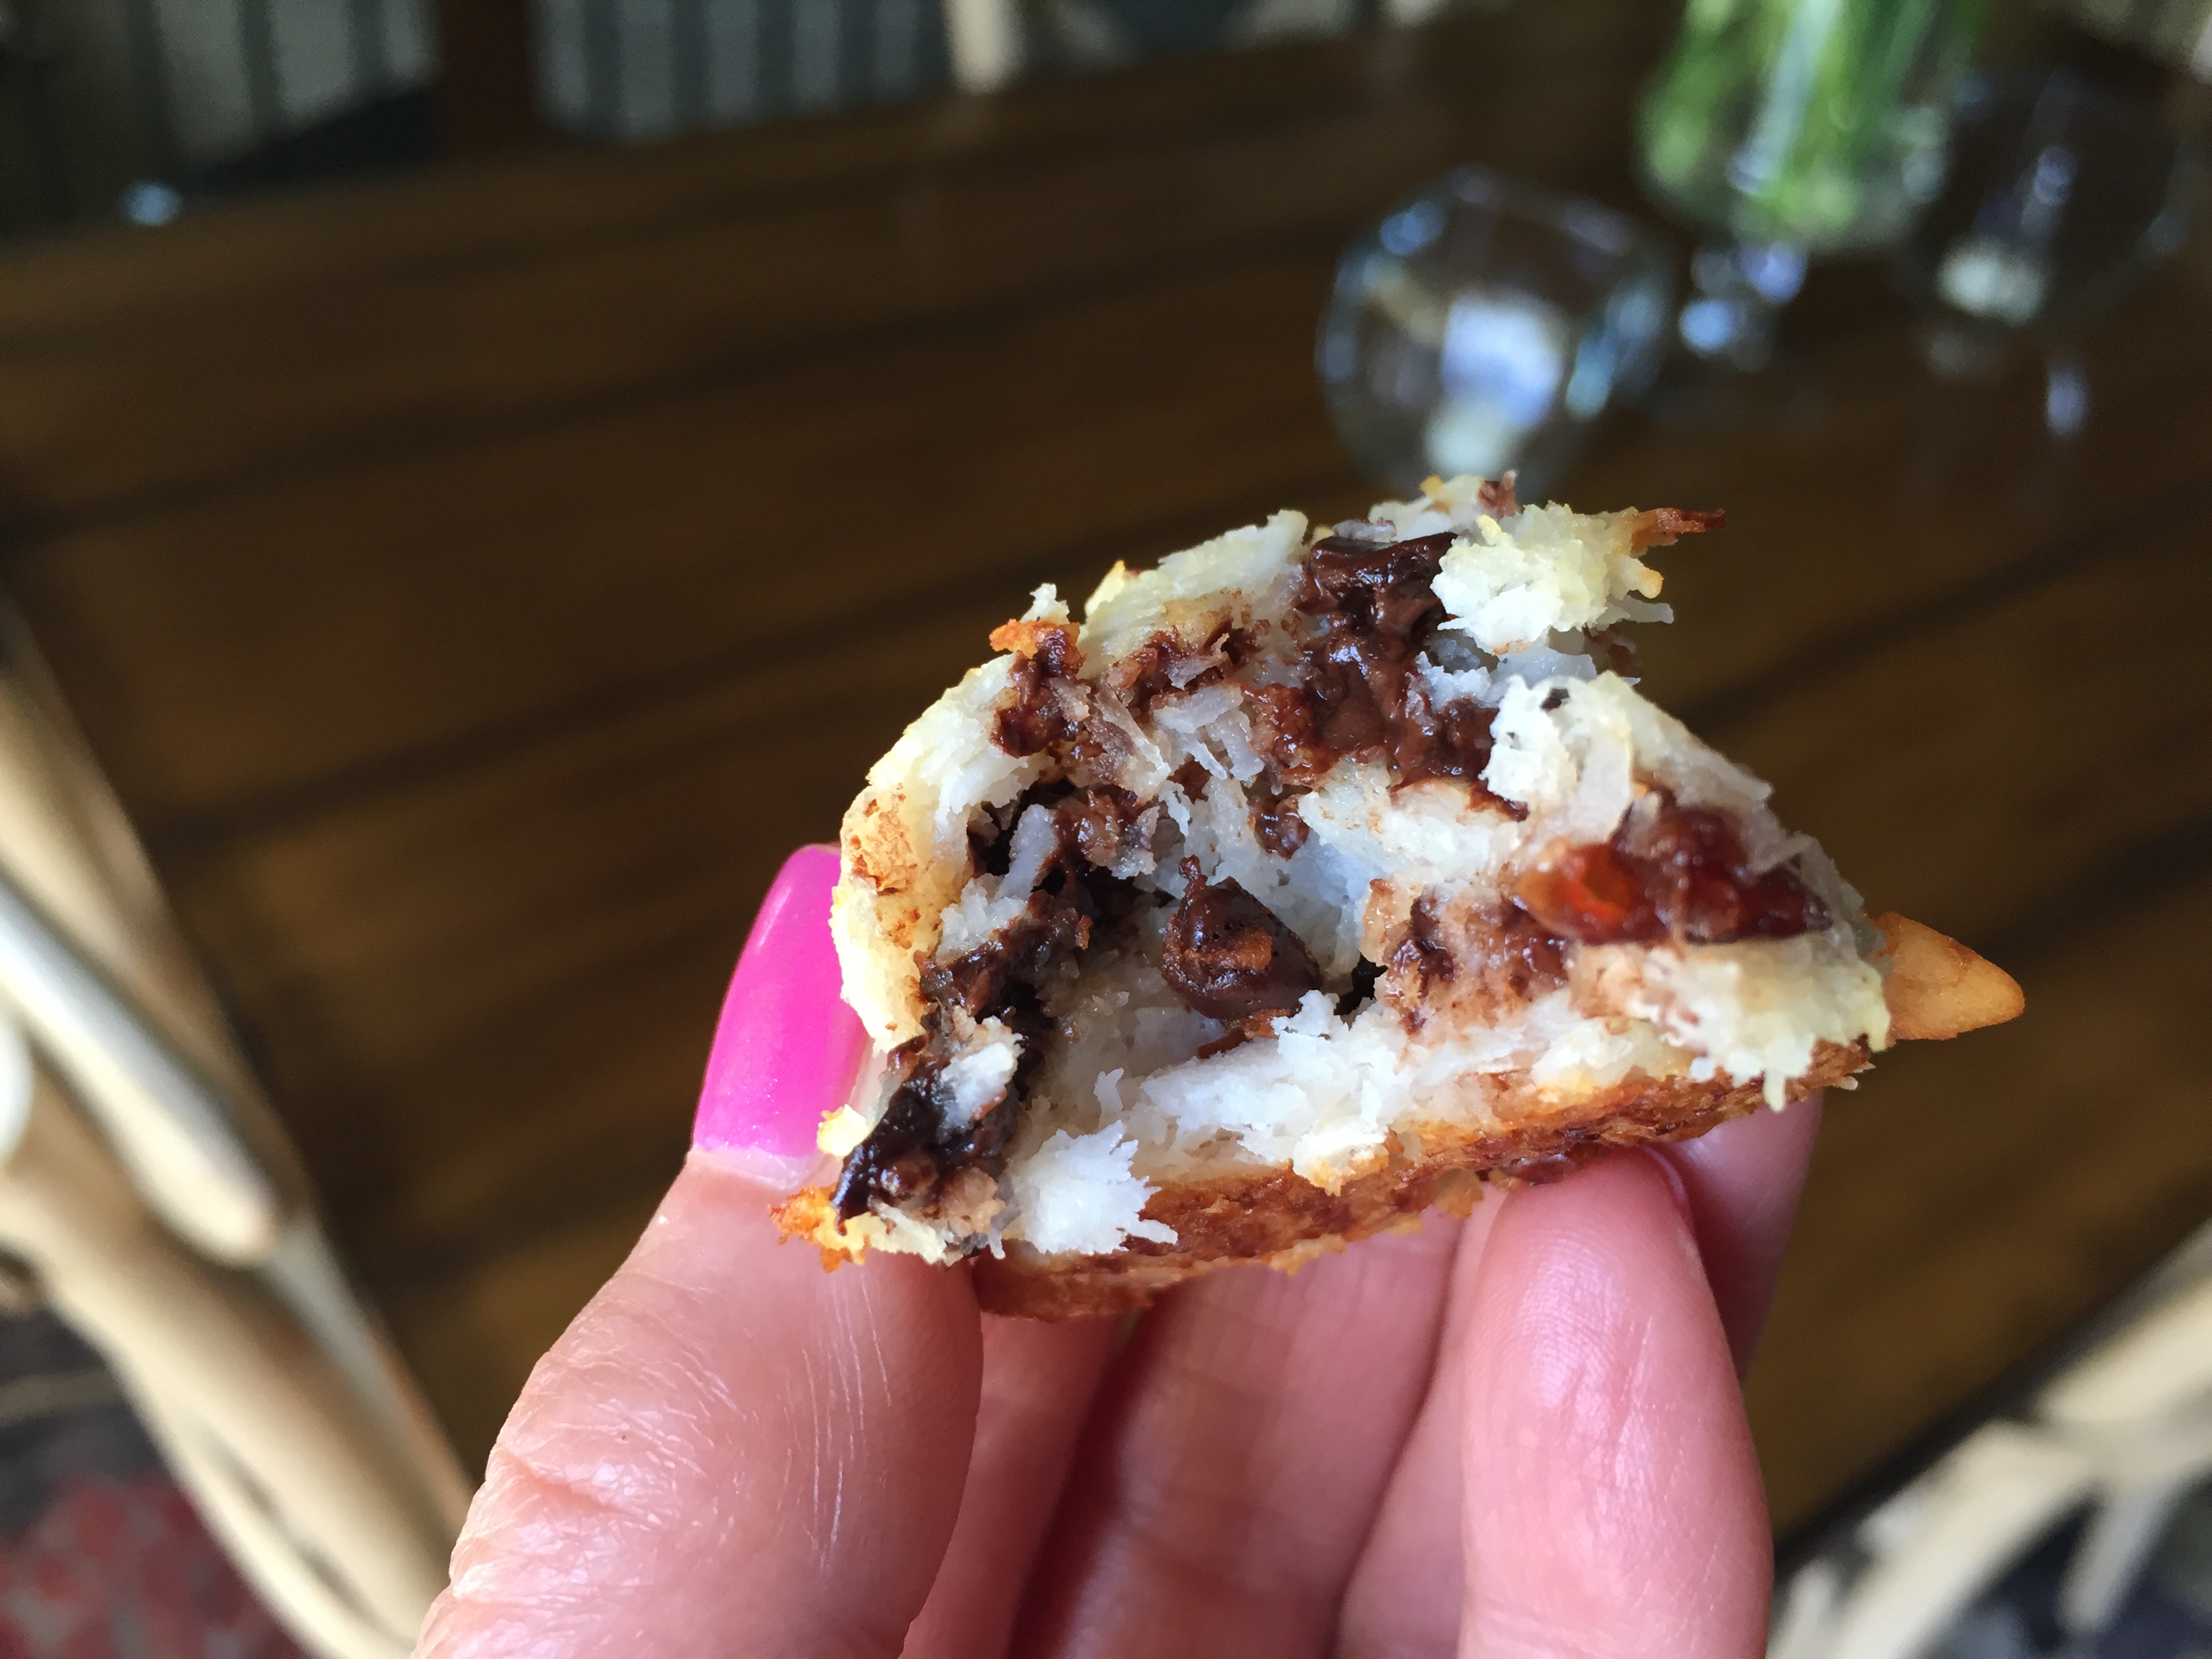
Cherry Chocolate Chip Macaroons
*Makes 32 Servings
2 Cups of Organic Unsweetened Shredded Coconut
1 Cup of Organic Unsweetened Flaked Coconut
1/2 Cup of Organic Dried Cherries, chopped
3/4 Cup of Enjoy Life Mini Chocolate Chips
1/8 teaspoon of Sea Salt
1 teaspoon of Organic Pure Almond Extract
1 teaspoon of Organic Pure Vanilla Extract
4 Organic Egg Whites
4 Tablespoons of Arroy D 100% Coconut Milk
Preheat oven to 325 degrees and line two baking sheets with parchment.
Measure all ingredients into a medium bowl and mix well with a spoon or spatula until fully incorporated. Scoop dough out a Tablespoon at a time and bake for 18 minutes. Allow to cool before transferring from baking sheet.
The Great Pizza Roll Experiment
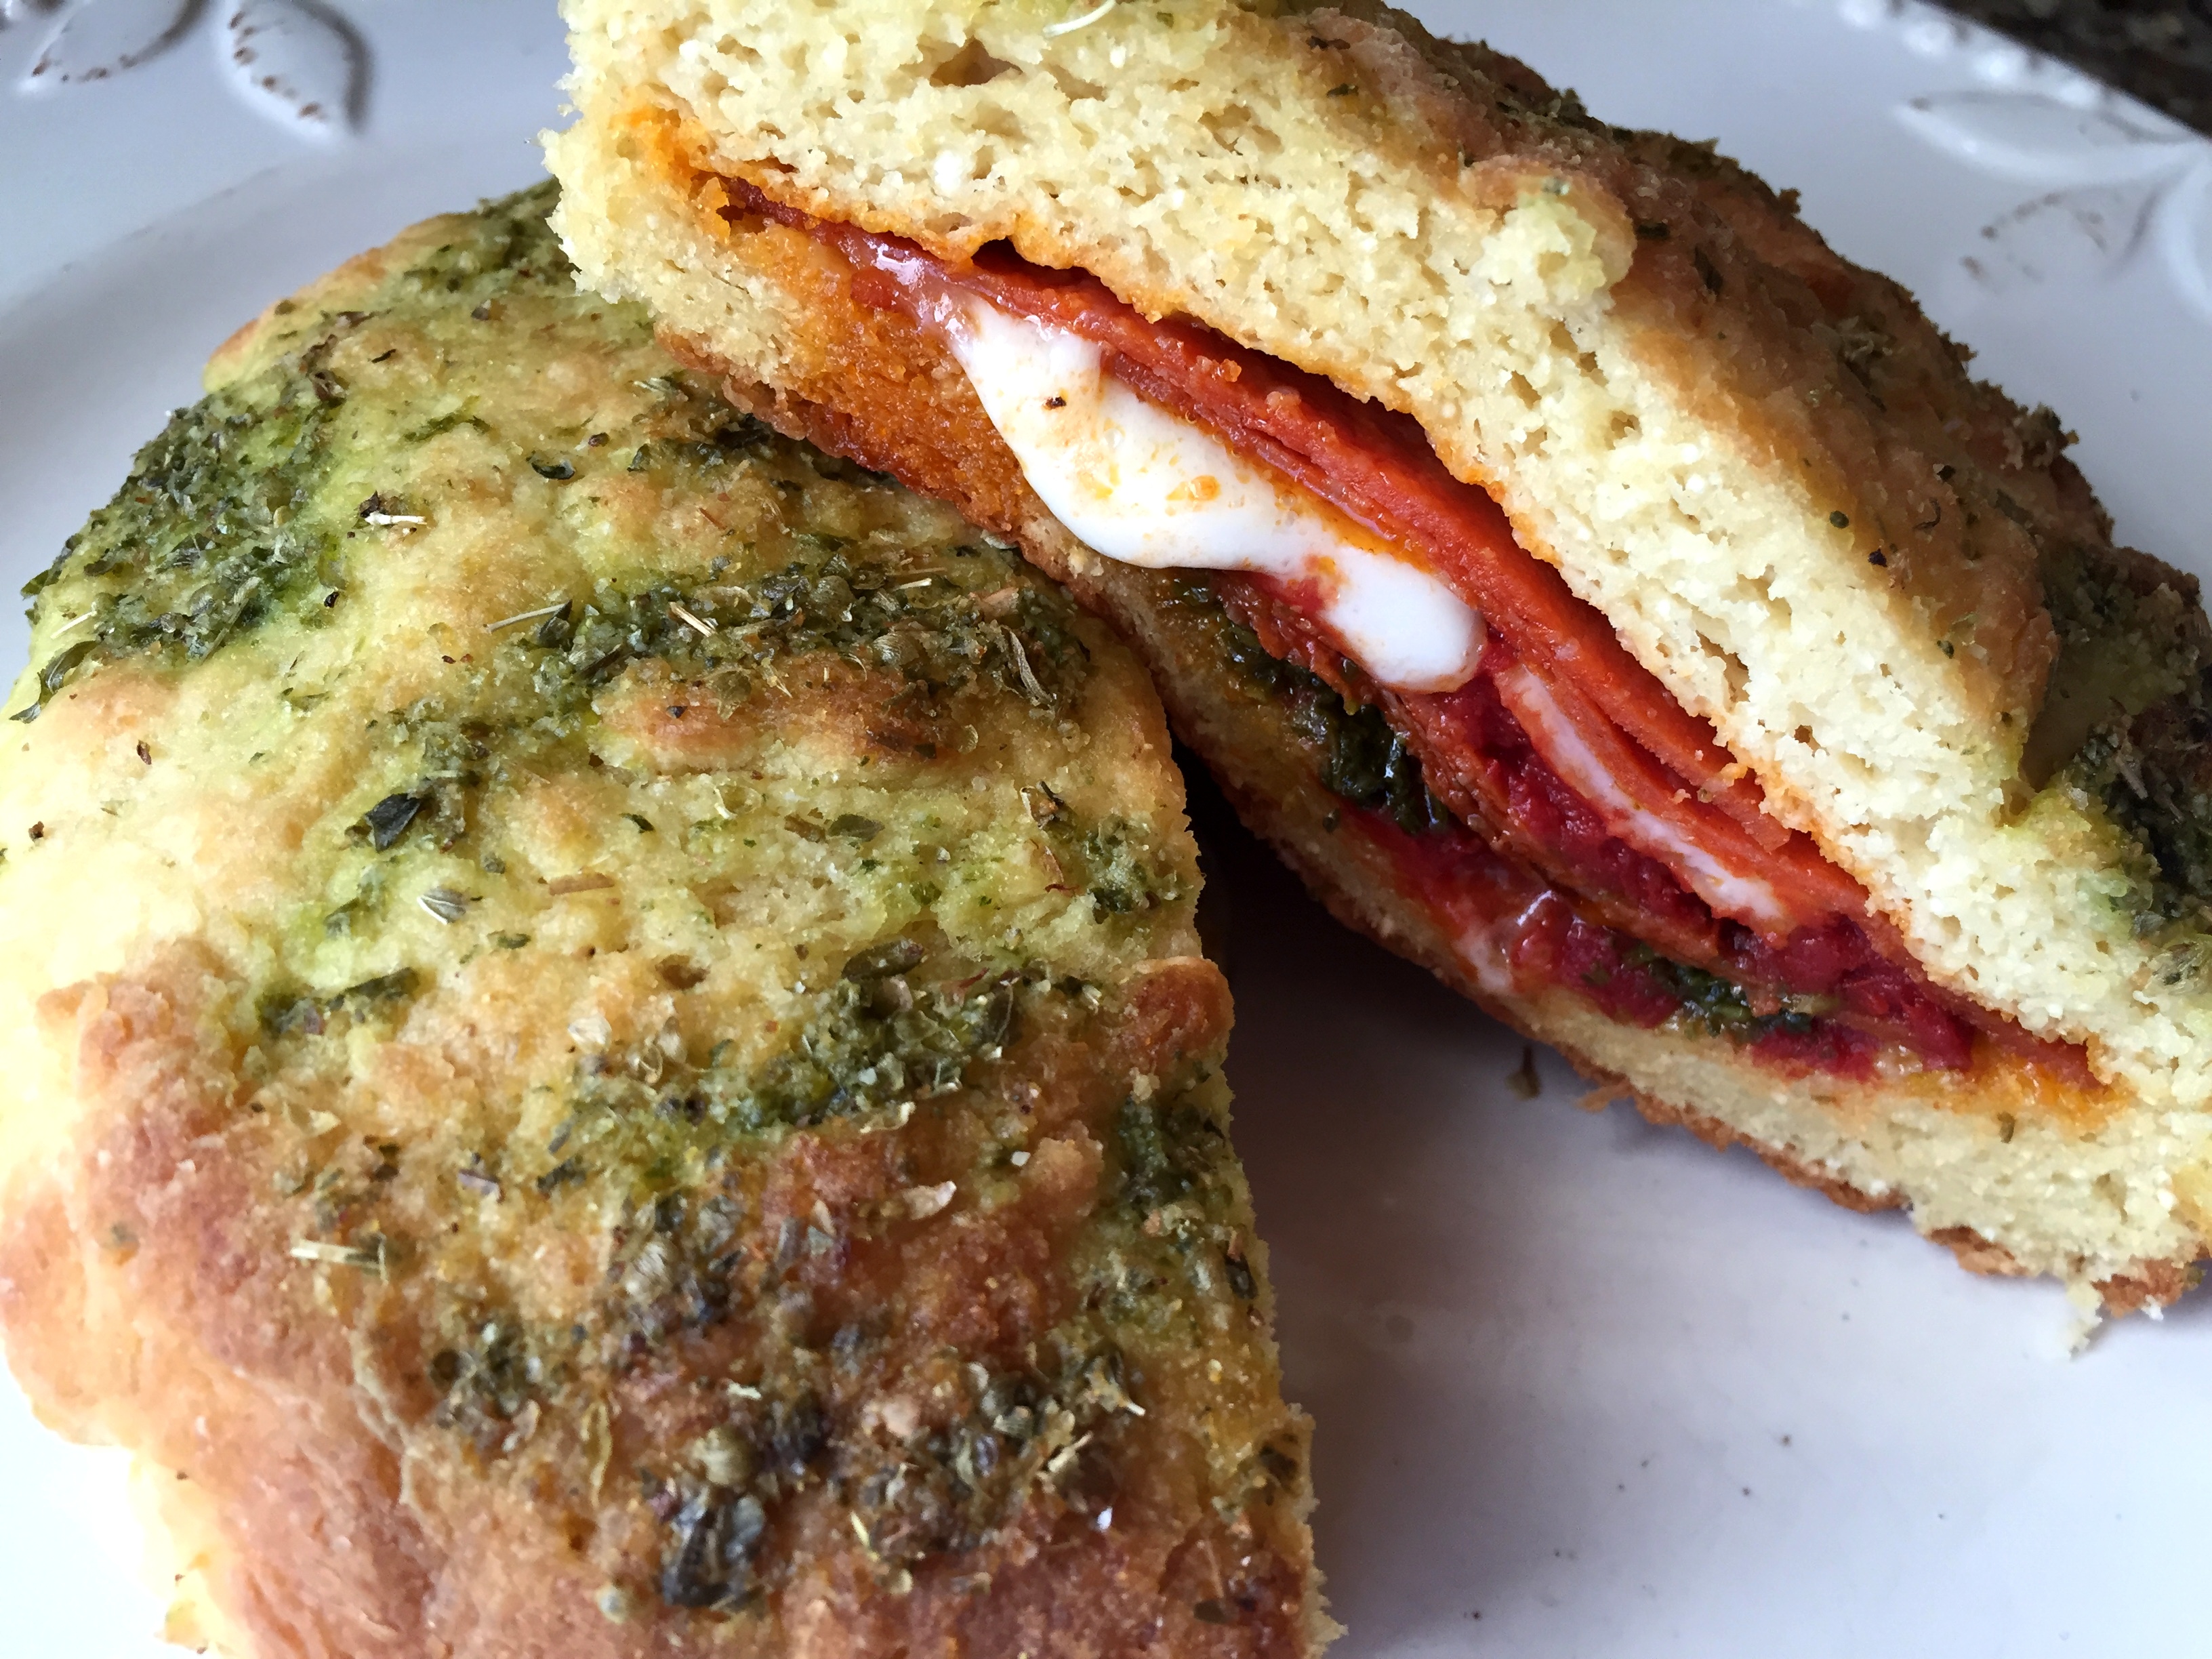


*There are two things I want to try differently the next few times I make this. One, the portions were big and I think I would like a little less bread, so next time I’ll try them a bit smaller, pat the dough out thinner, but stick with the same amount of filling.
Grain Free Pizza Rolls
*This recipe makes 6 large servings
1 Batch of My Grain Free & Dairy Free Dinner Roll Dough
Extra Arrowroot Flour or Sweet Potato Flour for patting (arrowroot is less expensive to use on hands!)
1 Batch of My Vegan Spinach & Basil Pesto
About 12 ounces of Goat Mozzarella, cubed or sliced
About 24 Large Pepperoni Slices
1 Small Can of Tomato Paste
Dried Oregano for Sprinkling
Olive Oil, Oregano, Basil, Garlic Powder, and Rosemary to brush on the tops.
Organic Garlic & Herb Marinara Sauce (for dipping)
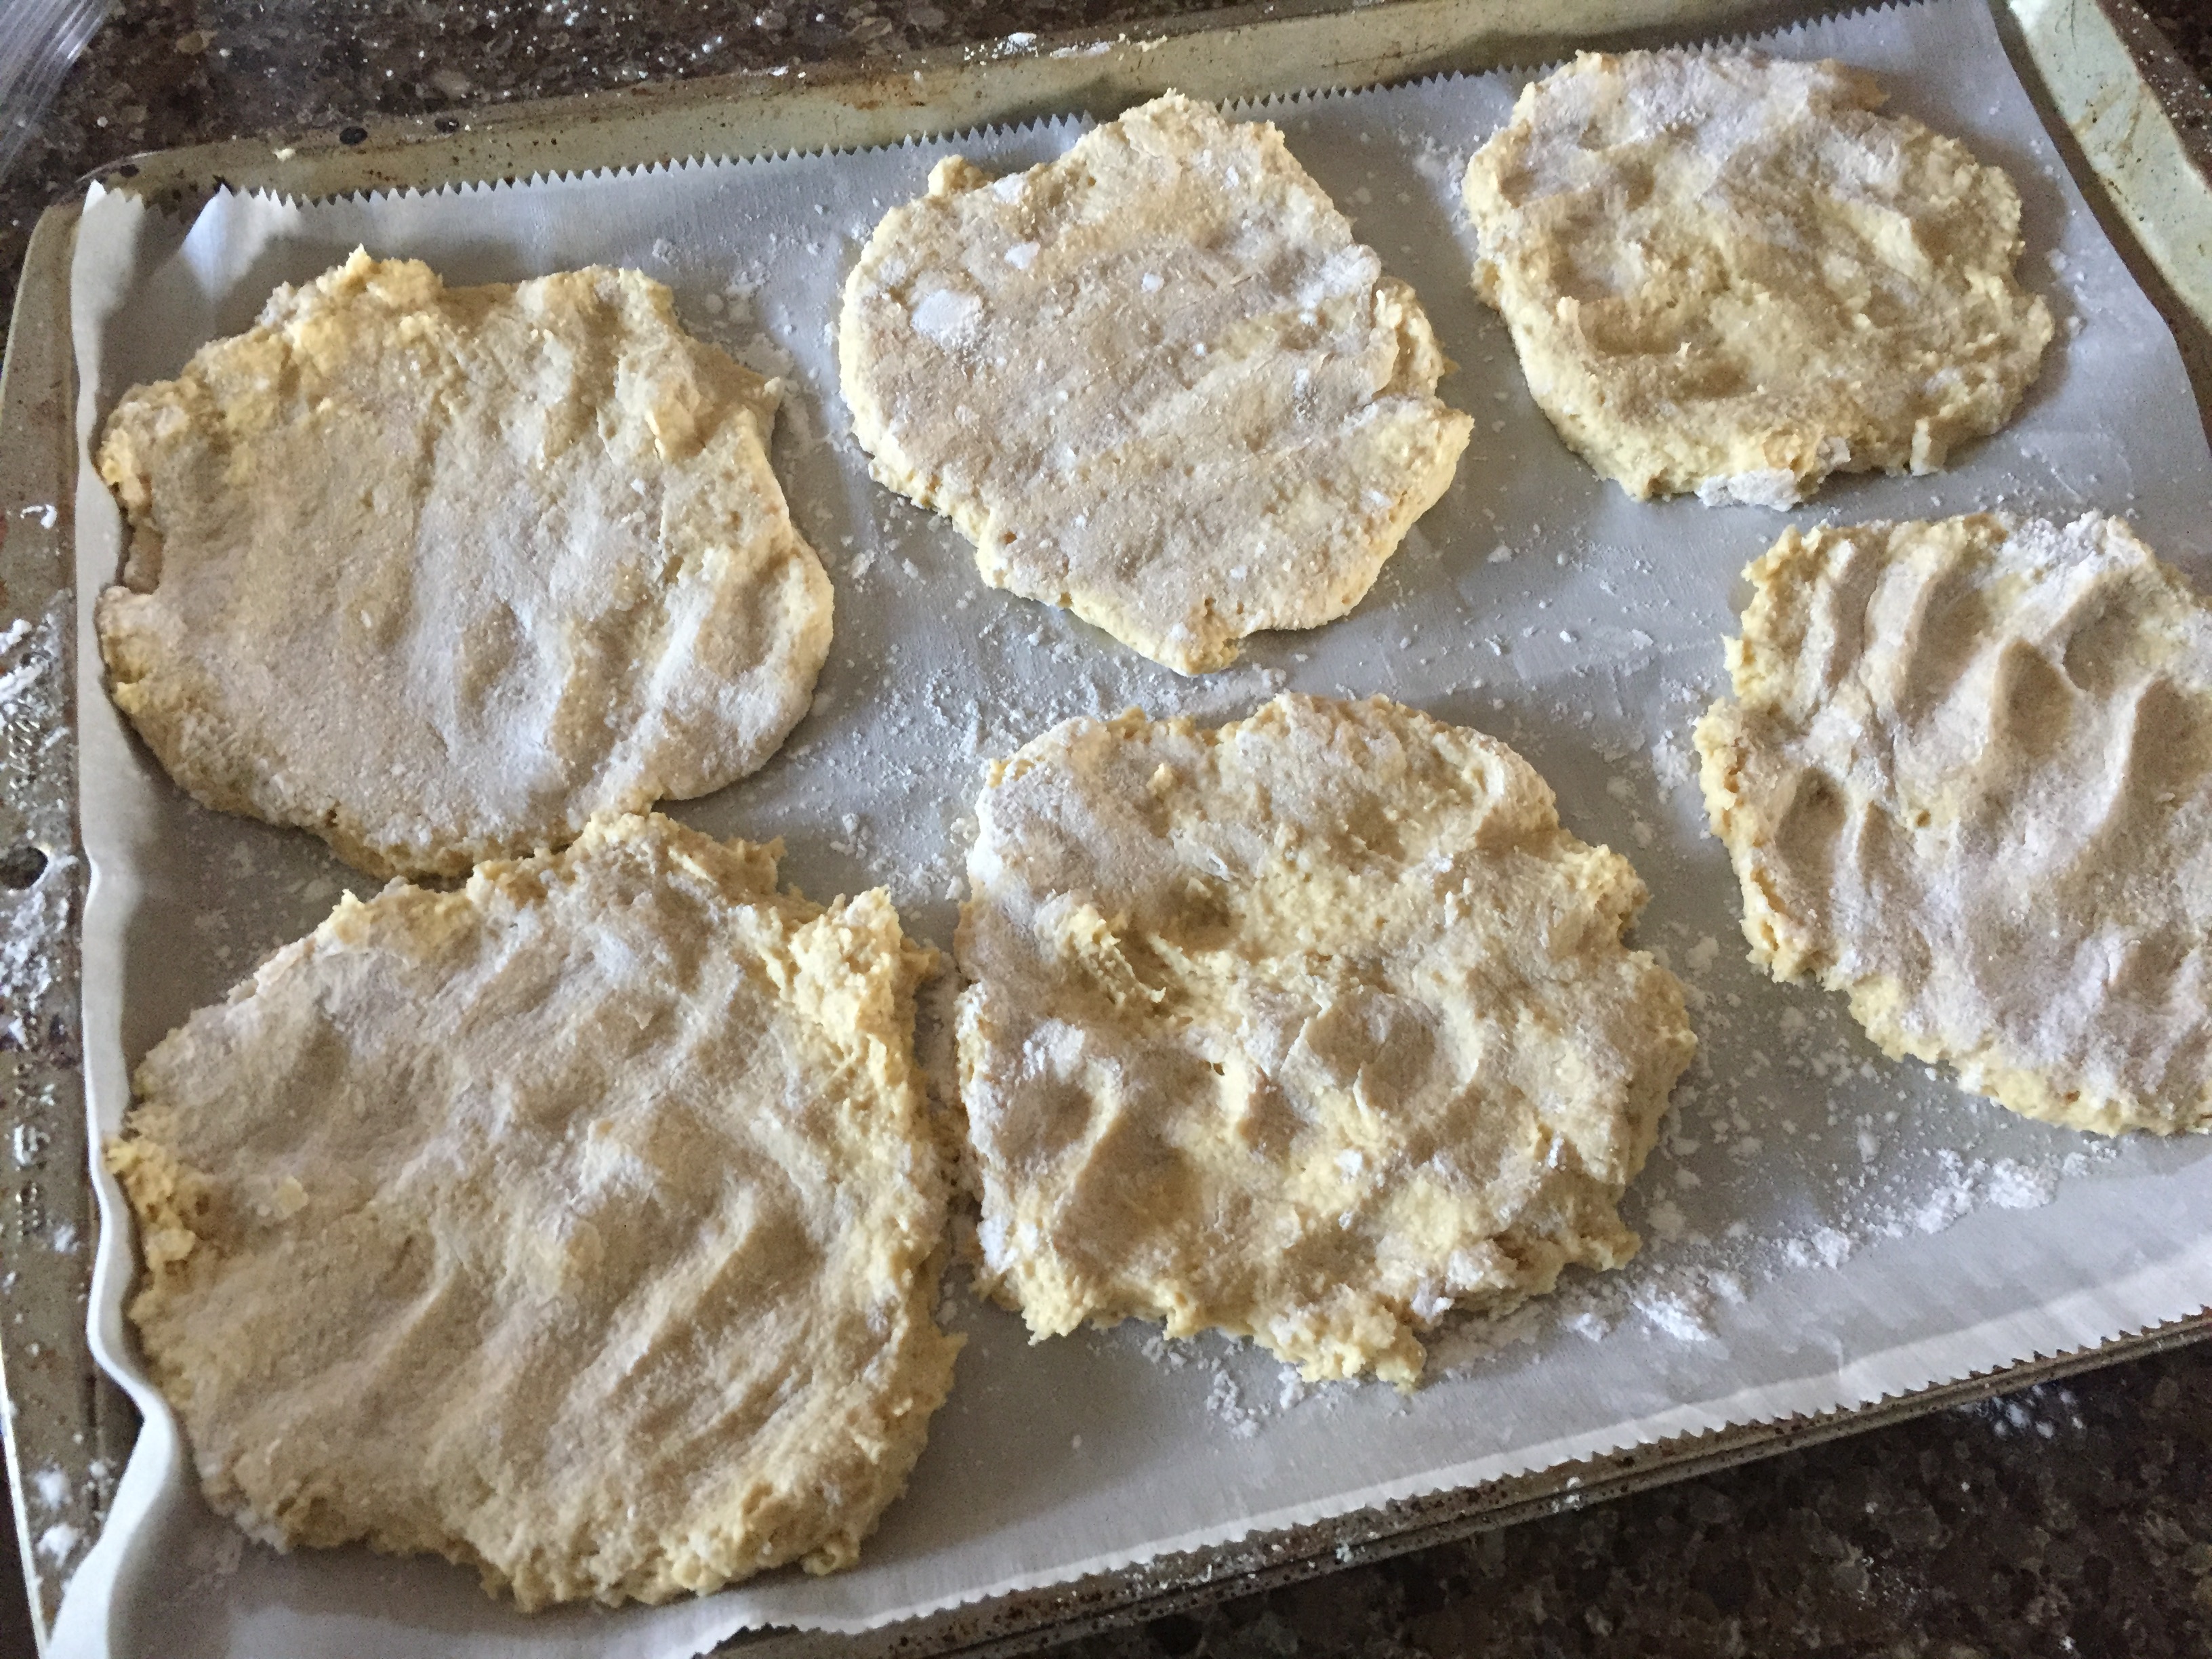
Turn the oven to 375 degrees and line a baking sheet with parchment.
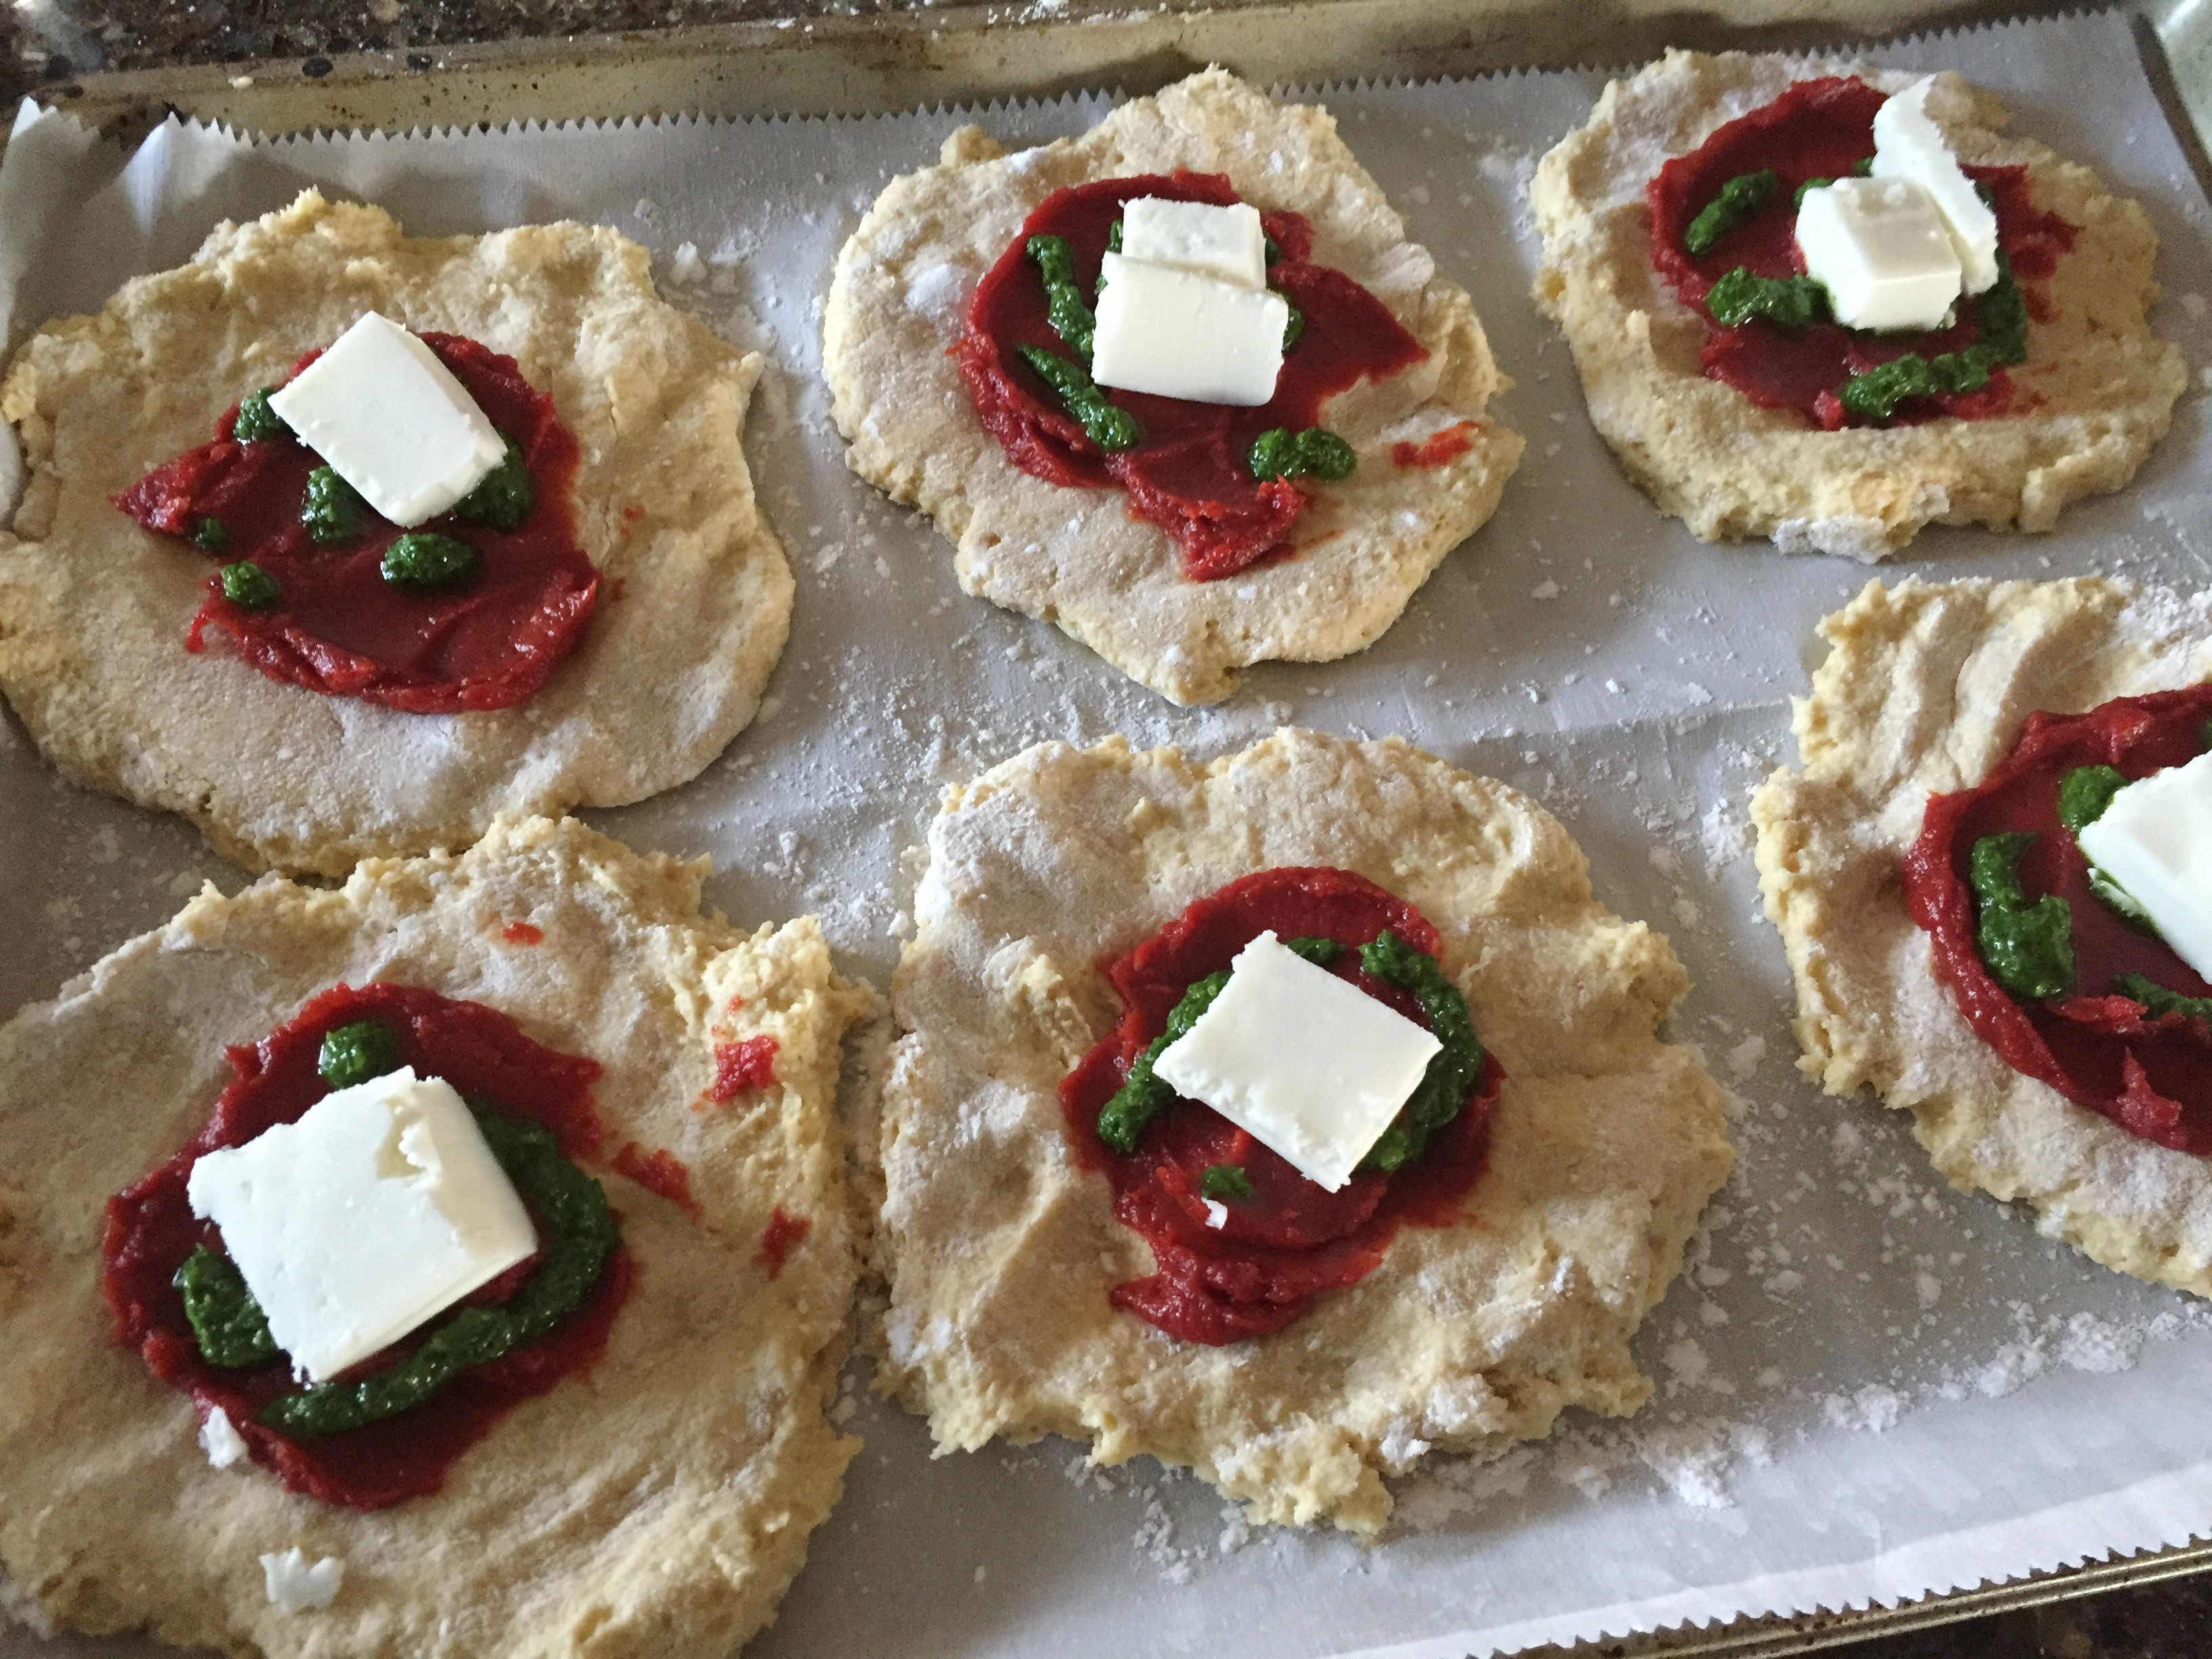
Using half the bread dough and floured hands, pat out 6 rounds of dough onto the parchment. Divide the can of tomato paste equally between the rounds and spread with a spoon. Squeeze a little pesto onto each one. (I freeze my pesto in ziplock baggies and then thaw when I’m ready to use. I snip the end and squeeze it out of the baggie.)
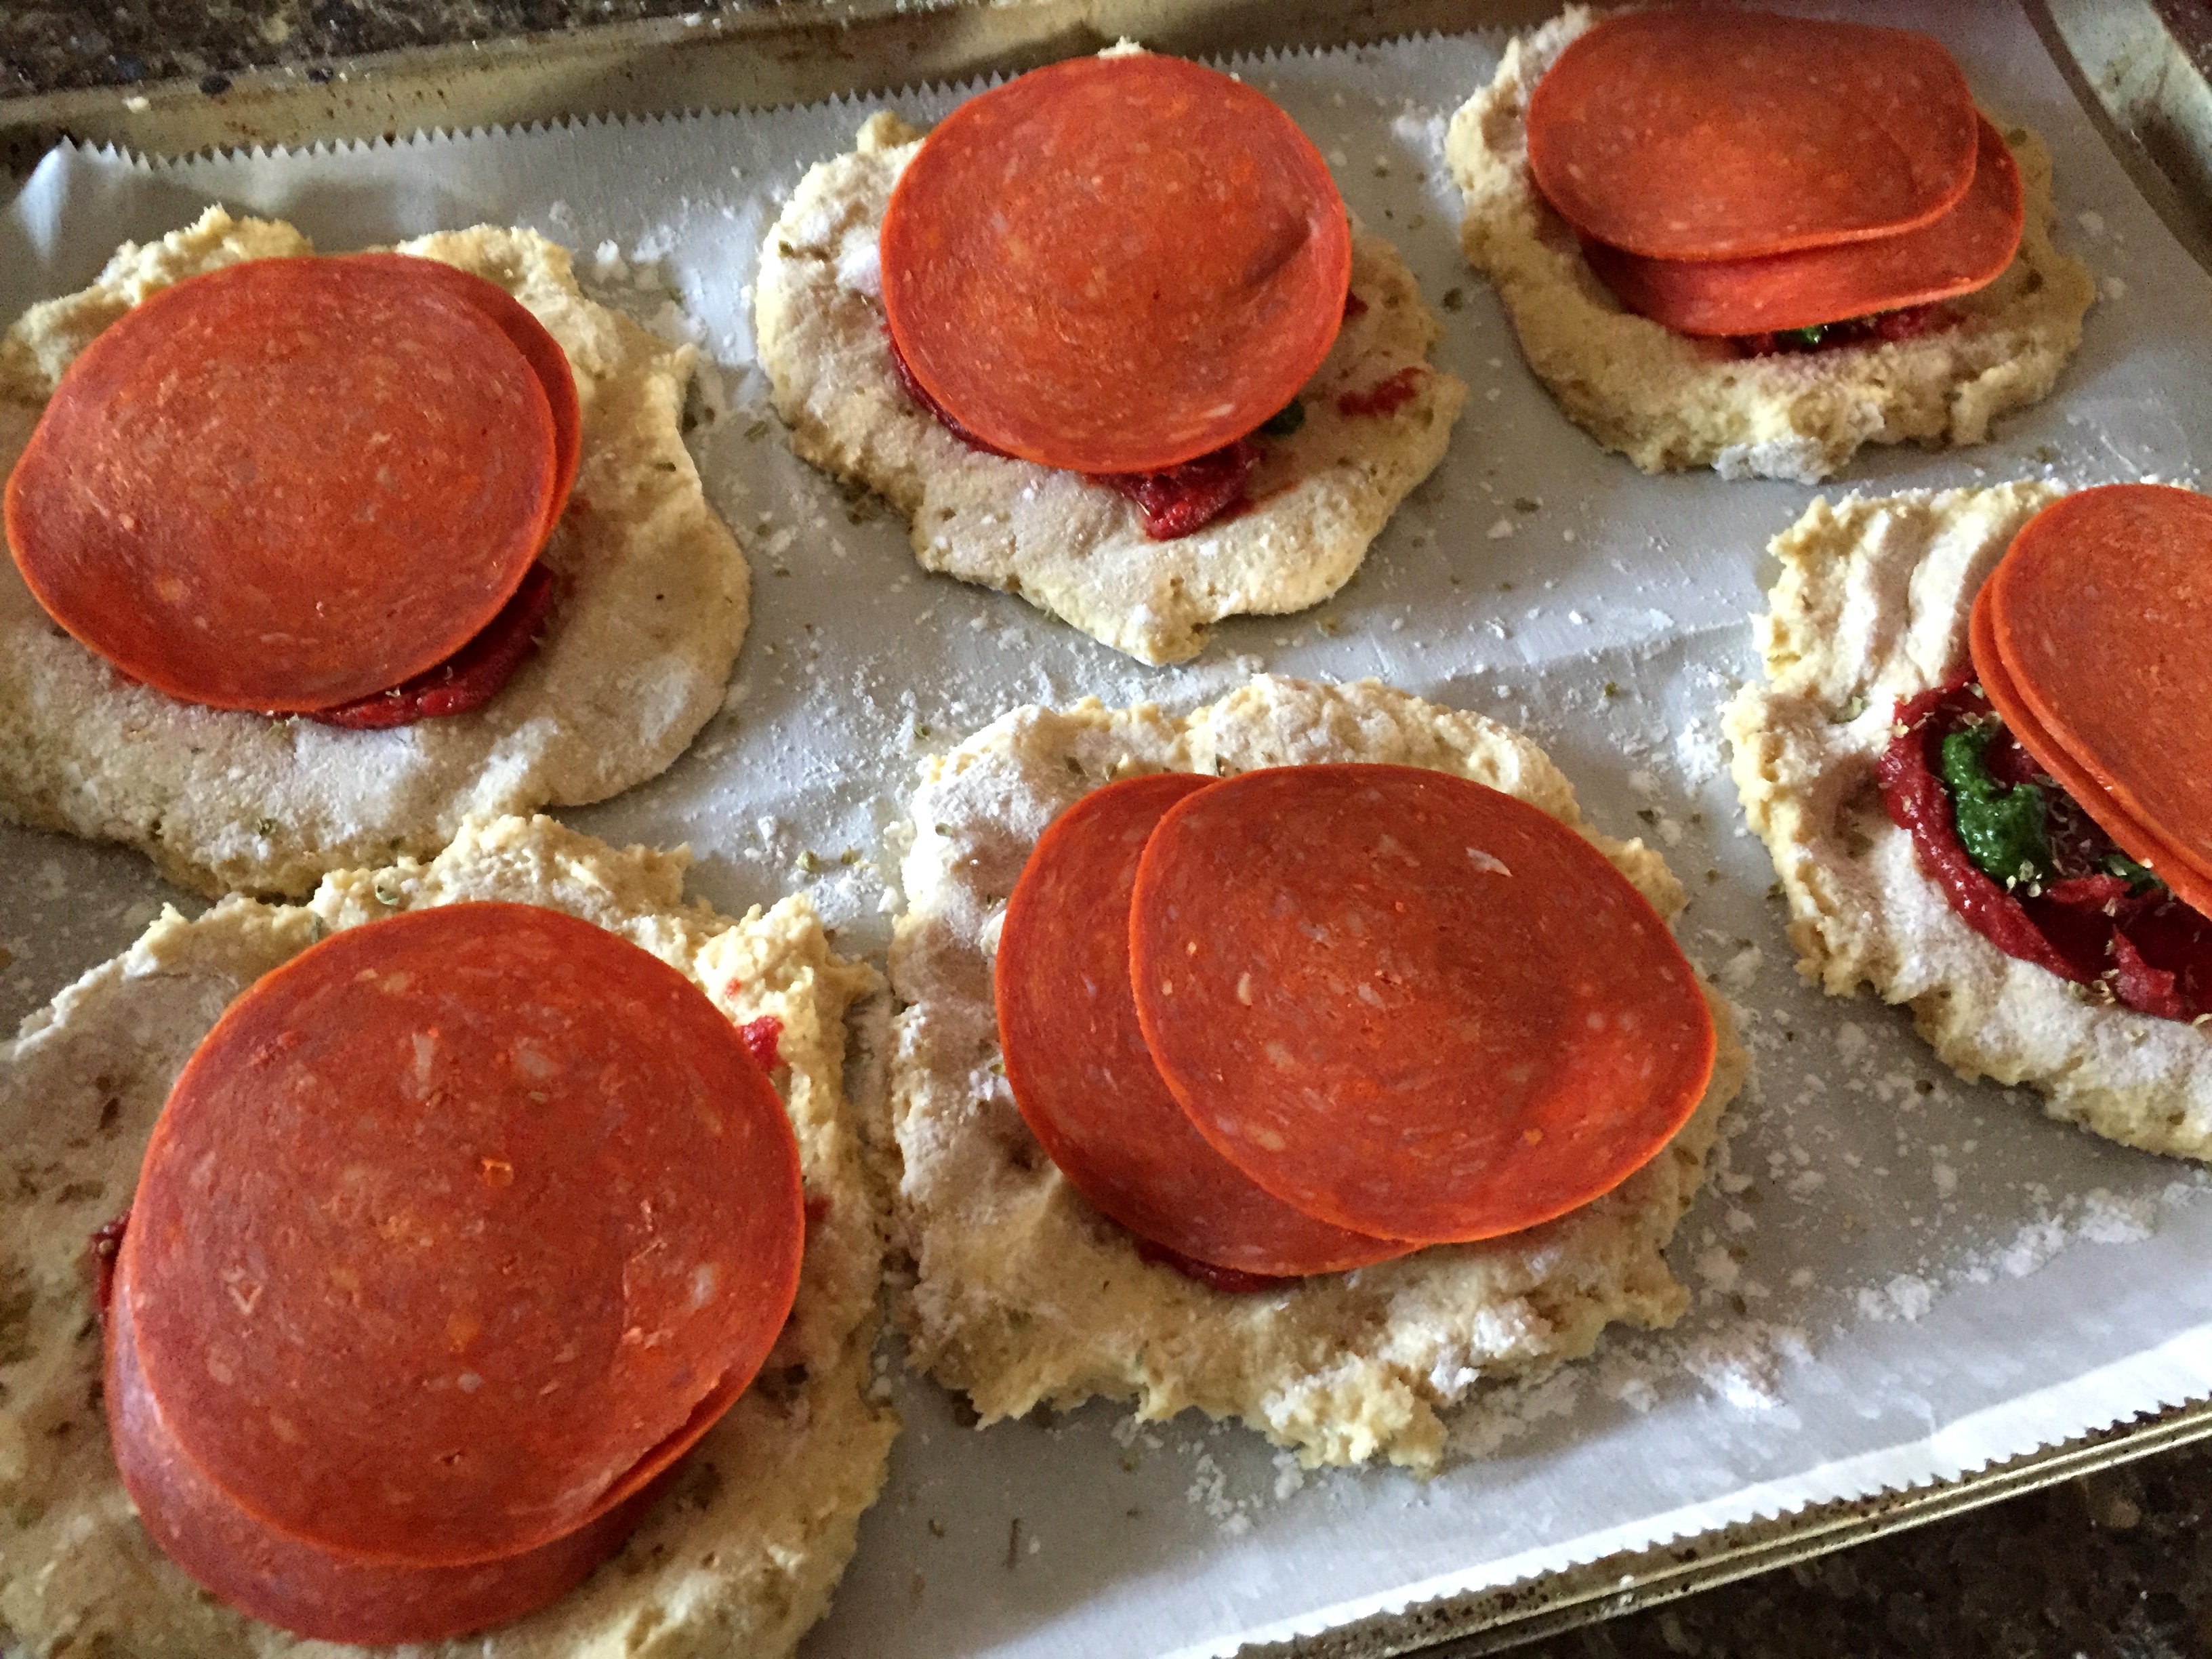
Place a couple of slices of mozzarella on top of the rounds and top with two slices of pepperoni. Sprinkle with oregano. Then top with a little more pesto, two more slices of cheese, two more slices of pepperoni, and sprinkle again with a little oregano.
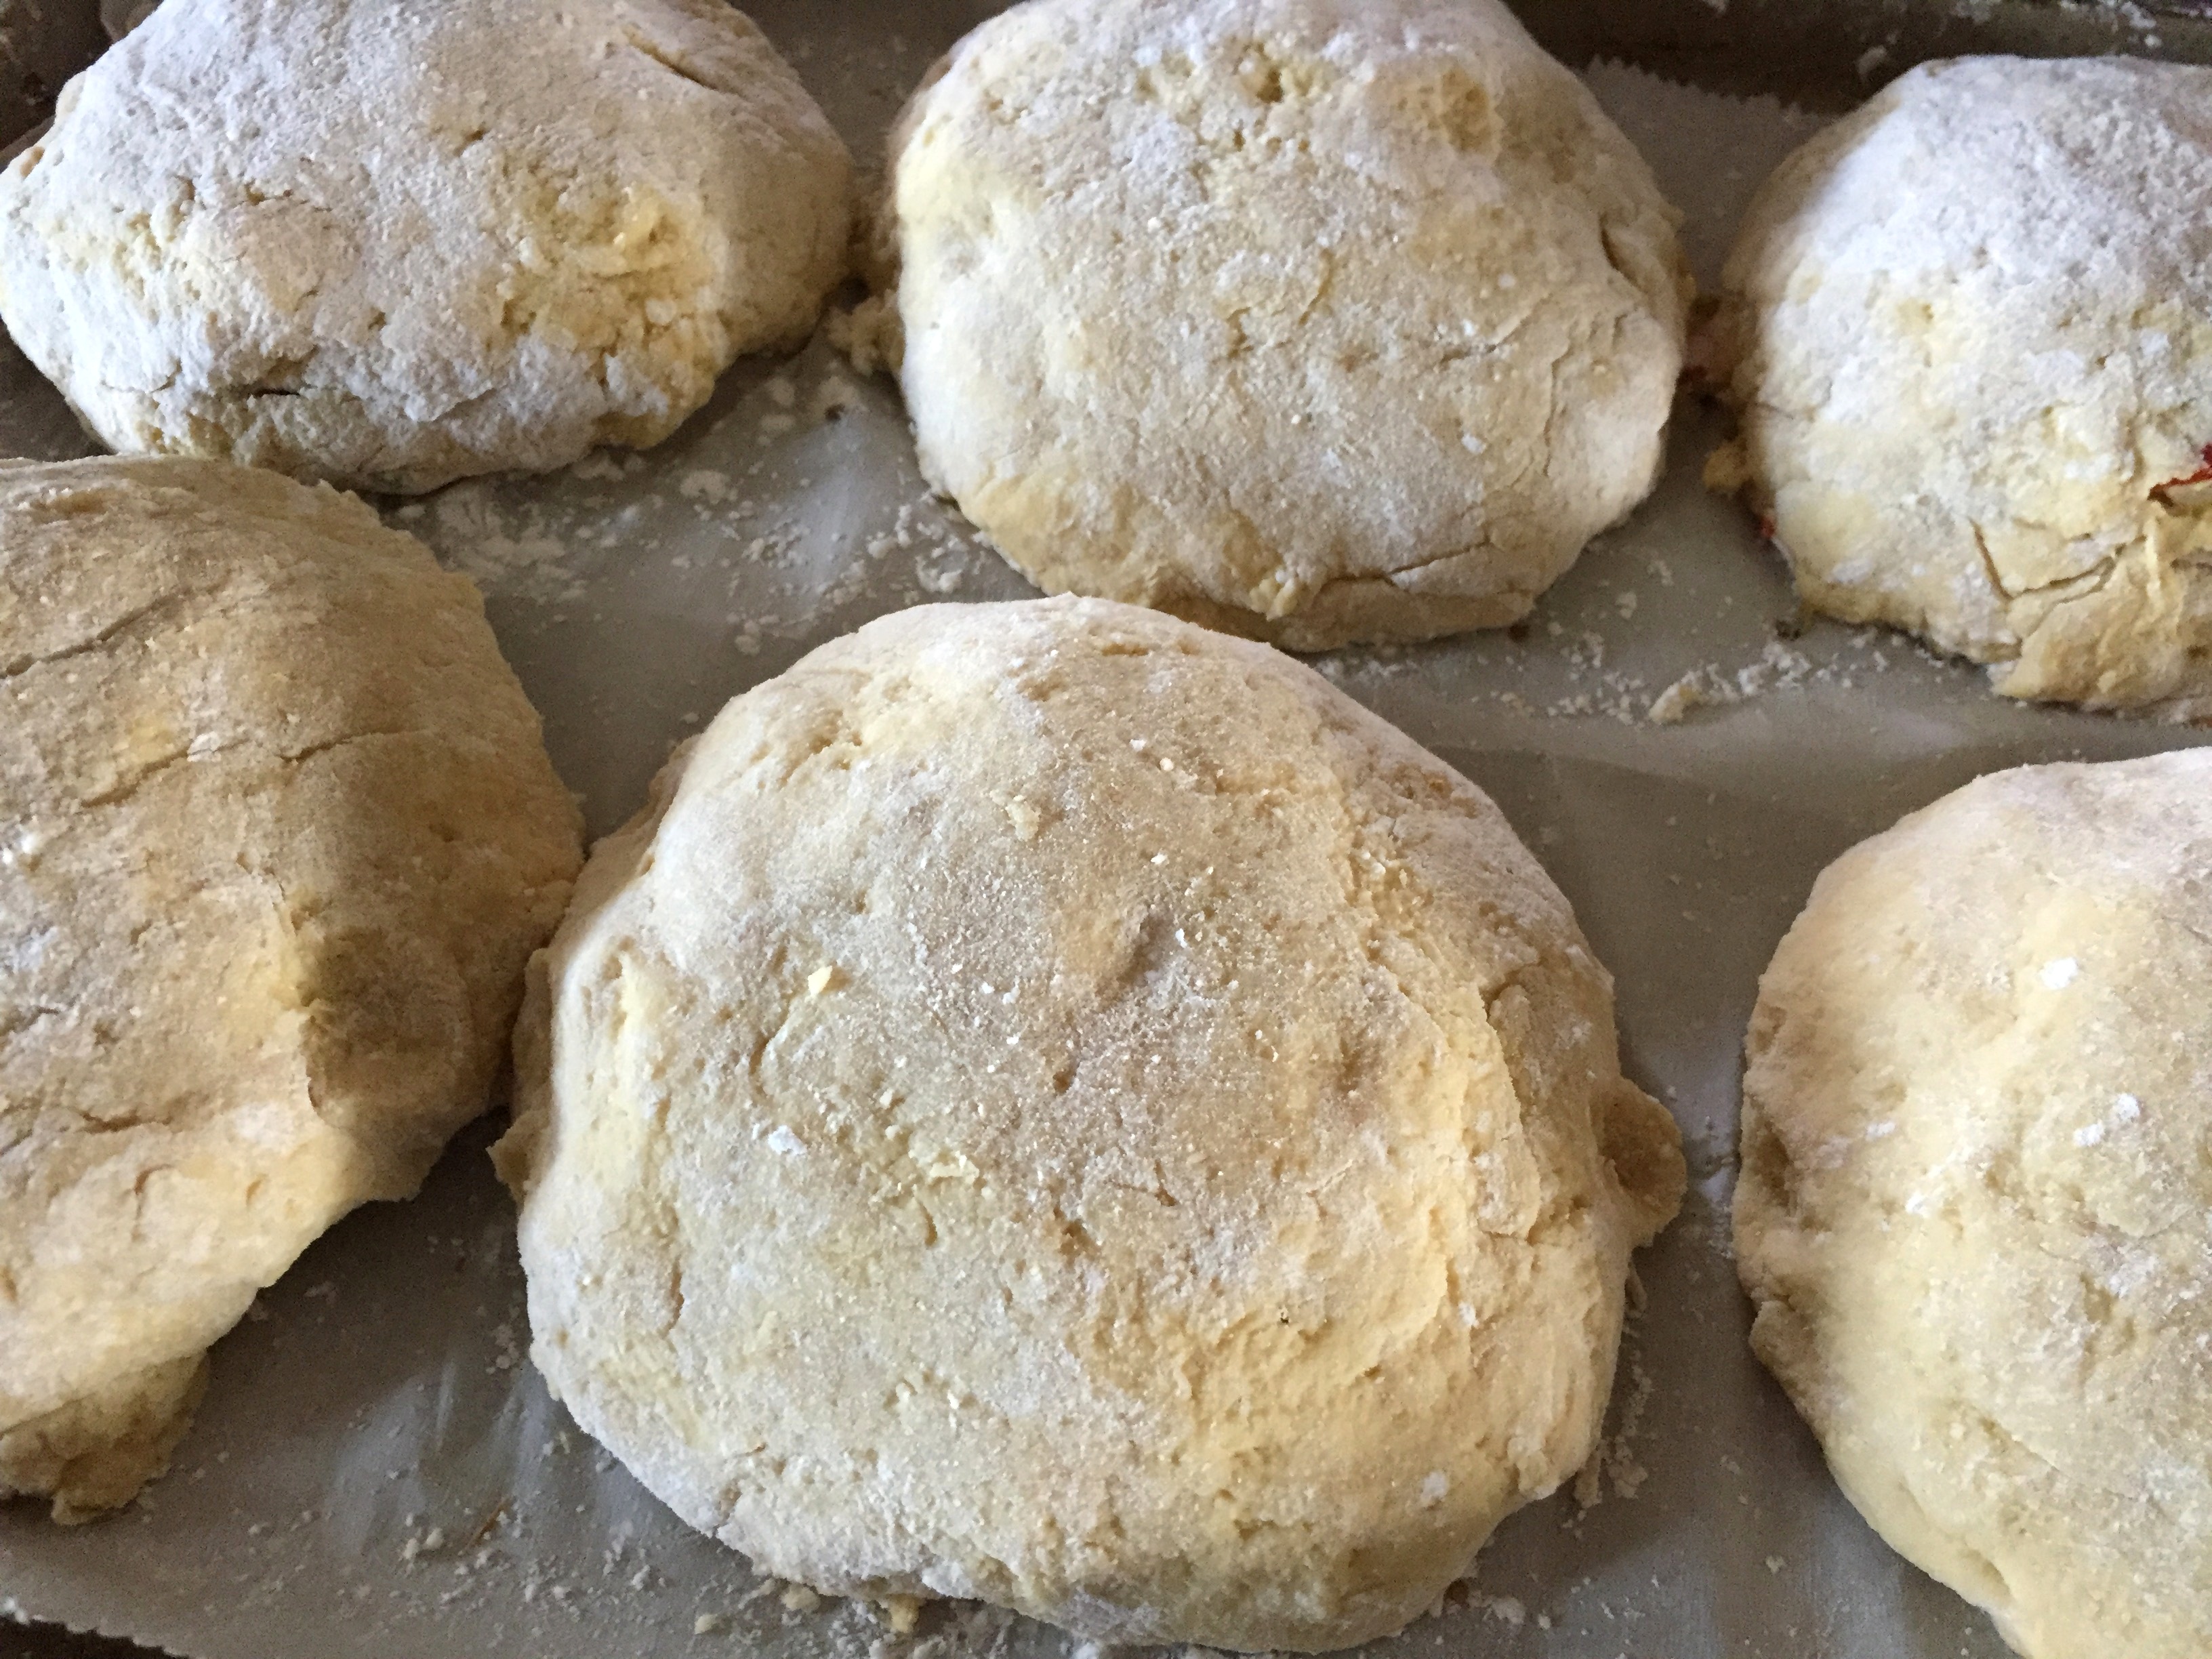
With floured hands, pat out the top dough on your palm and place it over the filling topped rounds. Press the edges down and lightly cup your hand over the dough and tuck the edges under all around.
Spray a piece of plastic wrap with non-stick spray and lightly lay over the top of the buns. Top with a kitchen towel and set on top of the stove to rise for 35 minutes.
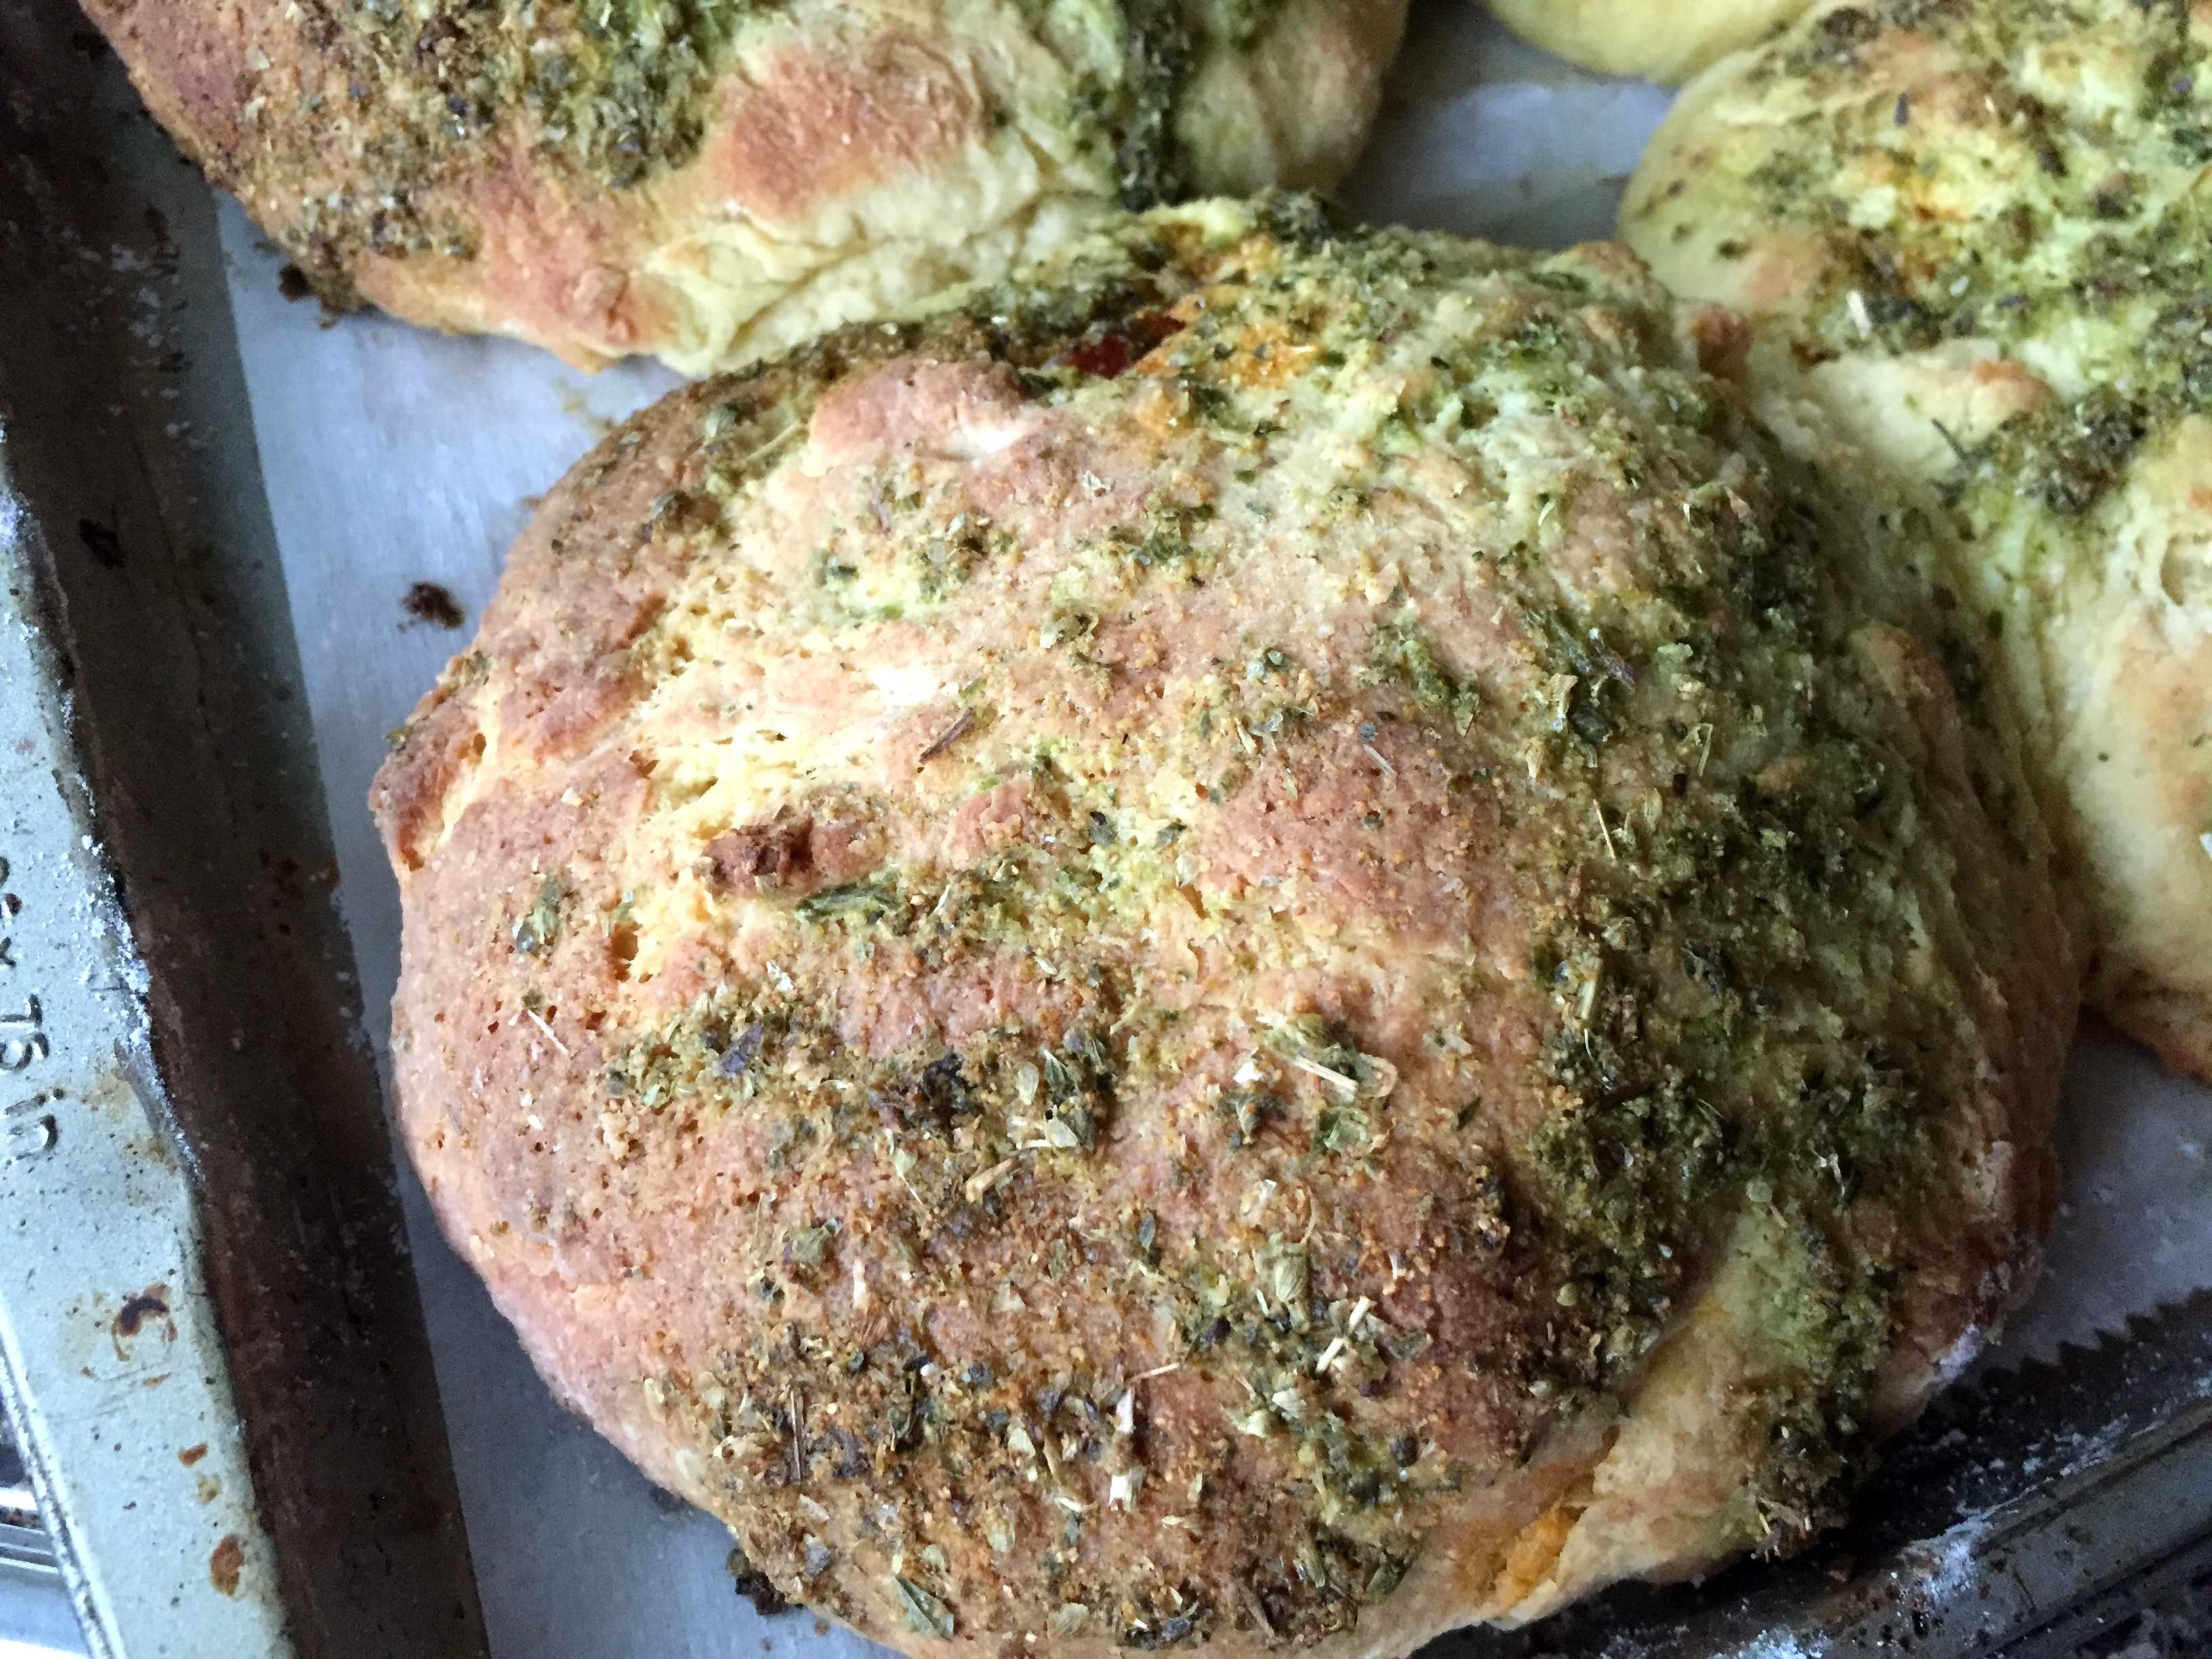
While the bread is rising, warm the marinara sauce on medium low in a small pan. Then, in a small bowl, add about 1/8 Cup of olive oil and about 1 teaspoon each of oregano and basil, about 1/2 teaspoon of rosemary, about 2 teaspoons of powdered garlic, and about 1/2-1 teaspoon of sea salt. Whisk together with a fork and brush liberally over the buns right before they go into the oven.
After 35 minutes, remove the towel and plastic from the pizza rolls and bake for about 20-25 minutes or until lightly browned.