gluten free zen
Taking The Stress Out Of Gluten-Free Grain-Free & Dairy-Free Living
Date Pecan Bread
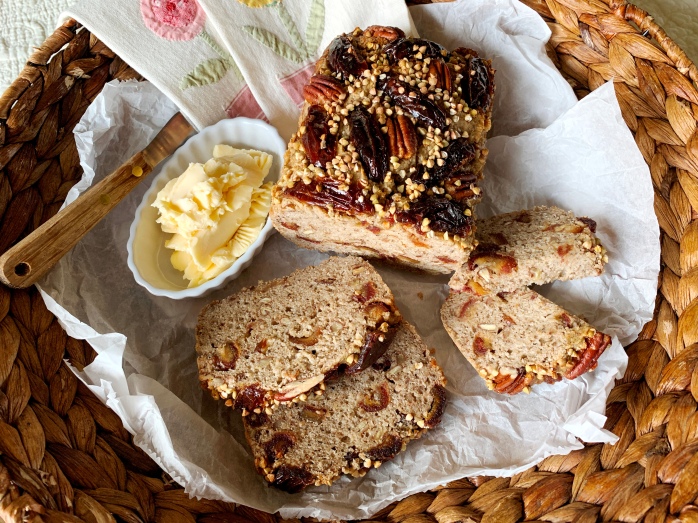
Date Pecan Bread
1 1/4 Cups of Ground Organic Raw Hulled Buckwheat Groats
1/8 Cup of Organic Chia Seeds
3 Tablespoons of Organic Coconut Flour
2 teaspoons of Double Acting Baking Powder
3/4 teaspoon of Celtic Sea Salt
1 Tablespoon of Organic Psyllium Husk Powder
1 Cup of Filtered Water
1/2 Cup of Filtered Water
1/4 Cup of Organic Extra Virgin Olive Oil
2 Tablespoons of Raw Organic Honey
3/4 Cup of Roughly Chopped Organic Pecans
1 Cup (packed) Chopped Organic Medjool Dates (seeds removed)
For The Topping:
3 Organic Medjool Dates (seeds removed, cut in 1/2 lengthwise, then cut again lengthwise)
8 Organic Pecan Halves
1 Tablespoon of Organic Raw Hulled Buckwheat Groats
Pinch of Celtic Sea Salt
2 1/2 Tablespoons of Melted Raw Honey
- Grind the groats into flour in a high speed blender (Vitamix or Blendtec work well). Then add the chia seeds and coconut flour and blend for about 1 minute. You will still see chia seeds.
- In the 1 cup of water, whisk the psyllium husk powder, it will thicken quickly. Pour into blender. Add the baking powder, sea salt, the remaining 1/2 cup of water, olive oil, and the 2 Tablespoons of honey. Blend until fully incorporated. Scoop into a medium bowl.
- Fold in the 3/4 Cup of chopped pecans and the 1 cup of chopped dates.
- Prepare an 8 1/2 x 4 1/2 bread pan by using non stick spray and a parchment liner that folds over each side so you can easily remove the bread. Preheat the oven to 325 degrees (I use convection which cooks a big hotter, it may take more time for you bread to cook if you use conventional).
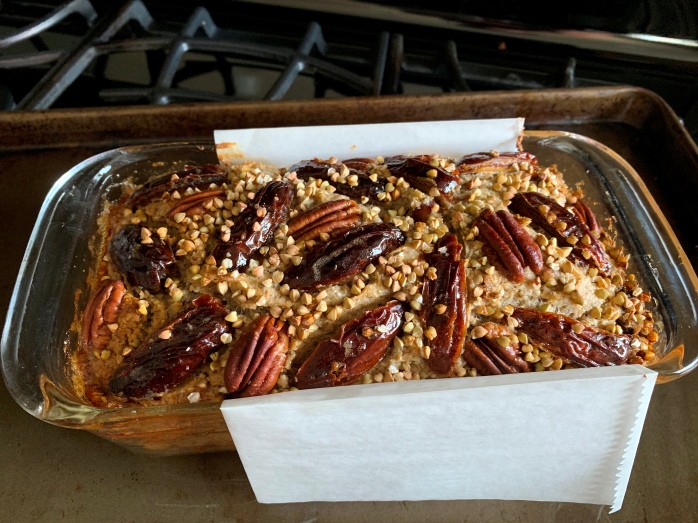
- Scoop the dough into the prepared pan, being careful not to pack it down too much. Smooth the top a bit.
- Arrange the sliced medjool dates and pecans over the top. Sprinkle with the groats and the pinch of sea salt.
- Melt the honey and drizzle over the top.
- Bake for 60 minutes. Cool for 10 minutes in the pan. Using a sharp knife, carefully loosen the edges of the bread, then use the overhanging parchment to lift the bread out onto a cooling rack. Cool completely before cutting with a sharp bread knife. (This bread freezes VERY well! I sliced it and stored it in a double ziplock. When I want a piece, I take one out and pop it in the toaster on the frozen setting.)
Chocolate Crumb Muffins

Chocolate Crumb Muffins
For The Muffins:
1 1/2 Cups of Otto’s Cassava Flour
1 Tablespoon of Coconut Flour
1/4 Cup of Cacao Powder
1/2 Cup of Coconut Sugar
1/4 teaspoon of Celtic Sea Salt
1 teaspoon of Double Acting Baking Powder
1/2 teaspoon of Baking Soda
2 Eggs
1/3 Cup of Dairy Free Butter, melted
1 Cup of Full Fat Coconut Milk
1 teaspoon of Pure Vanilla Extract
For the Chocolate Crumb Topping
1 Cup of Coconut Sugar
1/2 teaspoon of Celtic Sea Salt
1 Cup of Otto’s Cassava Flour
1/2 Cup of Cacao Powder
3/4 Cup Plus 3 Tablespoons of Dairy Free Butter, melted
Directions
Preheat oven to 350 degrees. Makes 12 muffins.
- For the muffins, measure and whisk the dry ingredients in a medium bowl. In another bowl, whisk the eggs, melted butter (cooled), coconut milk, and vanilla. Fold the wet ingredients into the dry ingredients just until the liquid is absorbed (lumps are a good thing). Set aside.
- For the crumb topping, whisk the dry ingredients. Stir the melted butter in with a spoon. You have two options here. I stirred mine in “lightly” then when through it with my fingers to make a smaller crumb. If you want larger crumbs, stir the mixture together completely and then break it up into small chunks instead of crumbs with your fingers.
- Line a muffin tin with 12 paper liners. Fill each liner 3/4 of the way full. Top each muffin with the crumb mix and pat down very lightly into the batter.
- Bake at 350 degrees for 25 minutes. (I use convection, it may take a bit longer in a conventional oven). Cool for 10 minutes, remove from tins onto a cooling rack and cool completely before serving.
Carob & Sprouted Pumpkin Seed Bites

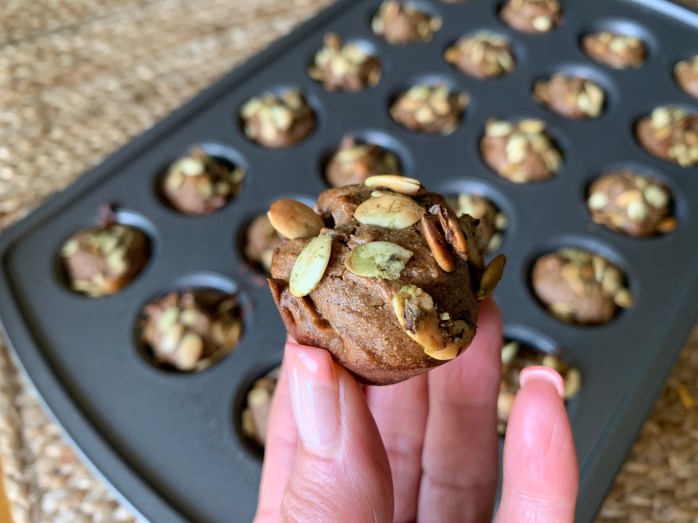

Carob & Sprouted Pumpkin Seed Bites
*Makes 24
1/2 Cup of Otto’s Cassava Flour
5 Tablespoons of Rice Bran Oil
1 Cup of Coconut Sugar
3/4 Cup of Carob Powder
1/4 teaspoon of Celtic Sea Salt
1 1/2 teaspoons of Pure Vanilla Extract
2 Eggs
Organic Raw Salted & Sprouted Pumpkin Seeds
Preheat the oven to 325 degrees and lightly oil a mini muffin pan. Whisk the oil, sugar, carob, and salt in a small saucepan and heat on low stirring consistently until smooth. Add the eggs and vanilla to a mixing bowl and slowly add the warmed mixture as you beat the eggs and vanilla. Mix in the flour and spoon into the mini muffin pan. Sprinkle a few pumpkin seeds on each bite and bake for about 15 minutes or until they bounce back and a center test comes out clean.
Fermented Walnut & Raisin Bread
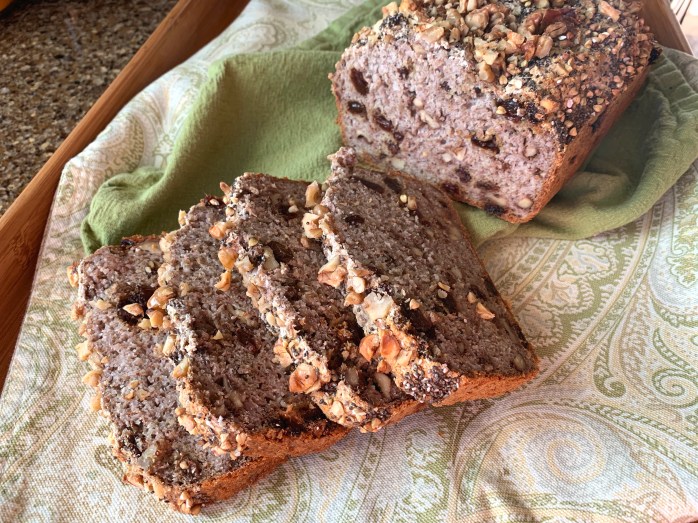

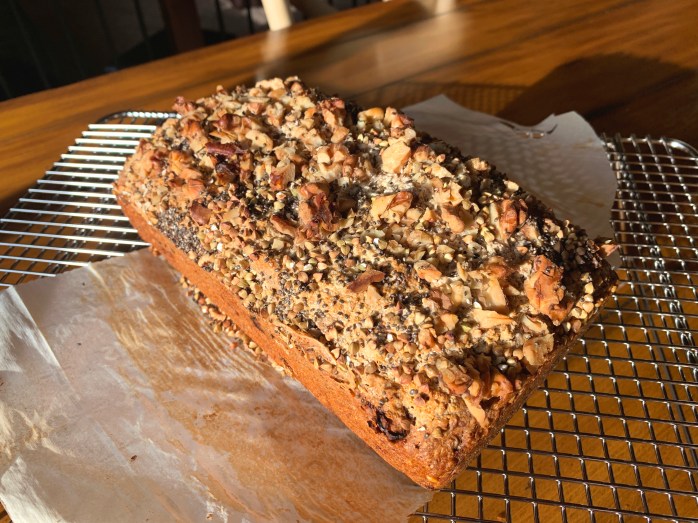
Fermented Walnut & Raisin Bread
**This bread takes time, it is a labor of love and patience. That patience will come with a wonderful reward! And of course as with many of my recipes, the recipe is versatile and the addition or subtraction options are almost endless – add your own flair!
2 1/2 Cups of Organic Hulled Buckwheat Groats
3 Cup of Filtered Water
3 Tablespoons of Fresh Lemon Juice
3/4 teaspoon of Celtic Sea Salt
1 Tablespoon plus 1 teaspoon of Organic Psyllium Husk Powder
2 teaspoons of Double Acting Baking Powder
2 Cups of Organic Walnuts
1 1/4 Cups of Organic Raisins
1 1/2 teaspoons of Organic Chia Seeds
1 Tablespoon of Organic Hulled Buckwheat Groats
Step 1
Pour the groats into a large bowl, add the water, stir in the lemon juice, cover lightly and let sit for 8 hours. Drain and rinse once during the resting process. No need to add more lemon, but do replenish the water.
Step 2
After 8 hours, drain the groats, rinse well, add them to a blender and add 1 1/3 Cups of filtered water. Blend until smooth. Pour into a large bowl, cover with plastic wrap and a kitchen towel, set the bowl away from cold air or drafts and ferment for 36 hours. I didn’t notice bubbles or a ferment-ish smell, but when I went to fold in the other ingredients, it was fluffier than it started. Don’t be alarmed if you don’t see any major changes. I also check the top carefully to make sure it hadn’t formed any mold! If it does that, you’ll have to toss it.
Step 3
8-12 hours before the batter will be ready, soak the walnuts. Put them in a medium bowl, cover them with filtered water and add 1/2 teaspoon of Celtic sea salt. Soak for 8-12 hours. Then rinse, pat dry, and chop, reserving 1/2 Cup for the top of the bread. (Go HERE if you’d like to learn more about activating nuts for easier digestion.)
Step 4
Prepare a regular sized bread pan with oil or spray and line the pan with parchment so that there’s a bit of overhang to remove the loaf. Preheat the oven to 350 degrees (I use convection – if you don’t, you may have to increase the time)
Fold the remaining walnuts, the raisins, the psyllium, the baking powder, and the sea salt into the batter. Scoop into the pan, do not flatten out or smooth the top. Sprinkle with the remaining walnuts, the chia seeds, and the whole groats.
Step 5
Bake for 1 hour and 35 minutes. Cool completely before slicing.
Buckwheat Chia Bread
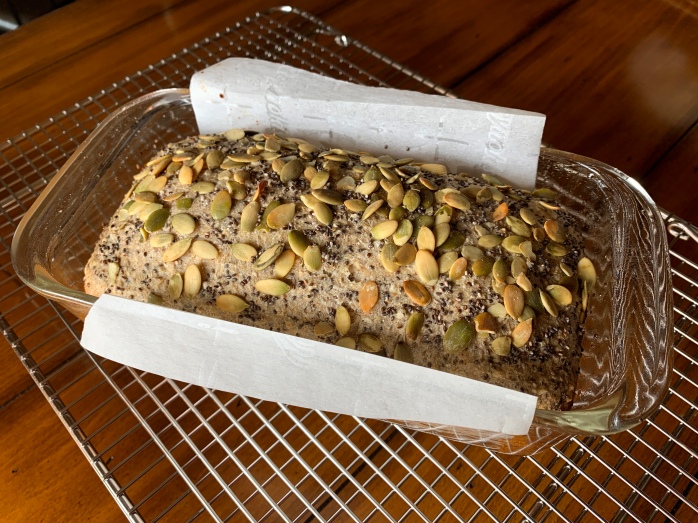
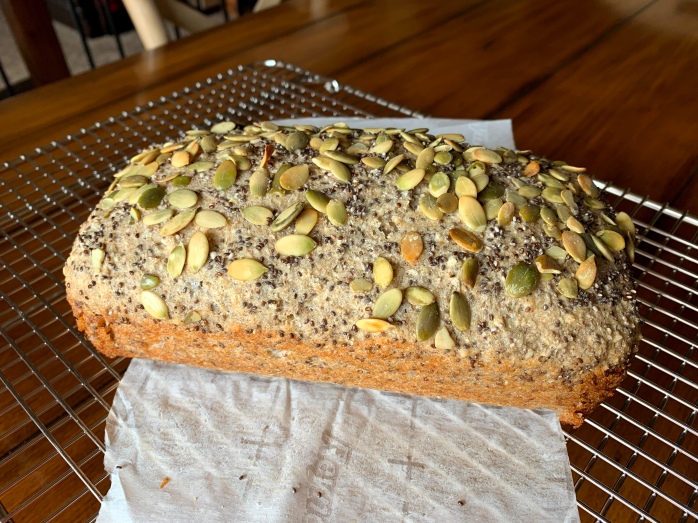
Buckwheat Chia Bread
1 1/4 Cups of Organic Raw Hulled Buckwheat Groats
1/4 Cup of Organic Chia Seeds
3 Tablespoons of Organic Coconut Flour
1 teaspoon of Double Acting Baking Powder
3/4 teaspoon of Celtic Sea Salt
2 Tablespoons of Organic Psyllium Husk Powder
1 1/2 Cups of Filtered Water
1/4 Cup of Organic Extra Virgin Olive Oil
2 Tablespoons of Local Raw Honey
1/2 Cup of Filtered Water
1/4 Cup of Organic Raw Pumpkin Seeds
1 1/2 teaspoons of Organic Chia Seeds
Pinch of Celtic Sea Salt
*Preheat oven to 325 degrees (See note at bottom of instructions) and prepare an 8 1/2 x 4 1/2 (inside measurement) pan with non stick spray or oil and line with a piece of parchment that covers the bottom and goes up the two longest sides with an overlap to lift out the bread.
- Process the groats and chia in a food processor until you get a flour consistency, about 5-10 minutes. There will be visible chia seeds and it will feel a bit grainy.
- Add the coconut flour, baking powder, 3/4 tsp of sea salt, and process for 1 minute.
- Using the 1 1/2 Cups of water, whisk in the psyllium husk powder and let it sit for a minute or so until gelatinous. Pour into a medium bowl.
- Add the extra virgin olive oil and the raw honey and whisk to combine. Add the remaining 1/2 Cup of water and whisk to combine.
- Add the flour mixture and whisk to combine. Pour into the prepared pan and spread out very lightly if necessary.
- Sprinkle with the pumpkin seeds, the 1 1/ 2 teaspoons of chia seeds, and the pinch of salt.
- Bake for 48-50 minutes. Cool for 10 minutes before removing from pan onto a cooling rack. Cool Completely before slicing.
NOTE** I use convection for all of my baking and cooking. If you have a conventional oven you can either raise the temperature to 350 degrees and keep an eye on the baking time, or you can keep it at 325 degrees and it may take as much as 10-15 minutes more baking time. Keep an eye on it!
Pear & Oat Cookies
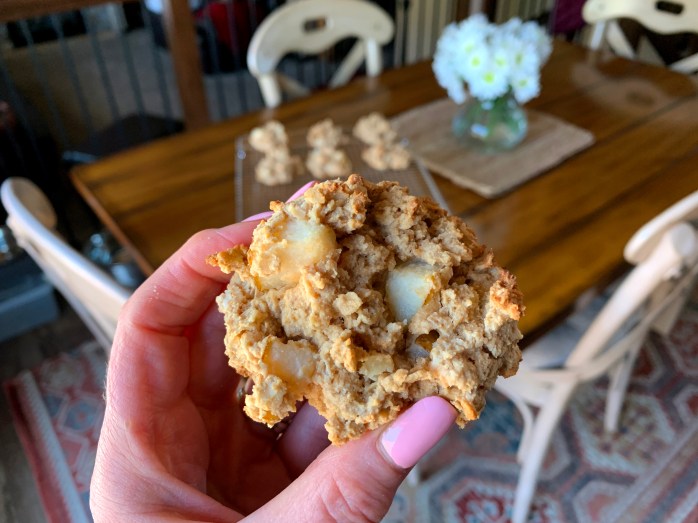
Pear & Oat Cookies
*Makes 14 Cookies
1 Cup of Cassava Flour
3 Tablespoons of Coconut Flour
1 1/2 Cups of Gluten Free Old Fashioned Rolled Oats
1 teaspoon of Double Acting Baking Powder
1/2 Cup of Coconut Sugar
1/4 teaspoon of Sea Salt
1/2 Cup of Dairy Free Soy Free Butter
2 Egg Whites
1 teaspoon of Pure Vanilla Extract
1 teaspoon of Pure Almond Extract
1 Pear Cubed (1 1/4 Cup)
1/2 Cup of Full Fat Coconut Milk
Preheat oven to 350 degrees (I use convection). Line two baking sheets with parchment and set aside.
Whisk dry ingredients. Work butter in lightly with fingers or cut in with knives (like you would for a crumble).
Add the egg whites, vanilla extract, almond extract, pears , and coconut milk. Fold in and continue folding until the dough comes together and the wet ingredients are distributed evenly.
Place 7 dollops of dough evenly on each sheet and bake for 15 minutes (may take a little longer if not using convection) until edges are crispy and lightly browned. Don’t overcook or the cookies will dry out.
Apple & Cinnamon Puff Pancake
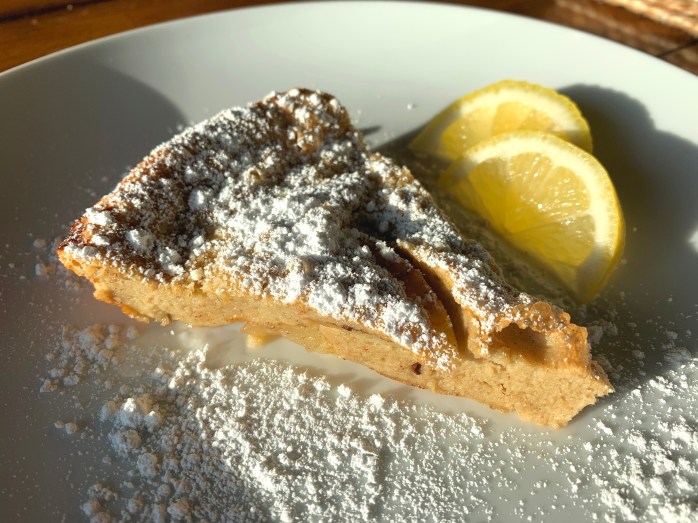
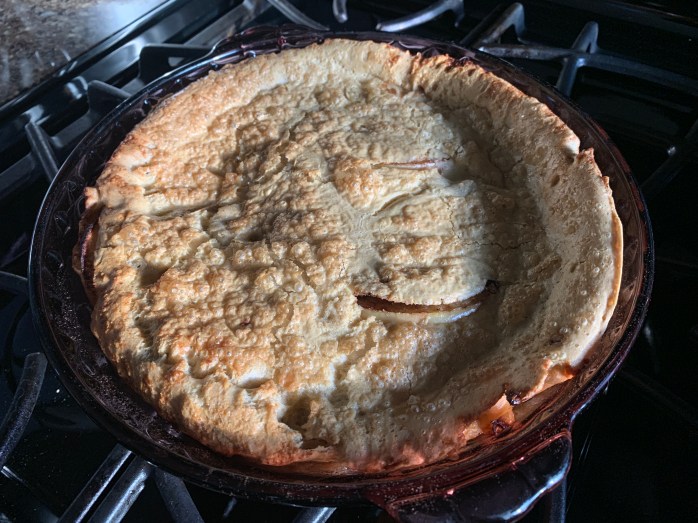
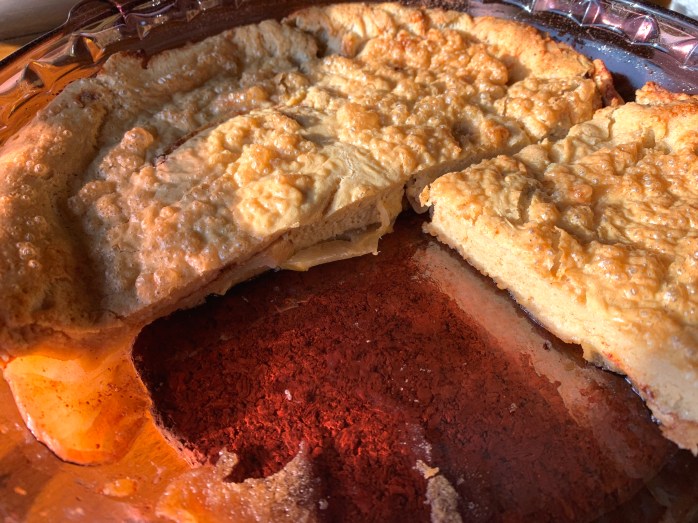
Apple Cinnamon Puff Pancake
*Gluten Free *Dairy Free
Makes 6 Servings & Can Easily Be Doubled & Baked in Two Pie Dishes
3/4 Cup of Dairy Free Milk (I used Malk Almond Milk)
3 Eggs
3/4 Cup of Mama’s All Purpose Almond Flour Blend
1/4 teaspoon of Xanthan Gum
2 Tablespoons of Coconut Sugar
1 teaspoon of Pure Vanilla Extract
2 teaspoons of Ceylon Cinnamon
1 Medium Honey Crisp Apple
3 Tablespoons of Dairy Free Butter
Powder Sugar & Fresh Lemon Wedges to serve
Preheat the oven to 375 degrees (for convection) or 400 degrees (for standard). Place the 3 Tablespoons of butter in a 9 inch pie plate and melt in the oven until sizzling and bubbly. While the butter is melting, core and cut the apple into thin slices.
Remove the pie plate from the oven and arrange the apples in a circle in a single layer around the bottom of the pan. (Overlapping won’t hurt.) Sprinkle 1 Tablespoon of the coconut sugar over the apples and follow with 1 teaspoon of the cinnamon.
Return the pie plate to the oven and bake the apple mixture for 8-10 minutes. While the apple mixture is baking – In your blender, blend the milk, eggs, flour, xanthan gum, remaining cinnamon and coconut sugar, and vanilla until completely combined and smooth.
Remove the apples from the oven and pour the batter over the apples. Return to the oven and bake for 22 minutes.
Slice and serve with powdered sugar and fresh lemon wedges for squeezing.

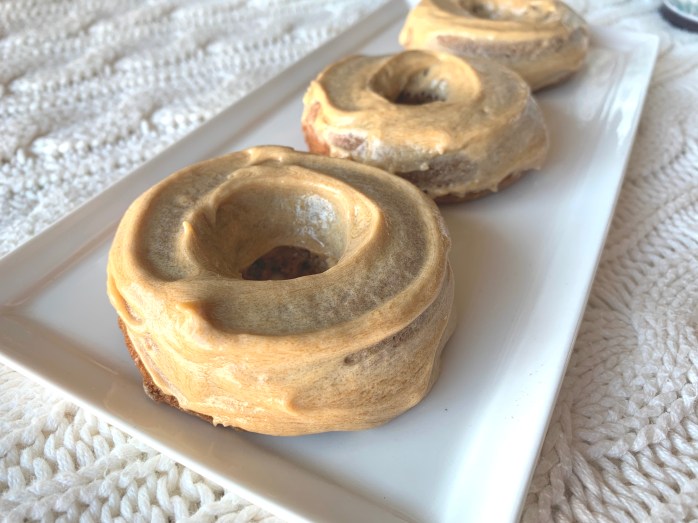
Maple & Clementine Doughnuts
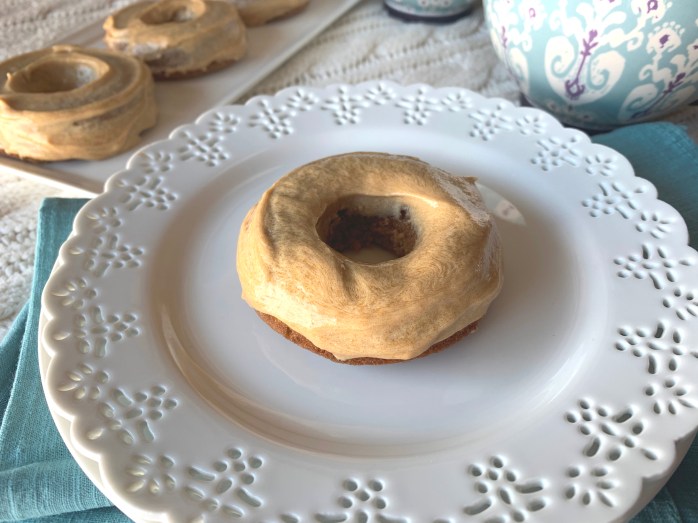


Maple & Clementine Doughnuts
*Grain Free *Dairy Free
*Makes 14 doughnuts
For The Doughnuts:
1 Cup of Full Fat Coconut Milk
1 teaspoon of Apple Cider Vinegar
1/2 Cup of Maple Sugar
1/4 Cup of Coconut Sugar
1/2 Cup of Dairy Free Butter
2 Eggs, separated
2 teaspoons of Clementine Juice
2 teaspoons of Clementine Zest
1/2 teaspoon of Pure Orange Extract
1 Cup of Cassava Flour
1/2 Cup of Chestnut Flour
1 teaspoon of Double Acting Baking Powder
3/4 teaspoon of Baking Soda
1/2 teaspoon of Sea Salt
Preheat the oven to 350 degrees and spray two non stick doughnut pans with oil.
Measure the coconut milk and add the apple cider vinegar. Stir and set aside. Cream the sugars and butter in a mixer until fluffy. Add the clementine juice, zest, and extract and mix to combine.
In a medium bowl, whisk the flours, baking powder, baking soda, and salt. Set aside.
Separate the eggs (I put the yolks in the coconut milk mixture and beat with a fork), and beat the egg whites to stiff peak. Set aside.
Add the coconut milk mixture to the sugar and butter mixture and mix until combined. Add the flour mixture and mix on slow until combined, scraping down sides once or twice. Remove the bowl and fold in the egg whites.
With a small spoon, carefully fill the doughnut pan holes. Bake for 13 minutes. Cool in pan for 5 minutes, then flip the doughnuts (carefully) out onto a cooling rack. Cool completely before frosting.
For the Maple Orange Frosting:
2/3 Cup of Maple Sugar, blended to make powdered maple sugar (you could also just use regular powdered sugar but you will not have the maple flavor)
1/3 Cup of Dairy Free Butter
2 teaspoons of Pure Orange Extract
Pinch of Sea Salt
About 2 teaspoons of Coconut Milk
Whiz up the sugar in your blender and pour into a bowl. Add the butter and salt and mash with a fork until the mixture is smooth, add the extract, and continue mixing. Slowly add in a little bit of coconut milk at a time until you have a medium thick dipping/spreading consistency. You can either dip each doughnut (carefully, they are a bit fragile), or spoon frosting on each doughnut and spread it. **Next time, I think I would go for a bit thicker of a frosting and just spread it on each doughnut. That way it will set up faster and be easier to handle when eating with your hands.
Beef & Veggie Burritos
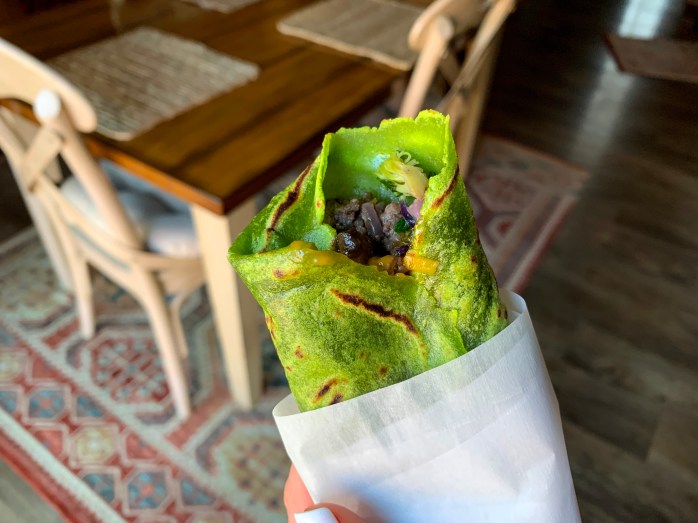
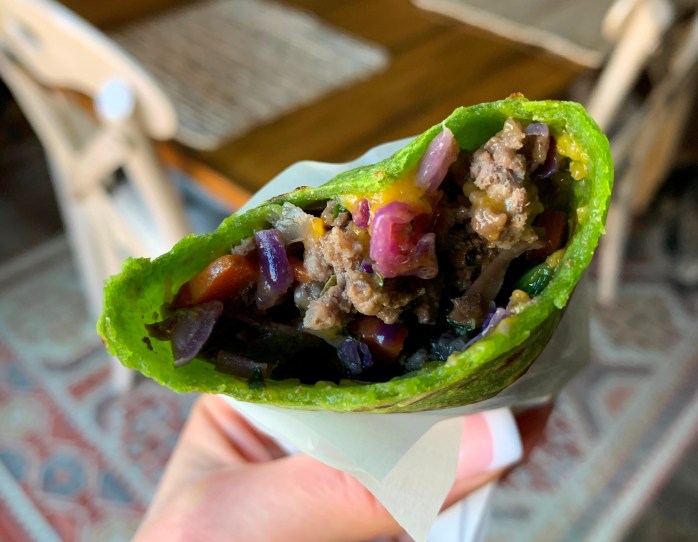
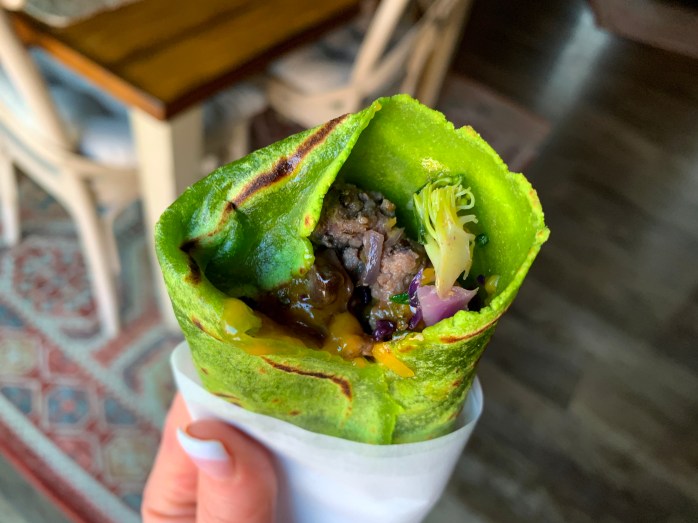
*Dairy Free *Grain Free *Egg Free
Beef & Veggie Burritos
*Makes 10 small/medium burritos
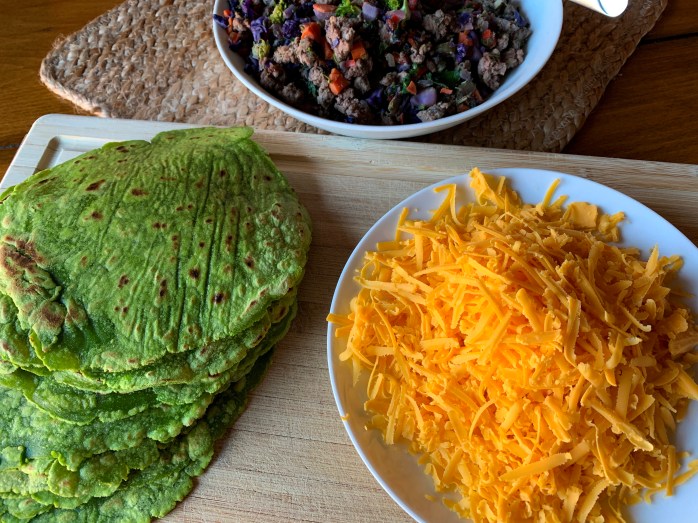
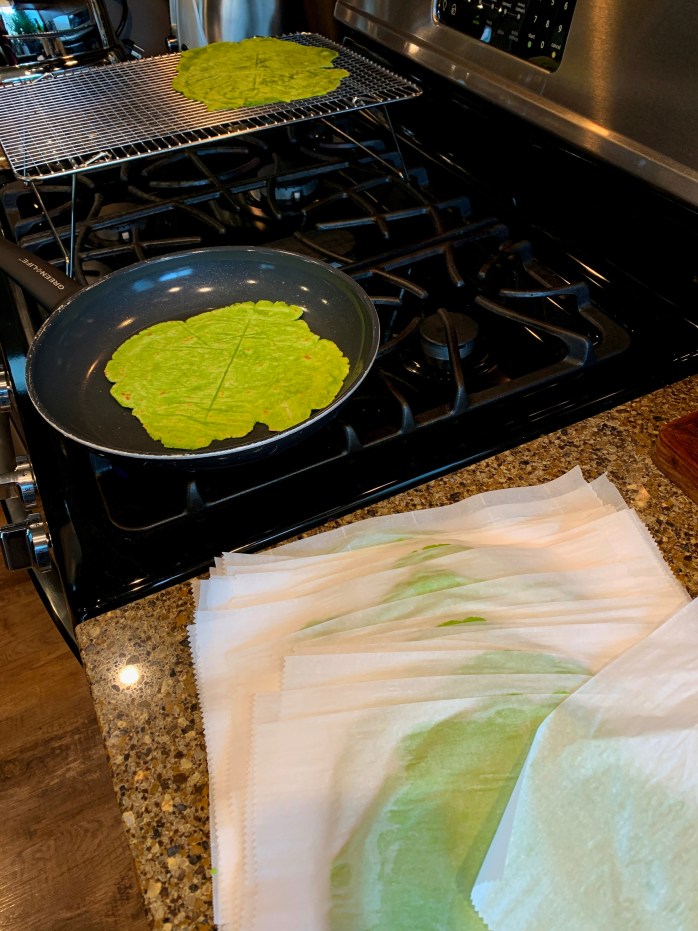
Double Batch of My Grain Free Spinach Tortillas
1 lb of Ground Beef
1 Cup of Chopped Red Onion
3 Cloves of Minced Garlic
1 Tablespoon of Oregano
1/4 teaspoon of Sea Salt
Few Grinds of Pepper
…………………………
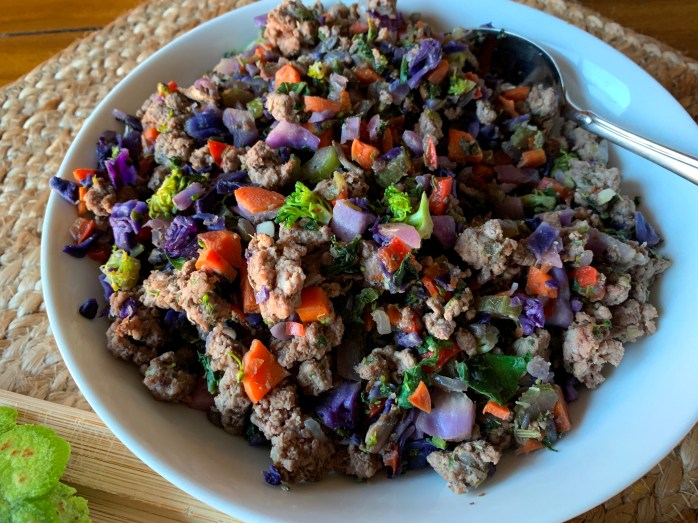
2 Cups of Chopped Red Cabbage
3/4 Cup of Chopped Broccoli Florets
1/4 Cup of Diced Celery
1/2 Cup of Diced Carrot
3/4 Cup of Diced Red Bell Pepper
1 3/4 Cups of Diced Cremini Mushrooms
2 Cups of Chopped (small) Baby Kale
3 Cloves of Minced Garlic
1 Tablespoon of Minced Fresh Rosemary
1 Tablespoon of Minced Fresh Thyme
1/4 teaspoon of Sea Salt
Few Grinds of Pepper
1 Tablespoon of Avocado Oil
1/4 Cup of Beef Broth
2 Cups of Daiya Cheddar Style Cheese (I like to buy the block and grate it, I think it tastes better and melts better)
…………………………………………………………………………………..
Make tortillas and cool.
Saute the first block of ingredients and set aside. Then, saute the cabbage, broccoli, celery, carrots, bell pepper, mushrooms, kale, garlic, and herbs in the 1 Tablespoon of avocado oil. Season with salt and pepper, add the first block of sauteed ingredients and stir together. Add the 1/4 cup of beef broth and stir. (I use grass fed lower fat ground beef…if you are using a high fat ground beef, you may not need to add the beef broth for moisture).
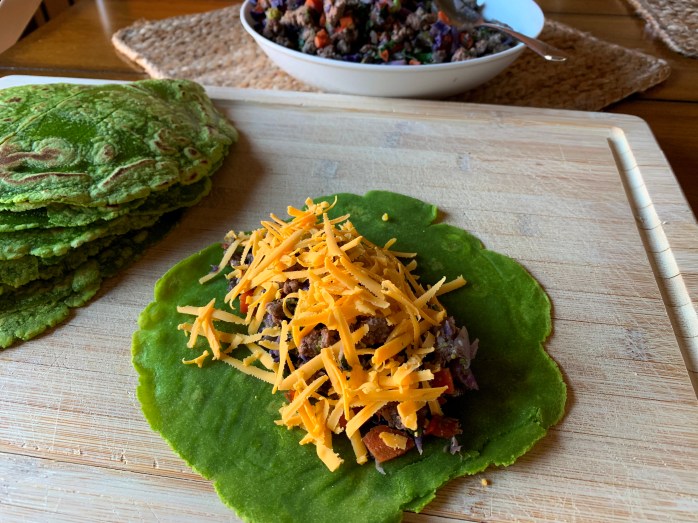
**If you are making these to eat immediately, then you’ll want to quick heat your tortillas in a frying pan as you assemble the burritos. I just heat a frying pan on medium high and heat the tortillas for a minute or so on each side. Then, add the filling and top with cheese, fold it up and serve. You can use any type of pan to heat and crisp the tortilla and do not need oil.
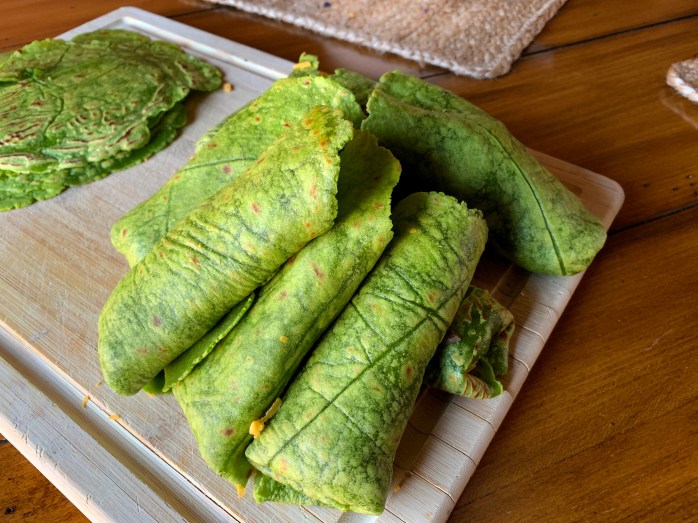
**If you’re meal prepping these for the freezer, then you’ll want to cool the ingredients completely before assembling. Then, assemble one by one and wrap each in a piece of parchment, layering the burritos in a freezer bag.
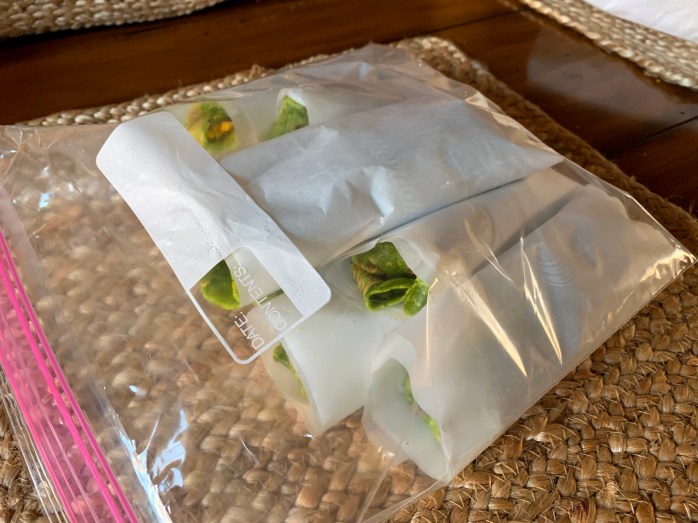
To reheat you can either wrap them in foil for a softer burrito or leave them naked for a bit of a crunch on the outside. Preheat the oven to 375 degrees and bake for about 30-35 minutes turning once.
You will have a few plain tortillas left over. They store well in the fridge for a few days or for a month in the freezer. If freezing, place a piece of parchment between each tortilla and stack. Double bag and freeze.
Maple Walnut Shortbread
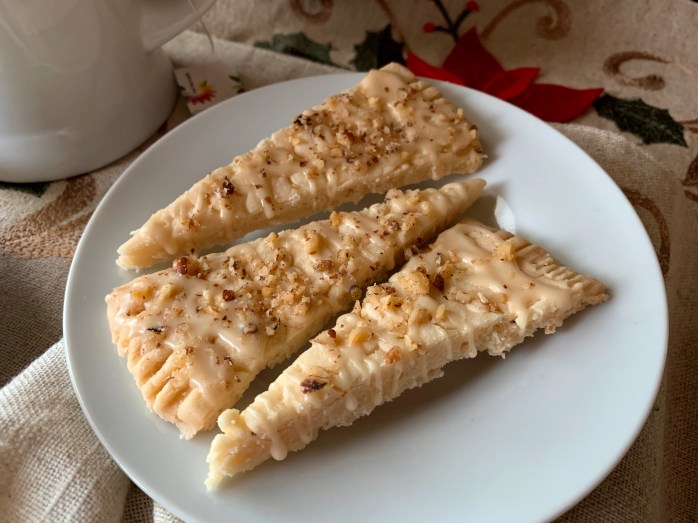
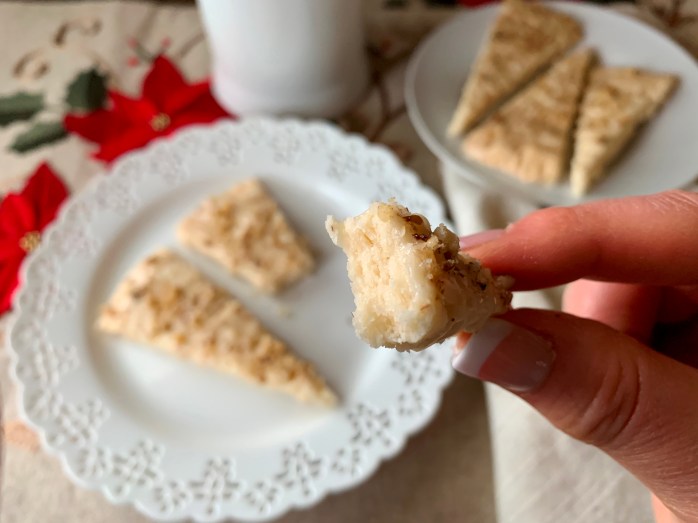
Maple Walnut Shortbread
1/2 Cup of Dairy Free Butter
1/3 Cup of Powdered Sugar
1/2 teaspoon of Pure Maple Extract
1/4 teaspoon of Pure Vanilla Extract
Pinch of Sea Salt
1 1/2 Cups of Mama’s Almond Blend All Purpose Gluten Free Flour
For The Frosting:
1 1/4 Cups of Powdered Sugar
1 teaspoon of Pure Maple Extract
Pinch of Sea Salt
2 Tablespoons of Almond Milk
1/4 Cup of Finely Chopped Walnuts
Preheat oven to 325 degrees
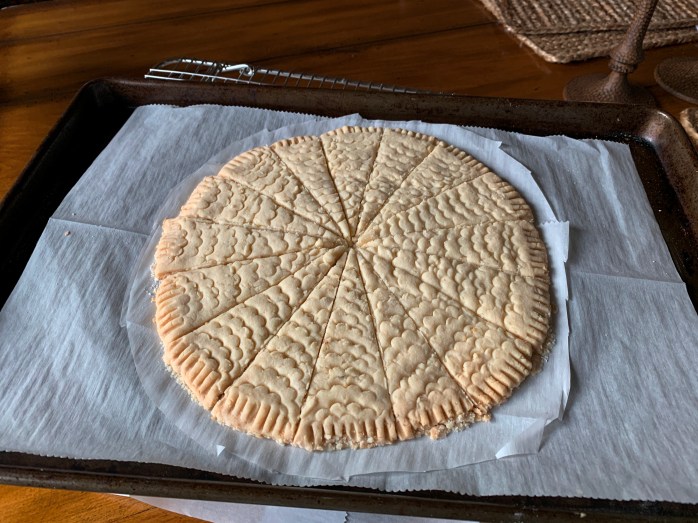
For the shortbread, cream the butter and sugar together. Add the extracts, sea salt, and flour and blend on low just until incorporated and the dough comes together. Lightly flour a piece of parchment, pat the dough into a circle, and roll the dough into about an 8 inch circle, smoothing the edges with your fingers. Using a sharp knife, cut the dough into 16 triangles. Press a fork lightly along the edges. I also used a scalloped cookie cutter for more design on top of the cookie. (Or you can use cookie cutters and cut out shapes, or roll the dough into a rectangle and cut squares…)
Transfer the shortbread dough WITH the parchment onto a baking sheet and bake for 30 minutes. Remove from the oven and run a sharp knife down the previous cuts. Let the shortbread cool completely, then move to a wire cooling rack for frosting.
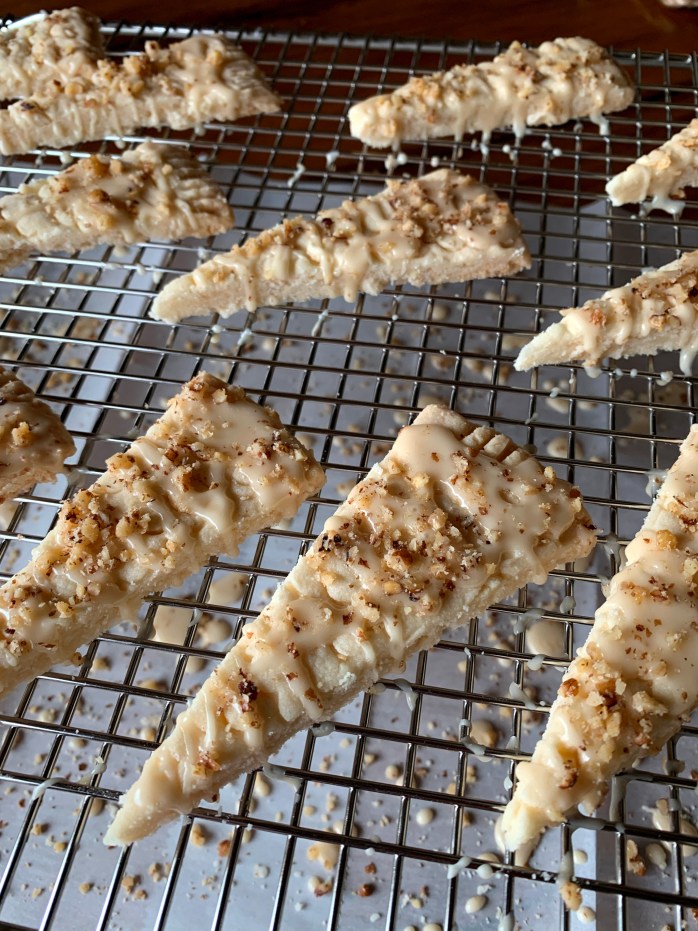
For the frosting, whisk the sugar, extract, sea salt, and almond milk until smooth and of drizzling consistency. Drizzle each cookie and sprinkle with walnuts one at a time (otherwise the drizzle will set and the nuts won’t stick).
Serve with hot tea, coffee, or hot buttered rum (recipe coming soon!).